
Choosing the best backyard beehives for beginners is less about the box and more about the box’s support network. A hive style is close to irreversible, because frames, tools and spare parts do not cross between systems, so a poor first choice usually means buying a second hive rather than adjusting the first. Most pages in this niche explain hive types and then stop. Almost none of them name a hive you can actually order.
So we did that part. We compared 10 complete backyard hives, read the failure reports owners write after a full season in the weather, and ranked them by the two things that decide whether a beginner enjoys year one: how well the box holds together and how easy it is to find parts and help when something goes wrong. Last reviewed for 2026, with the season-by-season buying order and the placement rules most first-time keepers only learn after a colony swarms.
One thing we will say up front, because the forums repeat it more than anything else: the single best hive for a beginner is the one your local beekeeping club already has twenty members running. Experienced keepers consistently advise against starting with a design nobody local can troubleshoot, because a queenless colony at 7 pm on a Sunday needs a mentor, not a search engine. Everything below is designed around that logic.
Table of Contents
What Is the Best Beehive for Beginners?
A 10-frame Langstroth hive is the best beehive for beginners, and the reason is parts availability rather than design elegance. Nearly every club, supplier and mentor in North America runs 10-frame equipment, so frames, supers, foundations and donated swarm traps all fit the first box you buy. Our top pick is the Hoover Hives 2-Deep 1-Medium kit, a wax-coated fir hive with 10 wooden frames that is complete out of the box. Runner-ups are the BeeCastle kits and the Mann Lake single deep for anyone who wants less frame-building.
The Four Hive Styles in 60 Seconds
Before any product, the style question. Nearly every hive you will find for sale is a stack of removable-frame boxes, and the difference between the main styles is where the boxes go and how honey comes out. Understanding that one distinction prevents most first-year regrets.
Langstroth. Boxes are added on top as the colony grows, known as supering. This is the default in the United States, and it is the style this roundup ranks because spare parts and club support concentrate around it.
Top bar. A single horizontal bar suspends combs from above. Inspections are gentle because you lift one comb instead of ten boxes, and no extractor is needed at all since honey sits in the combs as-is. The cost is that top bar parts are not interchangeable with anything else you will buy.
Warre. Structurally similar to a top bar hive but stacked vertically, and the stack grows downward. New boxes are nadired underneath, which is quiet and has no heavy lifting. It is a genuinely elegant system and a poor first choice if no one nearby runs one.
Flow. A Langstroth-format box fitted with patented plastic frames. You fit a crank, reverse the frame, and honey drains into a jar. The marketing promise of near-zero beekeeping is the reason the design generates so much argument: the hive still needs full brood inspections and mite checks, and it only removes extraction from the list of jobs.
One more category worth naming is the insulated double-wall hive, sometimes sold in UV-resistant plastic. These keep colonies warmer through winter and cooler through summer, which matters in USDA zones 3 and 4. The tradeoff is plastic parts and a thinner parts ecosystem.
Two terms appear constantly in every product listing below, so here is what they mean. Bee space is the gap the whole system is engineered around, roughly a quarter to three-eighths of an inch; if the gap is wrong, bees glue everything shut with propolis and glue the hive shut with burr comb. A brood box, or deep, is where the queen lives and larvae develop. A super is a shallower box placed above for honey, and a medium super is the one beginners should prefer because a full medium weighs far less than a full deep.
Top 3 Picks for Backyard Beehives for Beginners (October 2026)


All 10 Hives Compared Side by Side in 2026
The table below is the fastest way to see which of these is a straight Langstroth box, which is a smaller nuc box, and which is a flow-style harvest. Every one of the ten is a real, complete hive. All frame counts are per box.
| Product | Specs | Action |
|---|---|---|
| Hoover Hives 2-Deep 1-Medium Kit |
|
Check Latest Price |
| BeeCastle 2-Layer Wax-Coated Kit |
|
Check Latest Price |
| BeeCastle 2-Deep 1-Medium Hive |
|
Check Latest Price |
 Mann Lake Traditional Complete Kit Mann Lake Traditional Complete Kit |
|
Check Latest Price |
 MayBee 10-Frame Two-Layer Hive MayBee 10-Frame Two-Layer Hive |
|
Check Latest Price |
 VEVOR 2-Deep 2-Medium Hive VEVOR 2-Deep 2-Medium Hive |
|
Check Latest Price |
 Honey Lake 4-Layer Cedar Hive Honey Lake 4-Layer Cedar Hive |
|
Check Latest Price |
 BeeCastle 5-Frame Nuc Box BeeCastle 5-Frame Nuc Box |
|
Check Latest Price |
 LANGLANG Auto-Flow Hive LANGLANG Auto-Flow Hive |
|
Check Latest Price |
 MayBee 8-Frame Kit With Tools and Suit MayBee 8-Frame Kit With Tools and Suit |
|
Check Latest Price |
Where to Put Your Hive in the Backyard
This is the section every competitor skipped, and it is also the half of your question that is actually about the backyard. Bees will not care what your hive looks like. They care about sun, wind, water and a clear flight path, and getting the four wrong can mean a colony that never gets going.
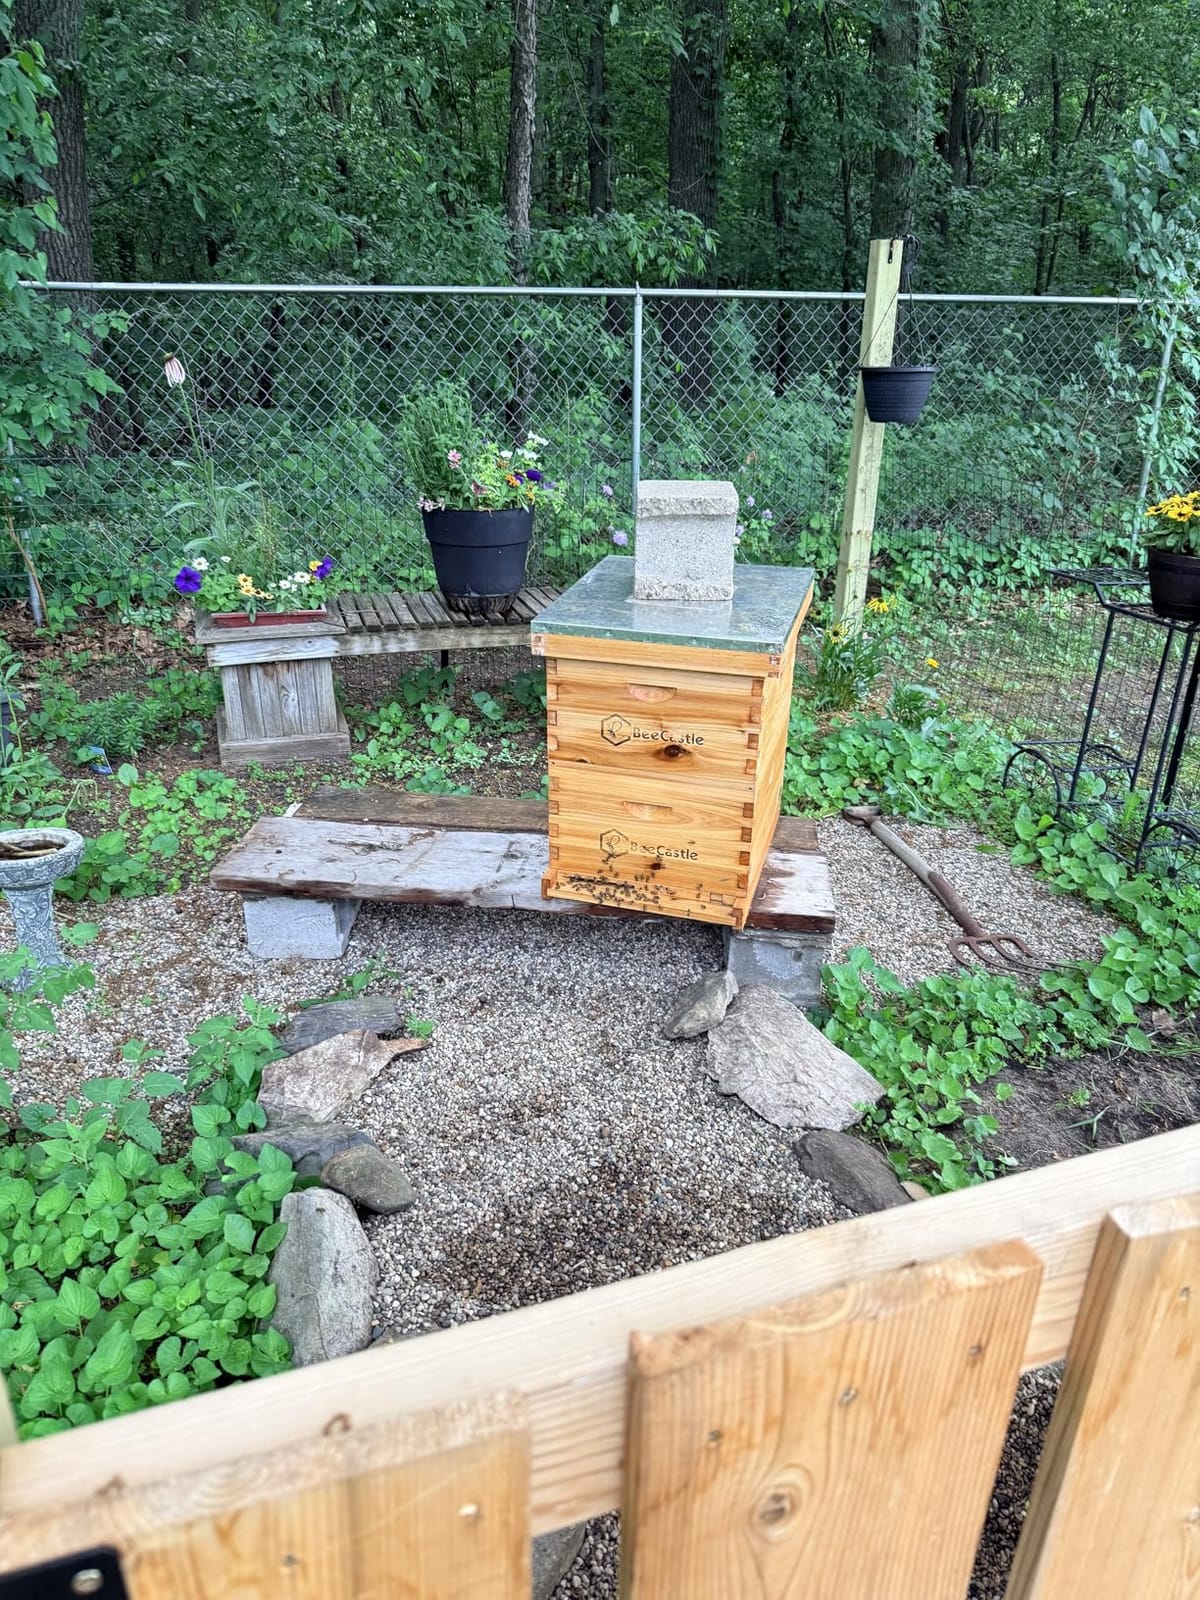
The rules that come up again and again on r/Beekeeping and in local association guidance are these four. Face the entrance toward the southeast so the colony gets the earliest morning light. Put the hive behind a windbreak, because wind drives bees to the ground and into the hive entrance, and a fence or hedge line is enough. Give it light shade rather than full sun or full shade, which keeps the entrance from over-heating in July while still warming the colony. Set it on dry, level, firm ground so the boxes do not settle out of square over winter.
Then there is distance. Many state rules and almost all local ordinances set a minimum setback from a property line, and three feet is the most commonly cited figure. The related convention that keepers pass around, sometimes called the 3-3-3 rule, is roughly three feet from the property line, three feet of clearance in front of the entrance, and three feet of headroom on the flight path.
Flight path is the neighbour question nobody asks until it is a complaint. Bees fly out roughly level with the entrance, so if the entrance faces a fence at head height, foragers learn to fly straight into it. Face the hive so the traffic rises over a fence, hedge or screen instead. A fence at least the height of the entrance is often enough; a screen or a row of shrubs is better.
Give them water they can find before they find yours. A shallow dish with stones, or a landing board near a birdbath, keeps foragers from investigating the neighbour’s blue washing. If the nearest water is a birdbath on the other side of the yard, expect a few days of fence-line scouting before the colony settles into a pattern.
Finally, check your local rules before you buy the bees rather than after. HOAs and municipalities vary widely on how many colonies you may keep, whether a permit is needed, and whether a water source is required. The hive is the cheap part of this decision; the bees are the part that runs away if you get it wrong.
1. Hoover Hives 2-Deep 1-Medium Kit: Best Overall
Hoover Hives: The Original Beeswax Coated Beehive Kit. Includes 2 Deep & 1 Medium Boxes with 10 Wooden Frames & Heavy Wax Coated Foundations. Easy Assembly with Predrilled Holes& Screws (Unassembled)
Wax-coated fir, 2 deeps plus 1 medium, 10 wooden frames
66 lb, 16x22x30 inch
Pros
- Highest review volume in the set by a wide margin
- Complete kit with queen excluder
- mouse guard
- escape gate and entrance reducer
- Thick beeswax coating needs no painting
- True dovetail joints that hold without glue
Cons
- Included screws can split thin wood
- Inner cover has no entrance gap so it needs modifying
- Frames need glue that is not included
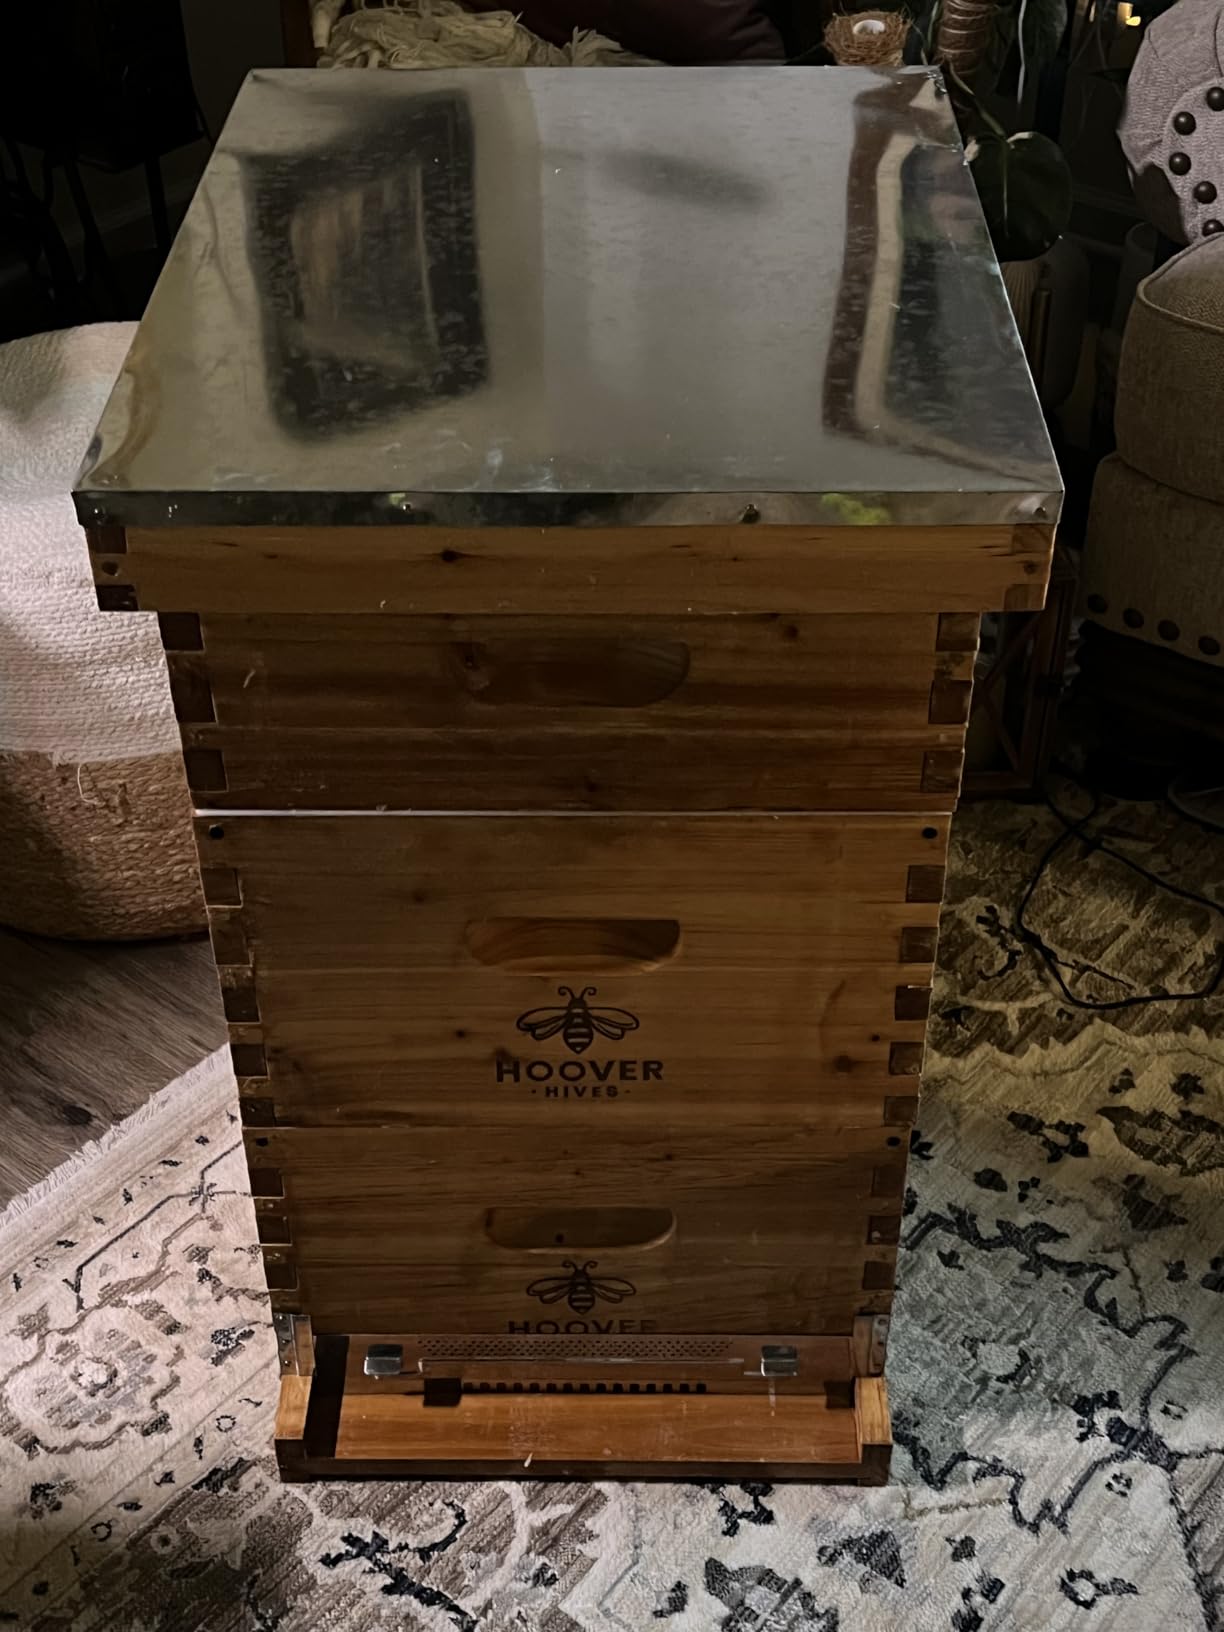
We kept coming back to this one because of the numbers underneath it. At 4.5 stars across more than 1700 owner reviews, it is by a wide margin the most examined hive in this roundup, and that matters more than a fraction of a star. When a kit has been through three seasons of weather reports from that many yards, the recurring problems are known rather than hypothetical.
The configuration is the sensible one. Two deep brood boxes plus one medium super gives you 20 frames of brood space and 10 of honey space from day one, which is enough room for a first colony to build a real population without a second purchase in August. The boxes are wax-coated fir at 0.74 inch-equivalent sturdiness, and the coating means you will never paint this hive.
What you actually get is unusually complete: a queen excluder, a mouse guard, an escape gate, an entrance reducer, a pre-built inner cover, a lid and a bottom board, plus 10 wooden frames with heavy wax-coated foundations. The predrilled holes and included screws mean a first-timer can finish assembly in an evening with a drill.
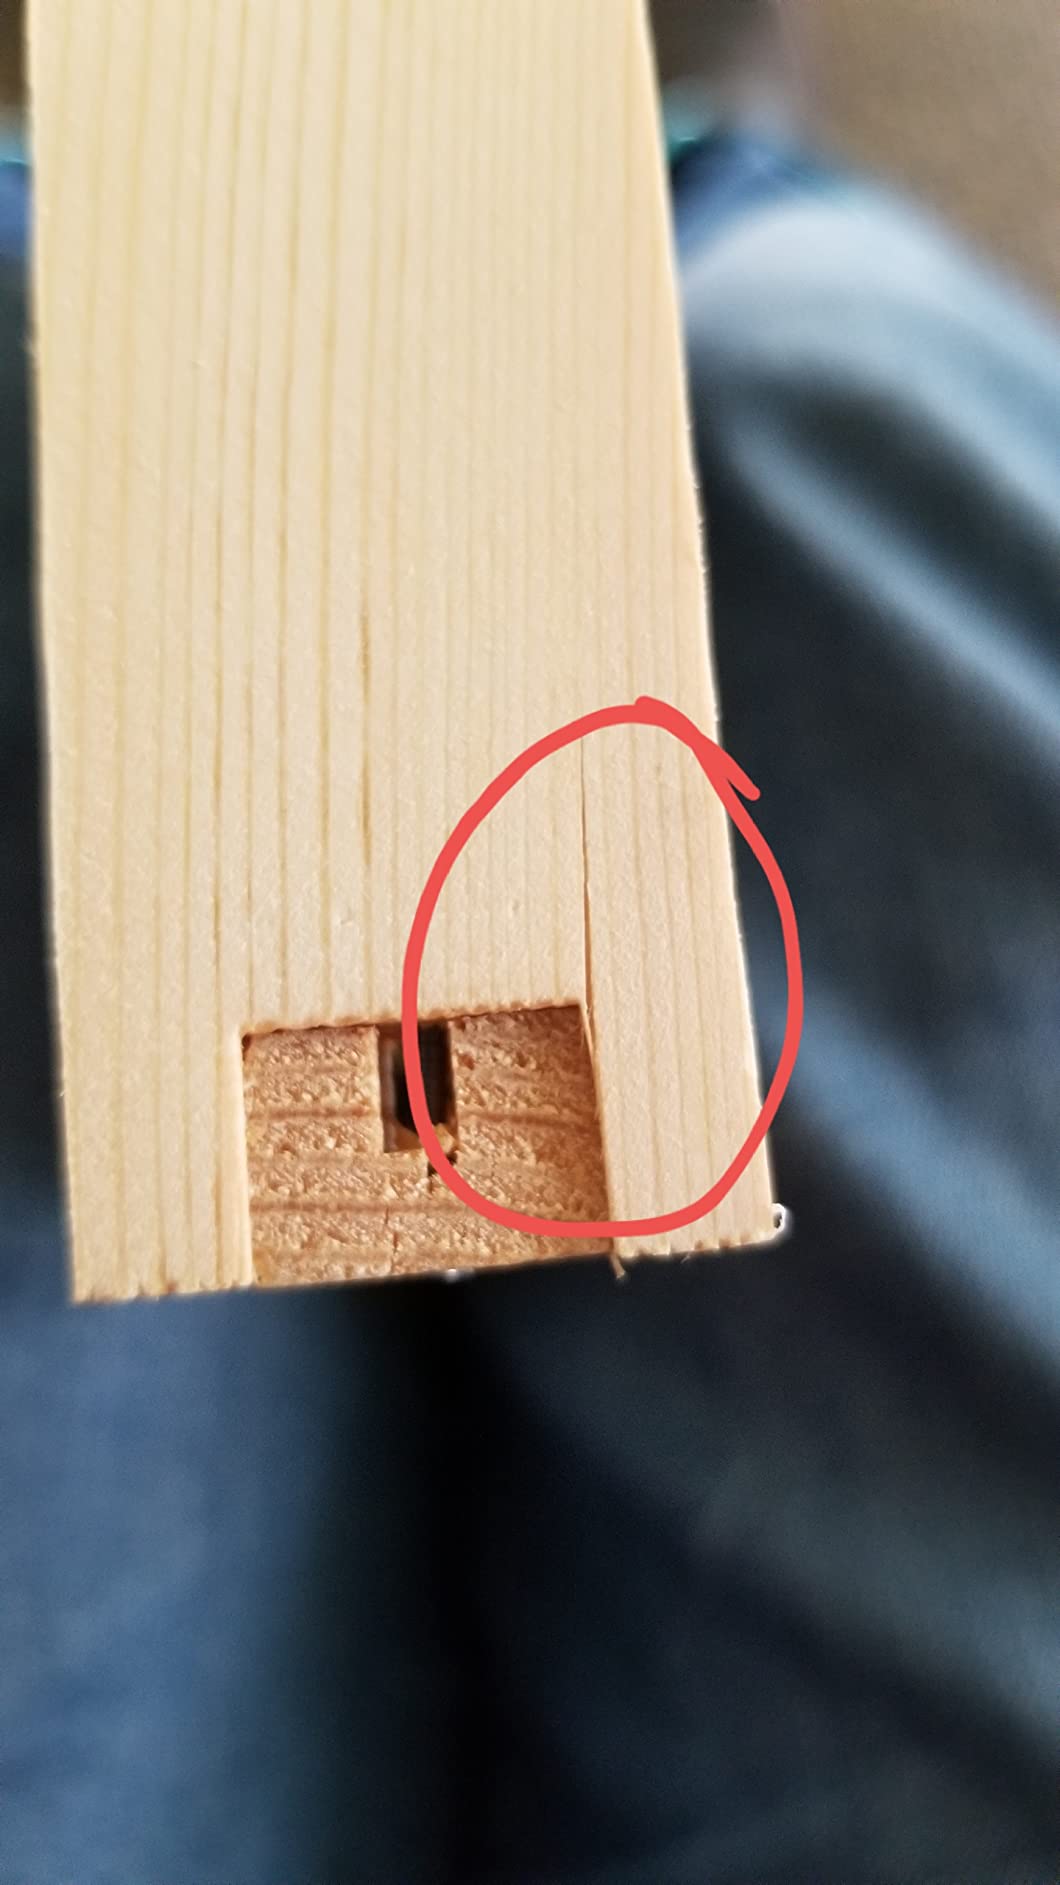
The honest weaknesses are all small and all fixable. The screws run slightly large and can cause minor cracking in a few spots. The inner cover has no side gap or entrance cut into it, so you have to fit an entrance yourself before the bees arrive. And frame wood occasionally arrives with hairline cracks or knots, which makes nailing fiddly and is why you glue the frames rather than trusting nails alone.
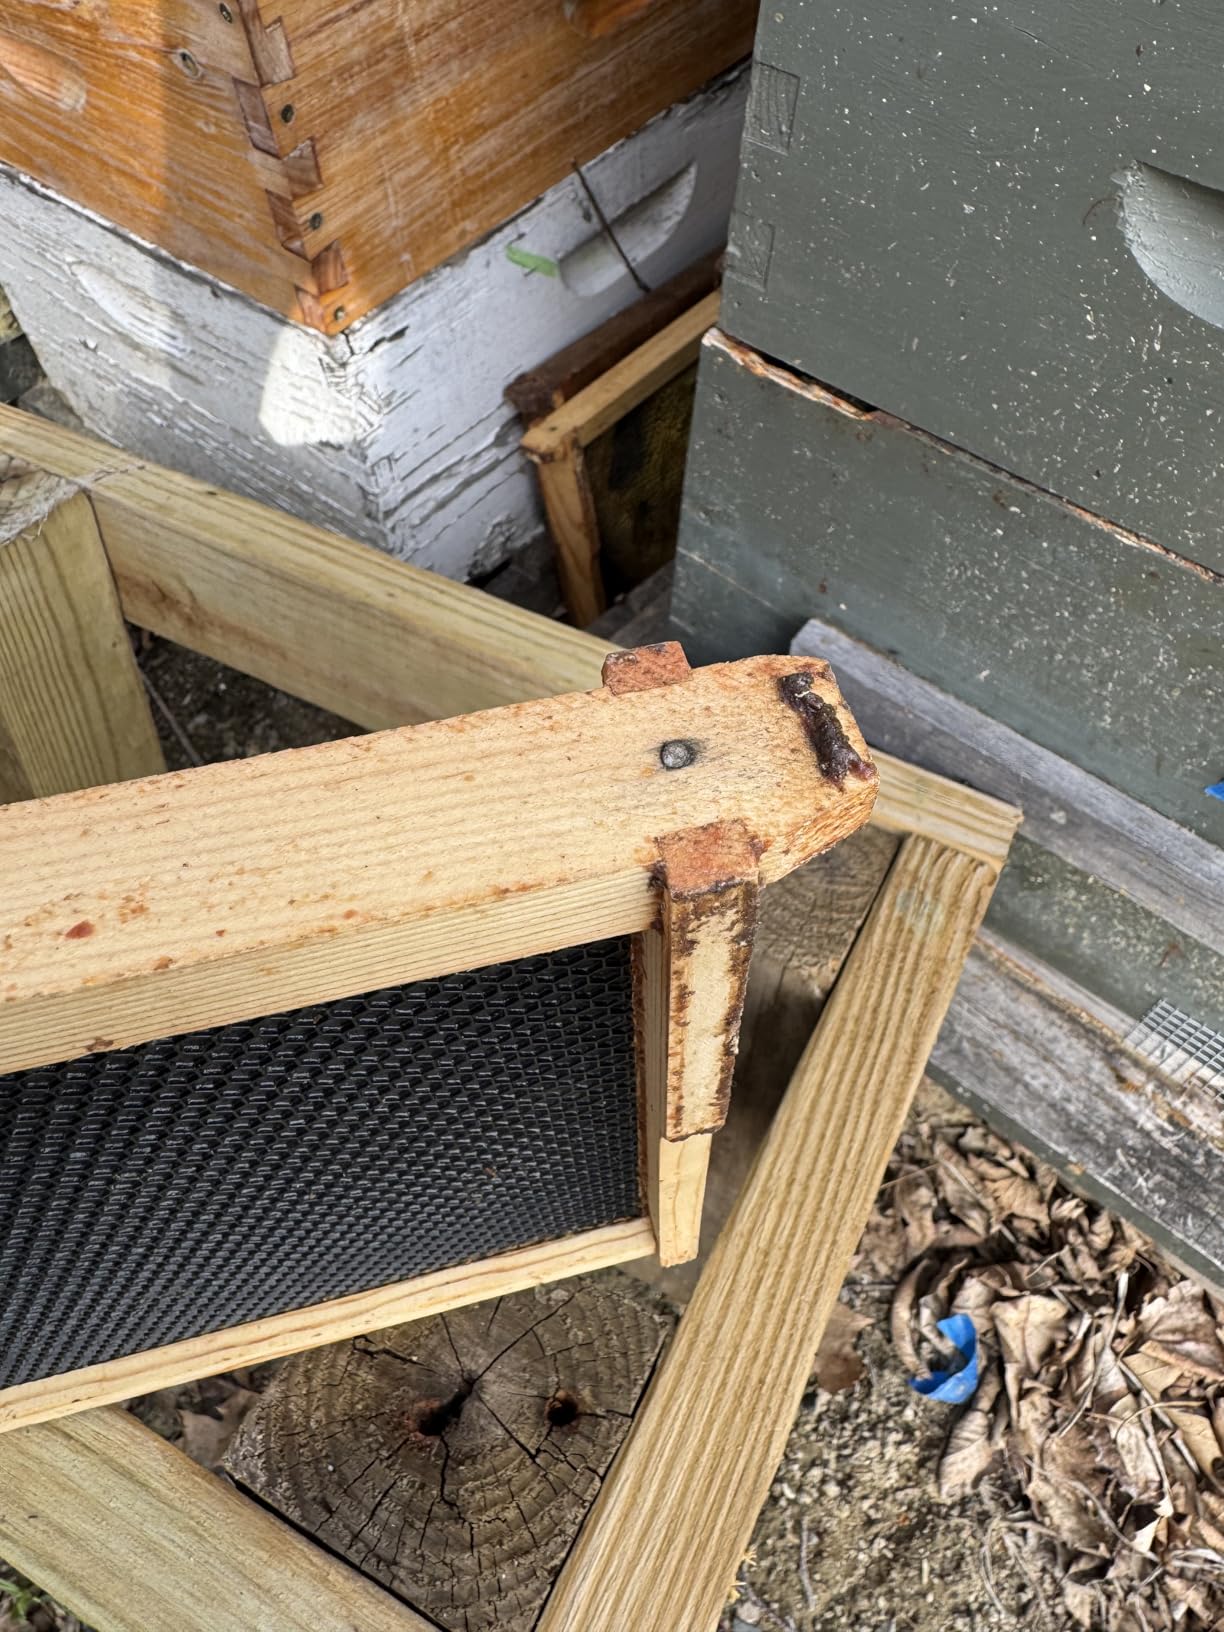
There is one more thing worth knowing because it is not in the listing. A keeper on r/Beekeeping described a base-model Hoover hive whose wooden frames came apart during an inspection, because a single nail per side holding the plastic frame base plate pulled out once the frames were full of honey and propolis. The frustrating part is that the plastic plate is trapped under drawn comb, so the frame cannot be swapped without dismantling the colony. It is a fair argument for spending care on frame quality over box quality, and for adding an extra staple or two when you build.
What you should check before the colony moves in
Check the inner cover before you place bees in it. If yours has no entrance gap, most owners simply use a hive tool to cut one, or run the colony with the inner cover off and the outer cover cracked for air movement in the first weeks. Decide before install day, not after the bees are already inside.
Check the frame wood in daylight before you nail anything. Hairline cracks and knots show up as darker, rougher areas. Set those frames aside, build the strong ones, and order replacements. Owners who do this report far less frustration than those who nail first and think later.
Who should skip this hive
Skip it if you want a pre-assembled hive. These boxes arrive flat and need an evening of work with predrilled holes and included hardware, so if building furniture is not something you enjoy, look at the Mann Lake instead. It also has no gabled roof option from this brand, so if you want a peaked roof you will need to source it separately.
Skip it if you are far from any beekeeping supply network. The boxes themselves are ordinary 10-frame Langstroth dimensions and parts are easy to find, but the frames are wooden and tied to this brand’s sizing. A club member who already runs this kit is a genuine advantage, and if you have one, buy it without hesitation.
2. BeeCastle 2-Layer Wax-Coated Kit: Best Value
BeeCastle 10-Frames Complete Beehive Kit, 100% Beeswax Coated Bee Hive Includes Beehive Frames and Beeswax Coated Foundation Sheet (2 Layer)
Wax-soaked cedar, 1 deep plus 1 medium, 20 dovetail frames
40.6 lb, standard 10-frame dimensions
Pros
- Fully wax-soaked cedar described as more waterproof than other waxed hives
- Pre-cut dovetails and predrilled holes
- Standard Langstroth sizing drops into an existing yard
- Wax scent helps bees orient quickly
- FSC-certified wood
Cons
- Printed instructions have tiny photos and spelling errors
- Instructions omit repeating box steps for the second box
- Frames ship unwaxed and are not predrilled
This is the kit we would hand to someone who has decided to keep bees this season and wants a complete hive in a single order. It is 1 deep brood box plus 1 medium super, 20 dovetail frames with waxed foundations, and the full complement of covers, excluder, bottom board and entrance reducer. Nothing structural is missing.
The construction story here is the differentiator. BeeCastle boxes are cedar, soaked in boiled beeswax so the wax penetrates the wood rather than sitting on it as a film. Owners consistently describe the result as more waterproof and more durable than lighter waxed hives, and it holds its finish through heavy rain and summer heat better than paint does.
Standard 10-frame sizing is the part that should make you relax. Deep brood boxes measure 16-1/4 by 19-7/8 by 9-5/8 inches and the medium super is the same footprint at 6-5/8 inches tall, which is textbook Langstroth. Every super, frame and accessory from any other supplier fits this hive.
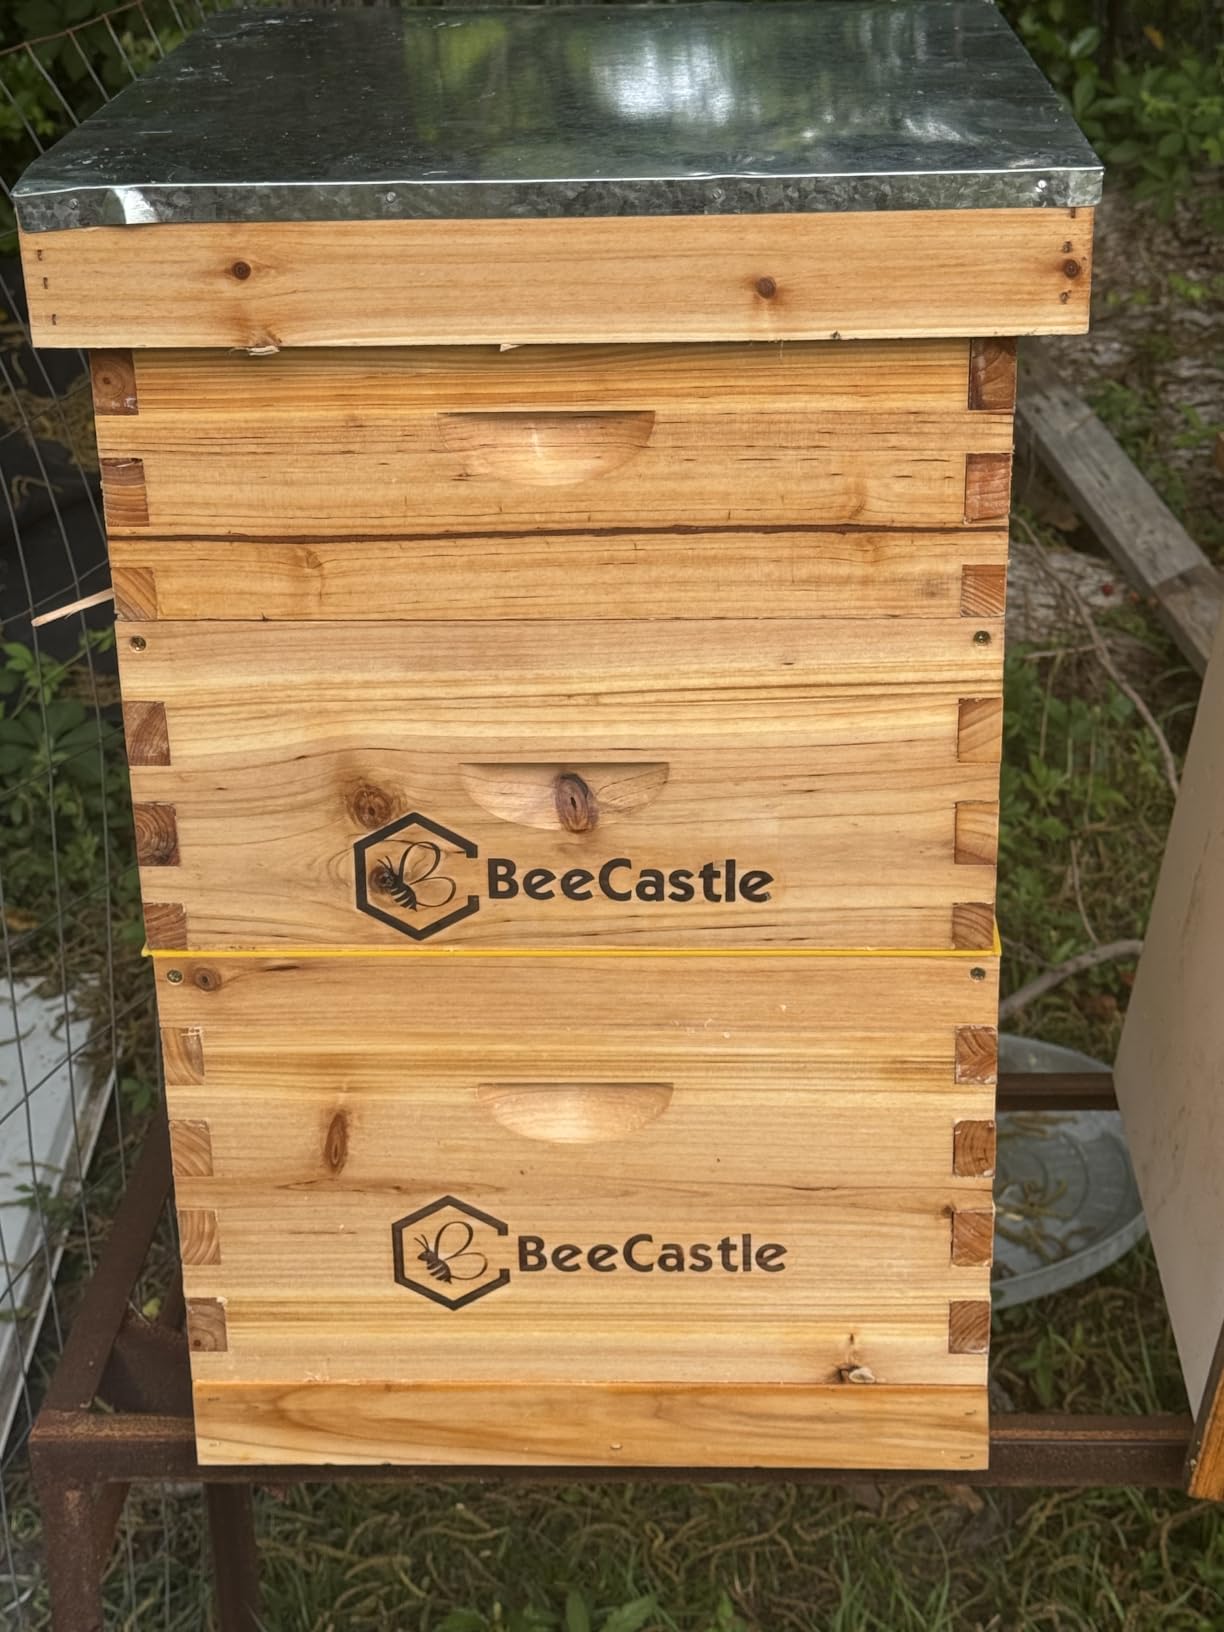
Owners also report that the wax smell helps. Swarms and package bees tend to orient to a waxed box quickly, and several reviewers specifically credit the scent with a colony settling in faster than expected. That is not a measurable claim in the data, but it comes up often enough that it is worth knowing.
The weakness is documentation, and it is the single most-cited complaint in the reviews. The printed instruction sheet uses tiny, poorly labeled photos and contains spelling errors. The instructions also never say outright that the box-assembly steps must be repeated for the second box, which is a real trap for a first-timer building a two-box hive. Plan to read them once with a diagram of your own before you start.
Two smaller things: the frames ship unwaxed even though the boxes are waxed, and their nail holes are not predrilled, so they are prone to splitting. Glue is not included. And the screws arrive in two sizes with nothing explaining which goes where. Buy a small bottle of wood glue and a separate box of exterior screws and this becomes a non-issue.

What the two-layer configuration actually gives you
One deep plus one medium gives a strong first season. The deep is where the colony raises brood, the medium is where the first honey goes, and 20 frames of comb is a real start rather than a token. Most colonies in year one will not fill either box, so you have room before the first expansion purchase.
What it does not give you is overwintering headroom in cold zones. A single deep is a small cluster space for a northern winter, and you will likely want a second deep on before the first autumn. Budget for it, and buy both deeps at once from the same seller so the wood ages together.
Who should skip this hive
Skip it if assembly documentation matters to you more than anything. If you learn better from clear diagrams than from tiny printed photos, the Mann Lake option arrives with pre-assembled frames and removes the fiddliest part of the build.
Also skip it if you want a gabled or ventilated roof, or if you plan to move colonies often. The metal top cover is a flat lid with no peak, which is fine in most climates but does less to shed standing water than a pitched roof. Many owners add a hive cover of their own on top once the colony is established.
3. BeeCastle 2-Deep 1-Medium Hive: Best Rated by Owners
BeeCastle 10 Frame Langstroth Bee Hive Coated with Beeswax Includes Beehive Frames and Waxed Foundations (2 Deep Boxes & 1 Medium Box)
Cedar boxes and pine frames, 2 deeps plus 1 medium, 30 frames
60 lb, standard 10-frame sizing
Pros
- Highest owner rating among the multi-box kits
- Beeswax coating outlasts a painted hive kept side by side
- True dovetail construction
- Full accessory set including mouse guard
- Fast replacement service for transit damage
Cons
- Thin shipping carton is easily punctured
- Inner cover notched only for a top entrance
- Supplied brad nails alone are insufficient on frames
Where the previous kit gives you a starting hive, this one gives you a setup that is ready for a strong first colony without a second order. Two deep brood boxes plus one medium super is 30 frames of comb in the box, and at 4.7 stars across more than 800 reviews it carries the highest owner rating of any multi-box kit here.
The warranty on the coating is the headline. Owners who ran this hive beside a painted hive report the beeswax coating weathered noticeably better, holding its surface through the seasons while the painted box faded and checked. The material is cedarwood boxes with pinewood frames, both FSC-certified, and the deep and medium boxes are standard 10-frame dimensions for full parts compatibility.
The box set is genuinely full: metal cover, inner cover, queen excluder, solid bottom board, entrance reducer, mouse guard, screws and nails, two deep boxes, one medium box, 30 frames and foundations. The mouse guard matters more than it sounds if you have squirrels, and the queen excluder is the component beginners most often forget to buy separately.
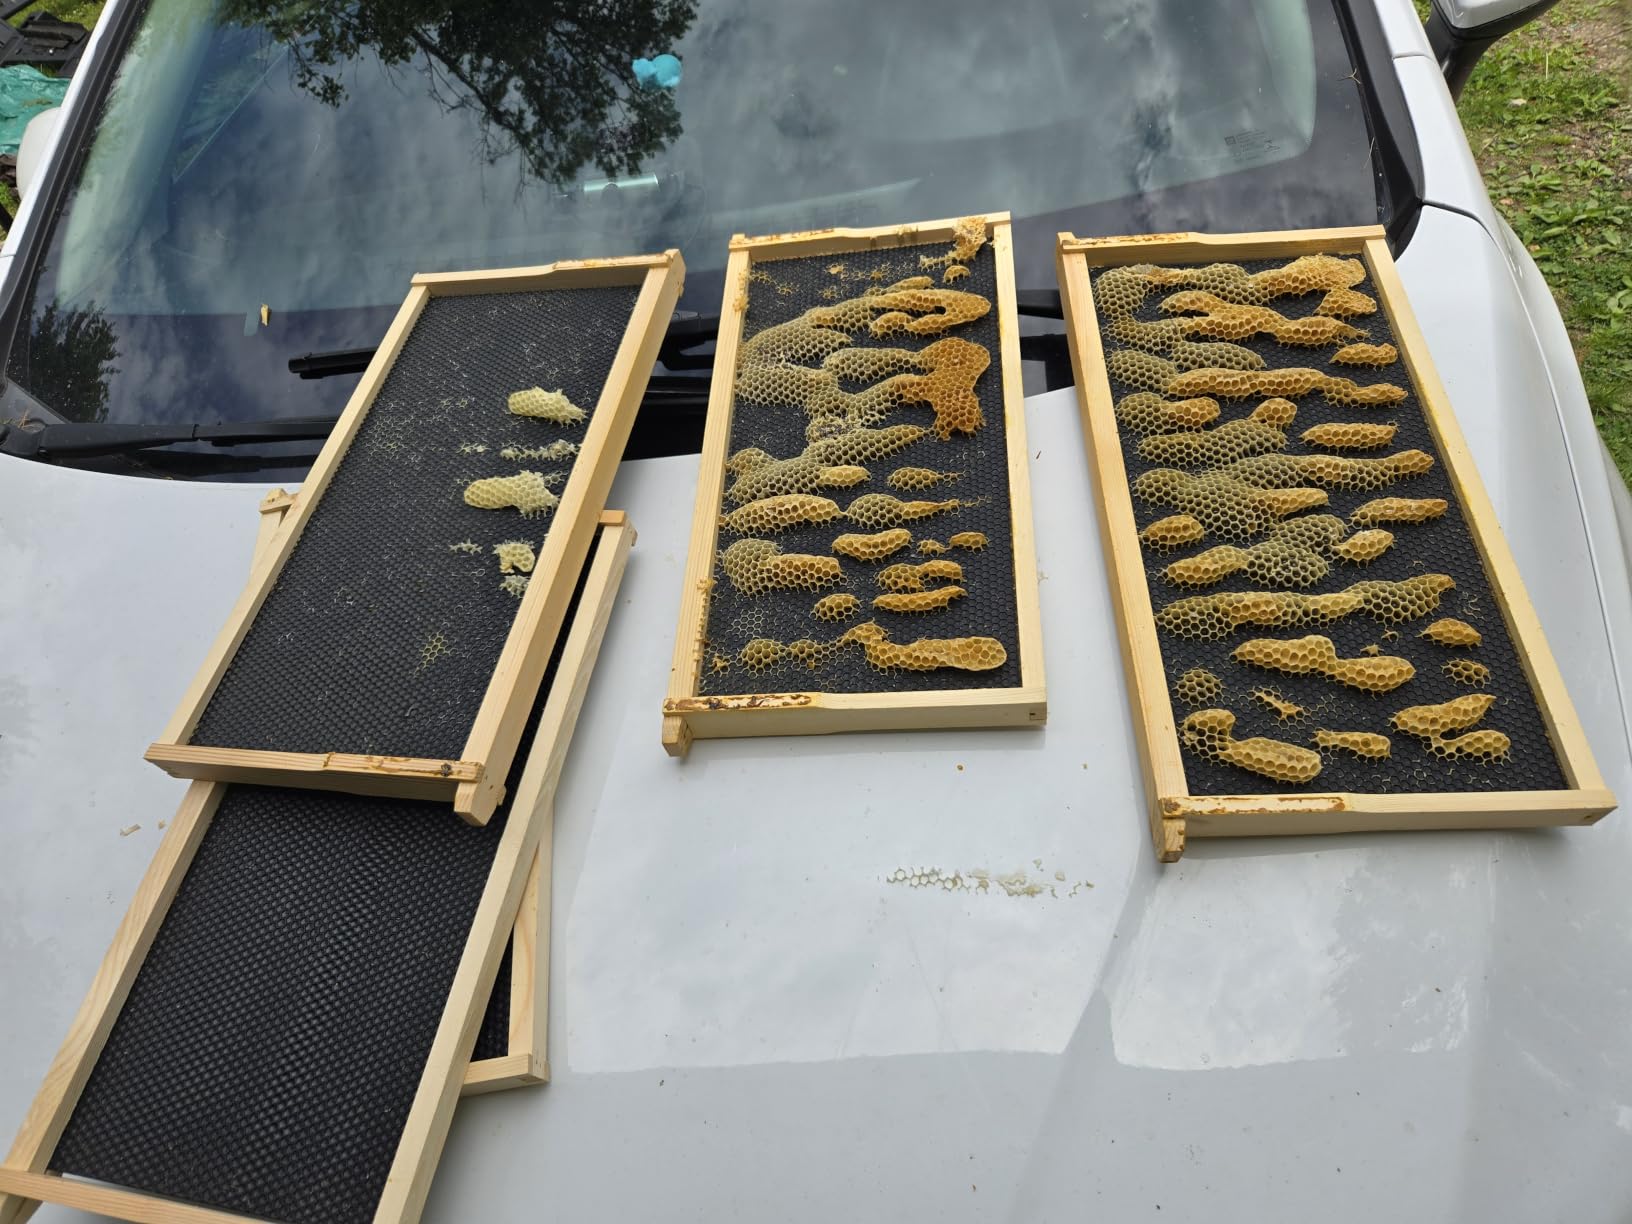
Owners consistently single out the joinery. These are true pre-cut dovetails with predrilled holes, not a butt joint that has been dressed up to look like one, and the result is a square box that stays square. That is what separates a hive you can stack four high from one that racks after a wet winter.
The main complaint is packaging rather than product. The corrugated carton is thin and easily punctured in transit, so cracked supers and missing parts do show up. The counterweight is service: reviewers report replacements sent quickly and courteously when that happens, which is the part of the purchase that actually matters when something arrives damaged.
Two smaller cautions. The inner cover is not notched for a top entrance and has to be modified, and the included screws can drive too deep into the pilot holes in the super and medium boxes if you are not careful. Supplied brad nails alone are not enough on the frames without added glue, and the foundations may need extra wax for fast, reliable comb drawing.
Why three layers is the right first purchase
Two deeps plus a medium is the configuration that lets a first colony build brood and put away honey in the same season. A single-deep setup is fine until midsummer, when a strong colony bumps against the ceiling and you are buying boxes at a moment when you least want to be making decisions.
There is also a matching argument. Adding a second deep later is easy, but a deep bought a season later will not have weathered the same way as the rest of the stack, and mismatched wood ages differently. Building the full brood chamber in one go keeps the whole hive the same age and the same material.
Who should skip this hive
Skip it if weight is a factor in your decision. At 60 pounds for the empty kit, before any bees or honey, this is not a hive you will be casually carrying between stands. Anyone with back or shoulder limitations should start with the lighter two-layer option instead.
Skip it if you want the smallest possible footprint on a small patio or balcony. Thirty frames of 10-frame box is a substantial stack for a tight space, and a top bar hive or the 5-frame nuc box will serve a constrained site better. It is also a heavier build than the two-layer kit, since you are assembling three boxes rather than two.
4. Mann Lake Traditional Complete Kit: Best for Skipping Frame Building
Mann Lake Traditional Complete Bee Hive Kit, 9⅝” Deep Hive Body, Painted
10-frame 9-5/8 inch deep body, 10 assembled frames
US-built radiata pine, 31.65 lb
Pros
- Frames arrive fully assembled which removes the hardest step
- US construction with reinforced finger joints
- Complete configuration with covers and entrance reducer
- Beeswax-coated plastic foundation for fast comb draw
Cons
- Single deep box only so supers must be bought separately
- Painted finish has less natural scent appeal
- Notched inner cover limits top-entrance options
Every other unassembled hive in this roundup ships you 20 to 40 frames to nail together. This one ships 10 frames that are already built. For a complete beginner with no tools and no patience for joinery, that single difference removes the step that beginners most often abandon halfway.
It is also the most traditionally built hive here. Mann Lake constructs it in the USA from sustainably sourced New Zealand radiata pine with reinforced finger-joint joinery, which is a fundamentally different joint from the dovetails the other kits use. Finger joints give broad glue and nail surfaces and resist racking, which is what you want in a box that will sit outdoors through years of freeze and thaw.
Everything else in the standard configuration is included: a telescoping outer cover, a notched inner cover, a bottom board and an entrance reducer, alongside the deep hive body and the assembled frames. The frames carry beeswax-coated plastic foundation, which encourages fast, even comb draw and a tidy brood pattern.

The telescoping outer cover is a detail worth more than it sounds. It overlaps the box rim so rain does not run down the joint, and a telescoping lid is the one cover style that reliably sheds water without you adding a roof on top. The notched inner cover provides the airflow control most hives leave to guesswork.
The configuration is deliberately modular. This is a single 10-frame deep, not a multi-box stack, and it accepts additional brood and honey boxes from any Langstroth supplier, so growing the hive later is straightforward. What you cannot do is get a full stacked hive from one order.
Paint is the other thing to know. The kit is available painted or unpainted, and the painted finish needs no waxing and no maintenance. The tradeoff is that a waxed box carries a natural scent that foragers respond to, while paint does not. Owners who care about that report it as a real difference in how quickly a new colony settles.
Whether one deep box is enough
For a first season in a moderate climate, yes. A single 9-5/8 inch deep is a legitimate one-box colony and many first-year bees never fill it. In cold zones it is thinner than you want going into winter, so plan on adding a second deep in late summer rather than spring.
Buying the extra box at the same time is the smarter move even if you do not need it yet. It halves the cost per box, guarantees matching wood, and means you are not making a hardware-store run in August when the colony needs the space. Beginners who start with two boxes and use one rarely regret it.
Who should skip this hive
Skip it if you want the deepest possible standard box in one purchase. At 9-5/8 inches this is a standard 10-frame deep rather than a tall commercial deep, so the brood volume is a little less generous per box and you will add height sooner.
Skip it if you are committed to a wax-coated or cedar hive specifically. This is painted radiata pine, which is entirely conventional and entirely reliable, but it will not have the wood scent or the waterproof finish of the wax-dipped kits. If your local club supplies gear from this brand, that advantage usually outweighs the material difference.
5. MayBee 10-Frame Two-Layer Hive: Best Vented Setup
Beehive 10 Frame Bee Hives and Supplies Starter Kit, Bee Hive for Beginner, Honey Bee Hives Includes 1 Deep Brood Hive Box, 1 Bee Hive Super Box with Beehive Frames and Foundations
Wax-coated cedar, 1 deep plus 1 medium, 20 frames
43.3 lb, 16.3x19.9x20 inch stack
Pros
- Vented inner boards improve airflow inside the hive
- Detachable bottom board with entrance reducer simplifies cleaning
- Pre-assembled metal top cover cuts build to about 30 minutes
- Heavy wax coating needs no painting
Cons
- Stacked boxes can shift when carried or moved
- Vent openings can be an entry route for small hive beetles
- Plastic foundation needs re-waxing for reliable comb draw
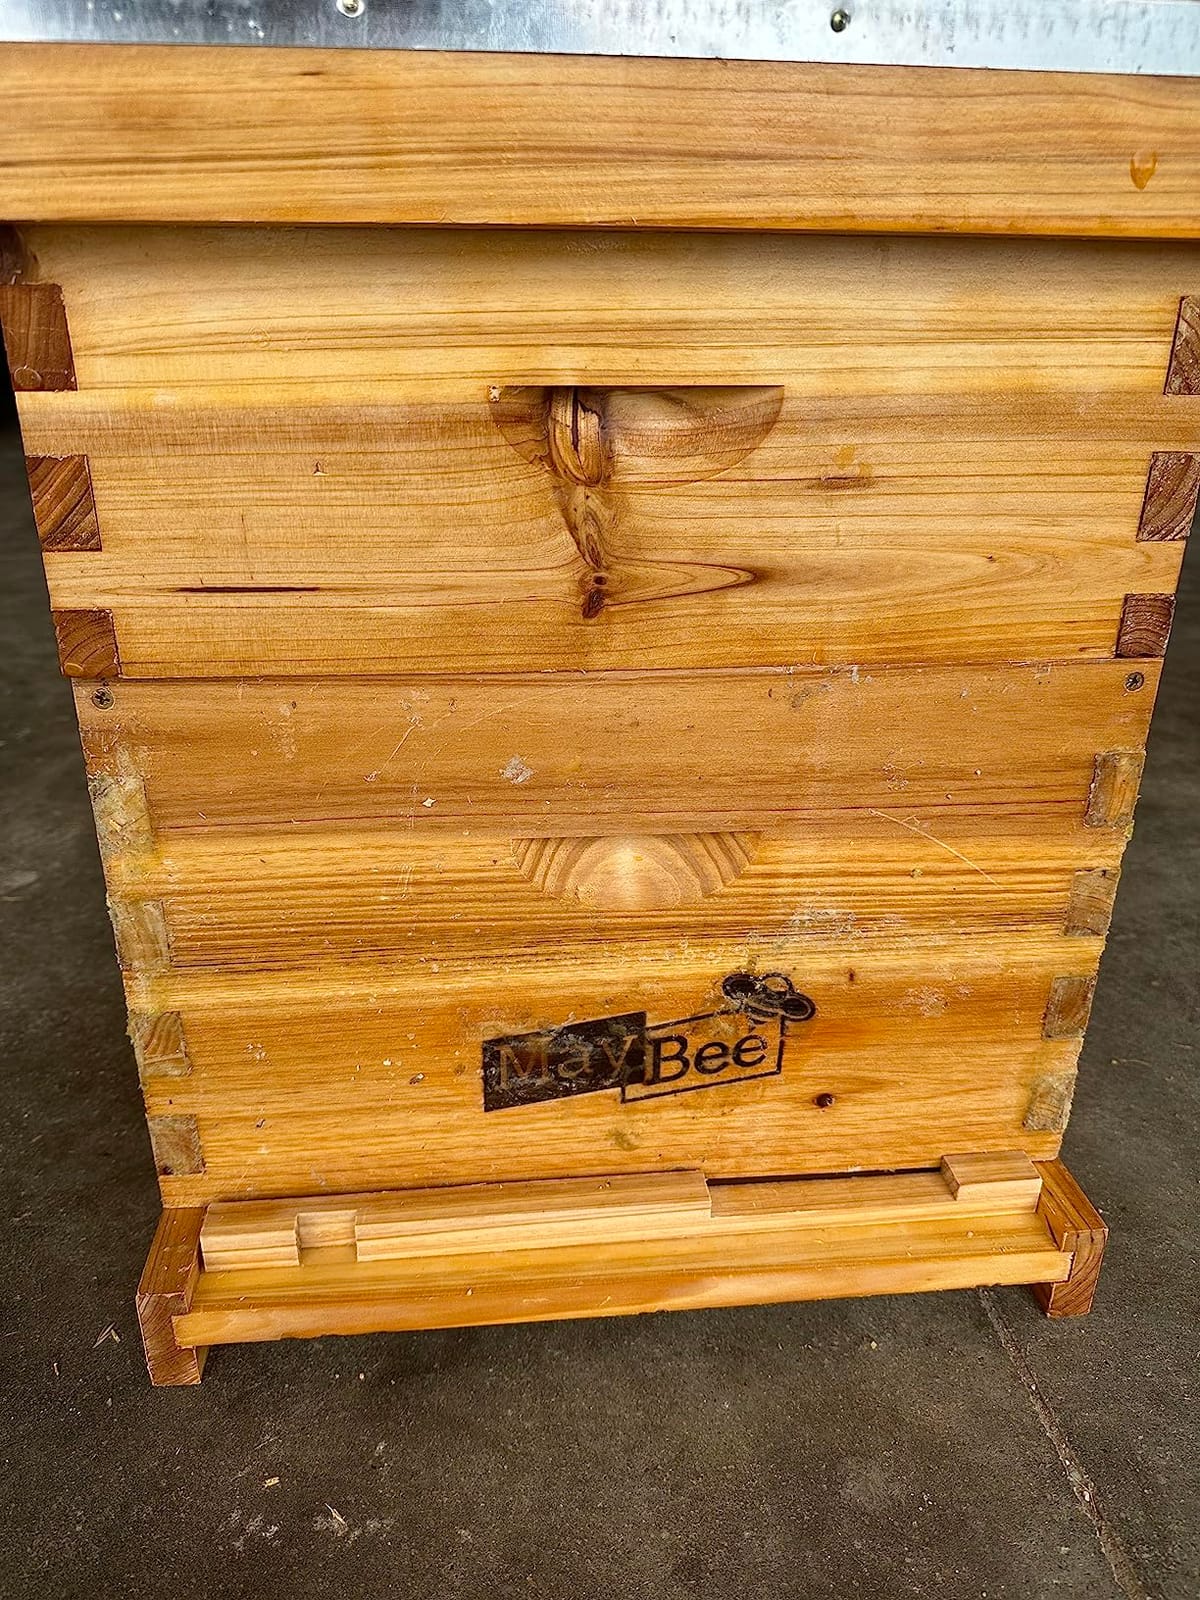
Airflow is the design story on this hive, and it is more than a marketing word. The inner boards are vented, and the bottom board detaches with an integrated entrance reducer, which together make a hive you can clear, clean and inspect without dismantling the stack. For a first-timer who is going to open the box every week from April to September, that is a real quality-of-life difference.
It is also the fastest build in this roundup. The metal top cover arrives pre-assembled, and owners report roughly 30 minutes from flat box to finished hive. The kit is a two-layer 10-frame configuration: one deep brood box, one medium super, 20 frames with waxed plastic foundations, plus bottom board, entrance reducer, inner cover, top cover and queen excluder.
The construction is heavy wax-coated cedarwood with pinewood frames and food-grade plastic foundation. The wax coating gives a rustic look that needs no painting, and the boxes are described as prepared, sanded and wax-coated for weather resistance.
Worth noting for anyone comparing this to the other cedar kits: this one uses plastic foundation sheets inside wooden frames rather than solid wooden frames with waxed foundation. That is a lower-cost approach and a completely standard one, but plastic foundation needs beeswax worked into it before installation or the bees may not draw the comb.
That is the most repeated piece of advice in the reviews, and it applies across nearly every wax-coated kit here. Take a beeswax block, warm it, and run it over the plastic sheet until the surface takes a proper coating. Budget an evening and a spare block of wax. Bees ignoring foundation is one of the most common first-season reasons a colony does not draw comb.
Two cautions. Because the boxes stack without hinges, the stack can shift when you lift and carry it, so move hives one box at a time rather than carrying the whole tower. And the vent openings in the inner boards can act as an unwanted entry route for small hive beetles in some climates, which is a genuine consideration in the southern United States.
How to handle the vent openings in beetle areas
If you are south of roughly the 32nd parallel, or anywhere with a documented small hive beetle history, screen those vents before the season. A strip of fine mesh cut to size and held in place with a small amount of wax is the standard fix and takes minutes.
Do this in the same visit as fitting the entrance reducer, and check the mesh again after a month because it can loosen in weather. Beetles entering a vented inner board find a protected cavity the rest of the hive does not have, so the fix is worth the ten minutes regardless of how the hive looks.
Who should skip this hive
Skip it if you plan to relocate colonies. A hinged or joined stack survives a move in a way that a free-stacking box does not, and if you expect to shuffle hives between yards as your apiary grows, the joinery on the dovetail kits here is a better answer.
Skip it if you want a tall brood chamber from day one. One deep plus one medium is a good first season but a modest overwintering setup for zones 4 and colder, so a second deep is a likely autumn purchase. That is a normal way to spend, not a flaw, just a cost to plan for.
6. VEVOR 2-Deep 2-Medium Hive: Best for Watching Bees Without Opening
VEVOR 10 Frame Bee Hive, Beeswax Coated Fir Wood, Bee Hives Starter Kit,2 Deep + 2 Medium Bee Boxes Langstroth Beehive Kit, Transparent Acrylic Windows with Foundations for Beginners Pro Beekeepers
Acrylic windows and vents, 2 deeps plus 2 mediums, 40 ABS frames
70.6 lb, 0.74 inch fir
Pros
- Acrylic windows show brood and stores without opening the hive
- Ventilation ports add airflow to otherwise sealed boxes
- High output per box compared with similarly sized hives
- Customer service resolves problems quickly
Cons
- Frame notches frequently cut too shallow to seat without shaving
- Glued boards from uneven strips leave gaps on top and bottom boards
- No screws or predrilled holes supplied
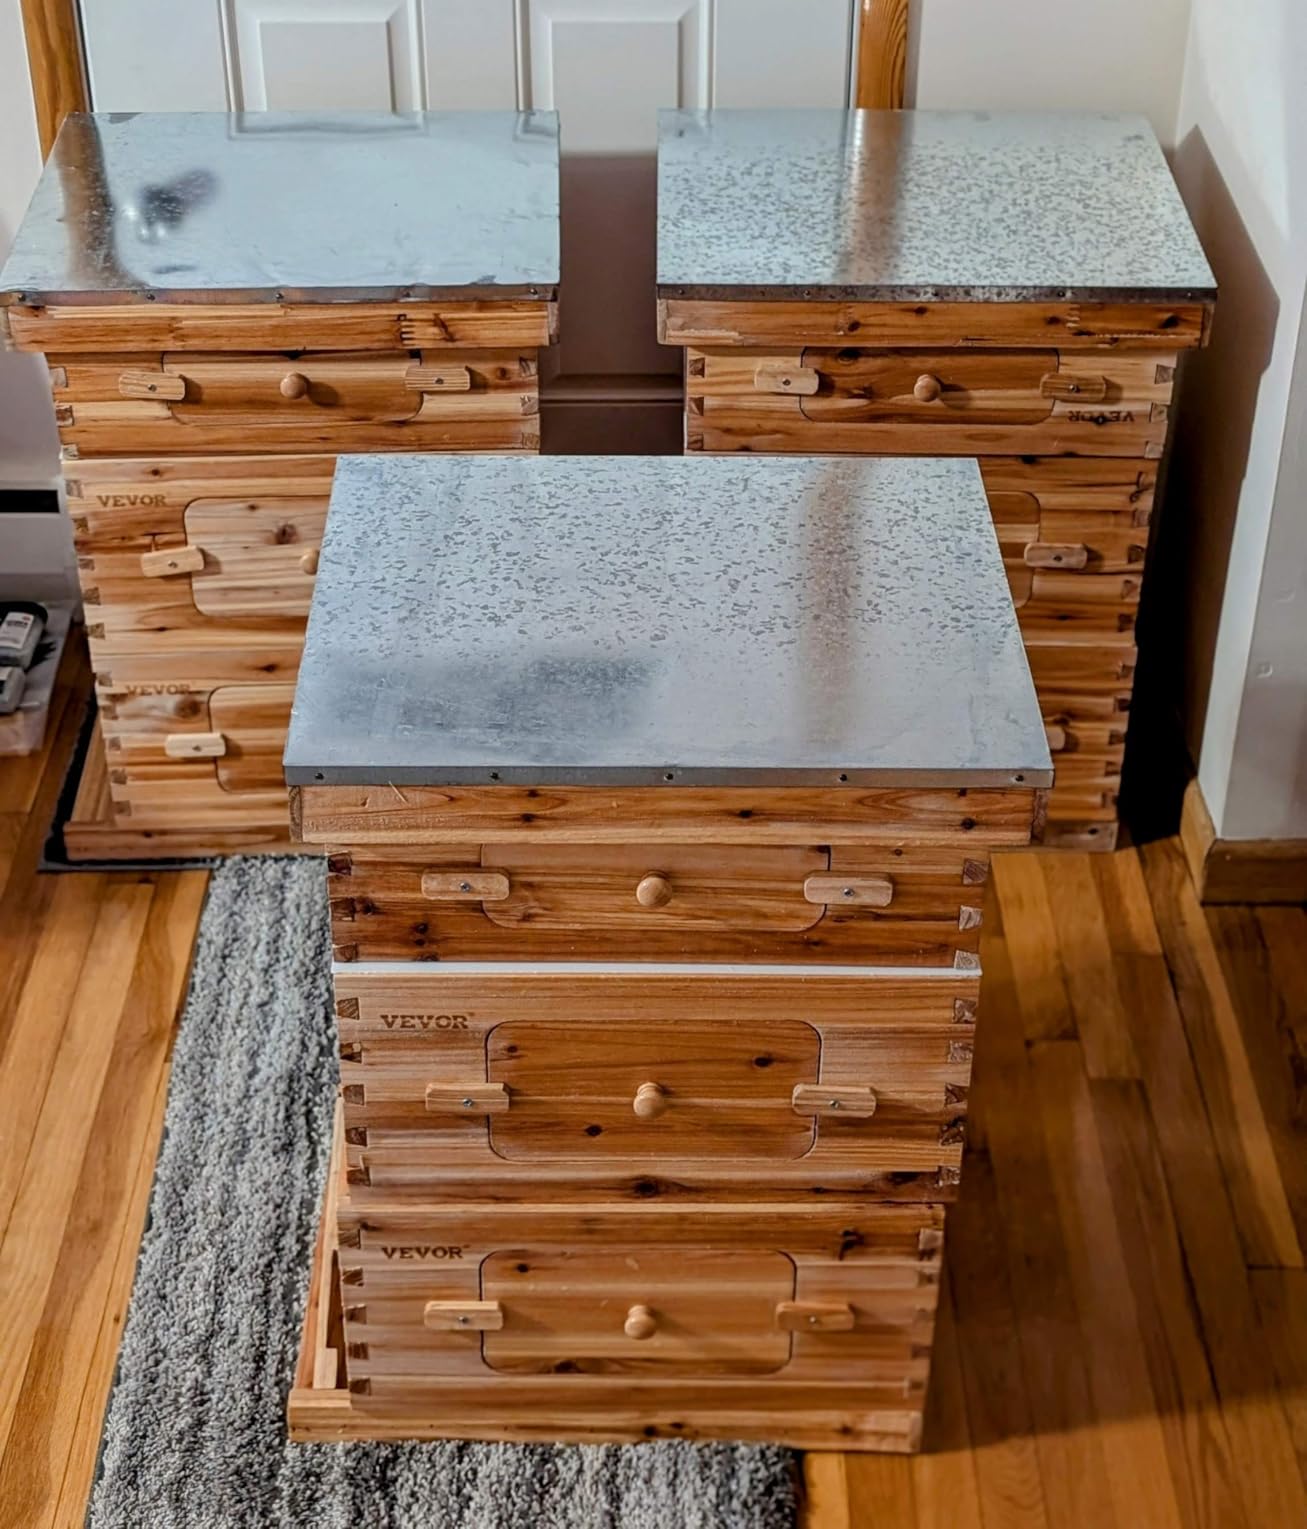
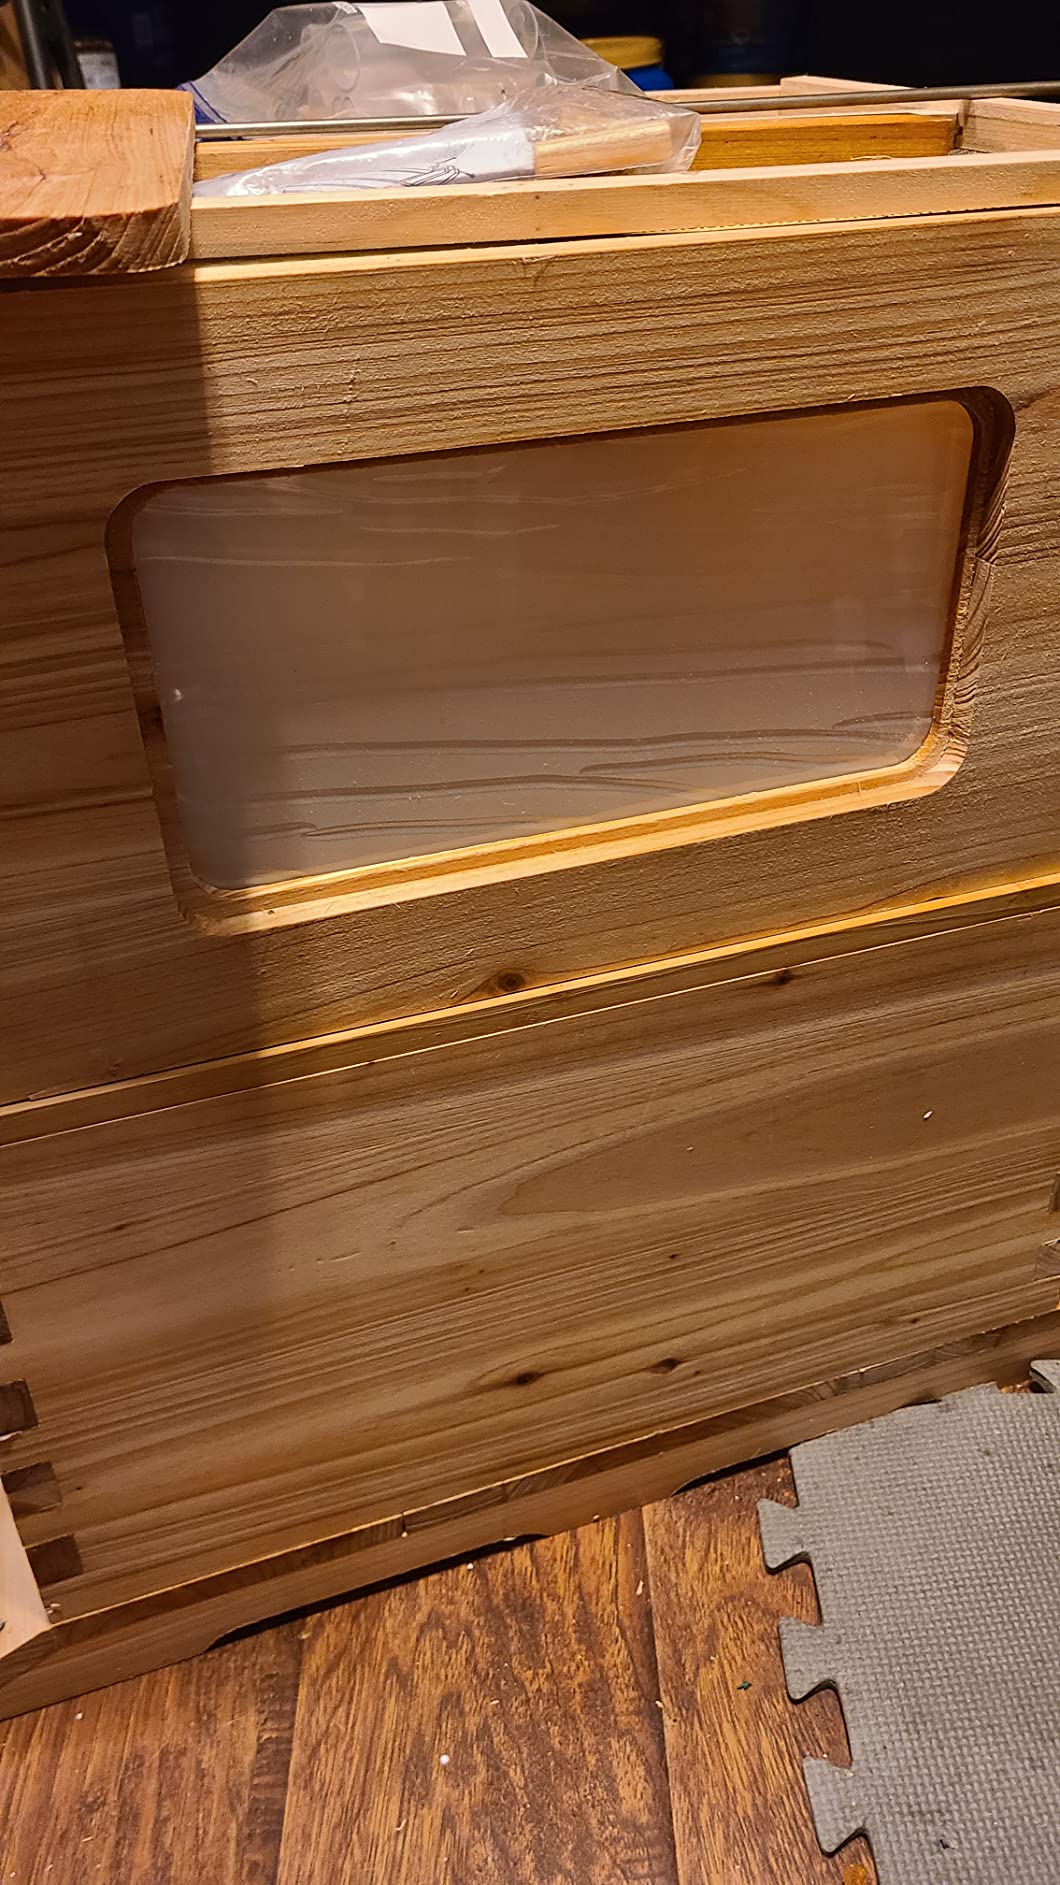
No other hive in this roundup lets you look at your bees without lifting anything. Each box carries transparent acrylic observation windows plus ventilation ports, so you can check brood pattern and honey stores from the side of the stack. For a first season, when most of what you are doing is learning to read a colony, that is genuinely useful.
The size is also the biggest. This is a four-layer kit, two deeps plus two mediums, in 0.74 inch fir with a full beeswax coating on the exterior. Forty ABS frames coated in beeswax come with it, and dovetail joinery is used on all boxes. Multiple box configurations are offered from this range, so you can start smaller and add on.
At 4.2 stars across 382 reviews, this is the lowest-rated hive here, and the reviews explain exactly why. The split is real: fans highlight the windows, the value and healthy colonies, while critics focus on quality control.
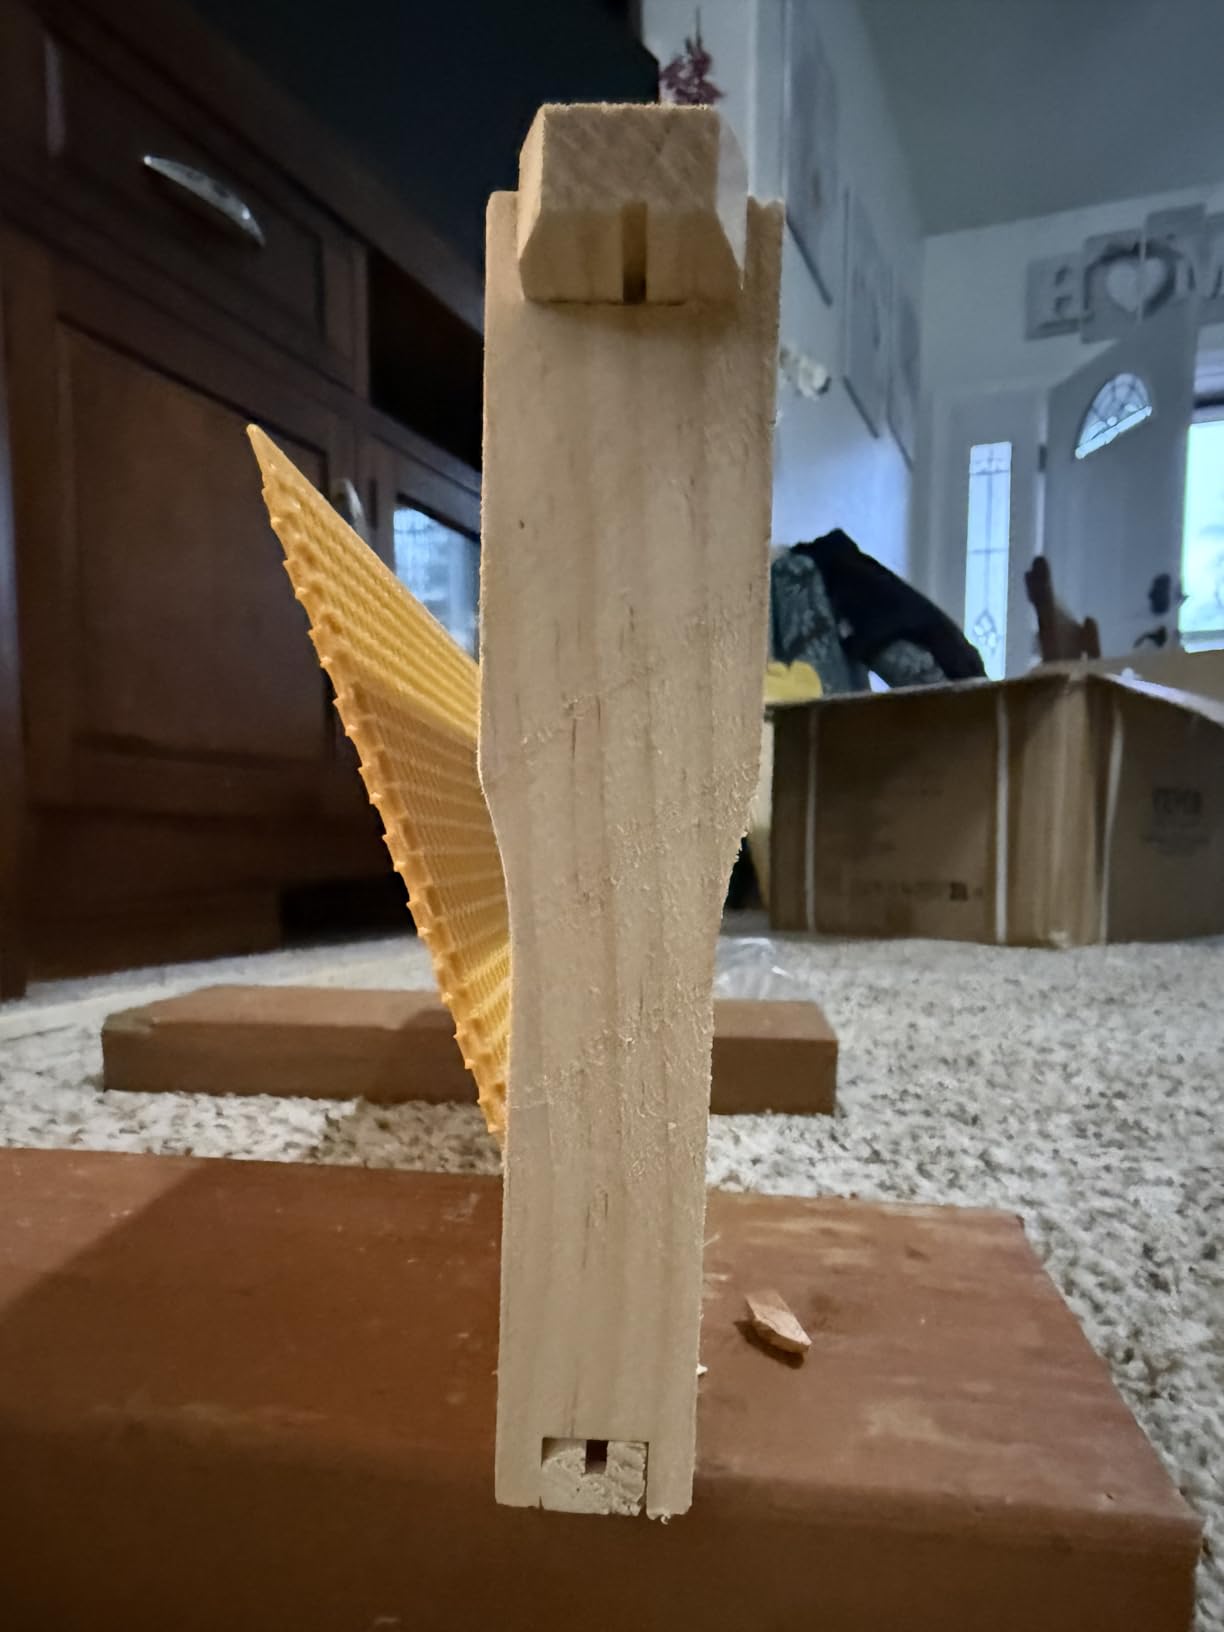
The most common frame complaint is specific and fixable. Frame components are frequently cut with notches too shallow to seat, so you have to shave the wood before the frame will go together. That is twenty to forty frames of work on this kit, and it is the single most repeated line in the reviews.
The other recurring issues are manufacturing consistency. Boards are glued from thin strips cut to uneven thickness, which leaves gaps at the top and bottom boards. Some deep boxes arrive with dovetails that do not mesh and crack when forced together. Waxing is sometimes uneven or missing in areas, and some boxes do not sit flat. No screws or predrilled holes are supplied, and glue does not bond well to waxed surfaces, so the joinery is largely dependent on the dovetails meshing cleanly.
Two practical notes. The venting holes in the acrylic window are widely criticized as a small hive beetle entry in southern climates, so screen them if you are in that range. And multiple reviewers recommend MayBee or BeeCastle as better alternatives at similar prices, which is fair advice from people who have used both.
How much inspection do the windows actually replace
They replace the quick daily glance, nothing more. A window tells you whether bees are moving, whether the cluster is where you expect and whether brood pattern looks solid. It does not let you check varroa mite levels, queen status, swarm cells, space or stores accurately.
So treat the windows as a monitoring tool, not a management tool. You will still be opening boxes on a weekly schedule from spring through fall, and you still need a plan for mite checks. The single most debated purchase in this niche teaches the same lesson: no hive design removes the actual work of keeping bees.
Who should skip this hive
Skip it if you are not comfortable finishing wood. Everything the other kits leave to predrilled holes and included screws, this one leaves to you, and the inconsistent machining means you cannot rely on a drill to fix a bad cut. That is a meaningful difference for a first-timer.
Skip it in beetle-prone climates unless you are willing to modify the windows on day one. It is also the heaviest empty kit here at 70.6 pounds, which matters if you will be lifting and moving boxes, and a serious consideration if you have any back or shoulder limitations.
7. Honey Lake 4-Layer Cedar Hive: Best Box Count for the Money
Honey Lake 10-Frame Langstroth Beehive Starter Kit, Beeswax Coated Complete Bee Hive Includes 2 Deep Brood Boxes & 2 Medium Super Bee Boxes with Beehive Frames and Foundations for Beekeepers (4 Layer)
Cedar, 2 deeps plus 2 mediums, 40 wood frames
Standard 10-frame dimensions
Pros
- Best price per box of any complete hive reviewed
- Predrilled screw holes make assembly quick and square
- Well-waxed boxes and frames need no painting
- Standard Langstroth sizing for easy expansion
Cons
- Ships insufficient nails so extra fasteners are needed
- Cedar is knotty and lower grade
- Factory foundation waxing is thin and usually re-done
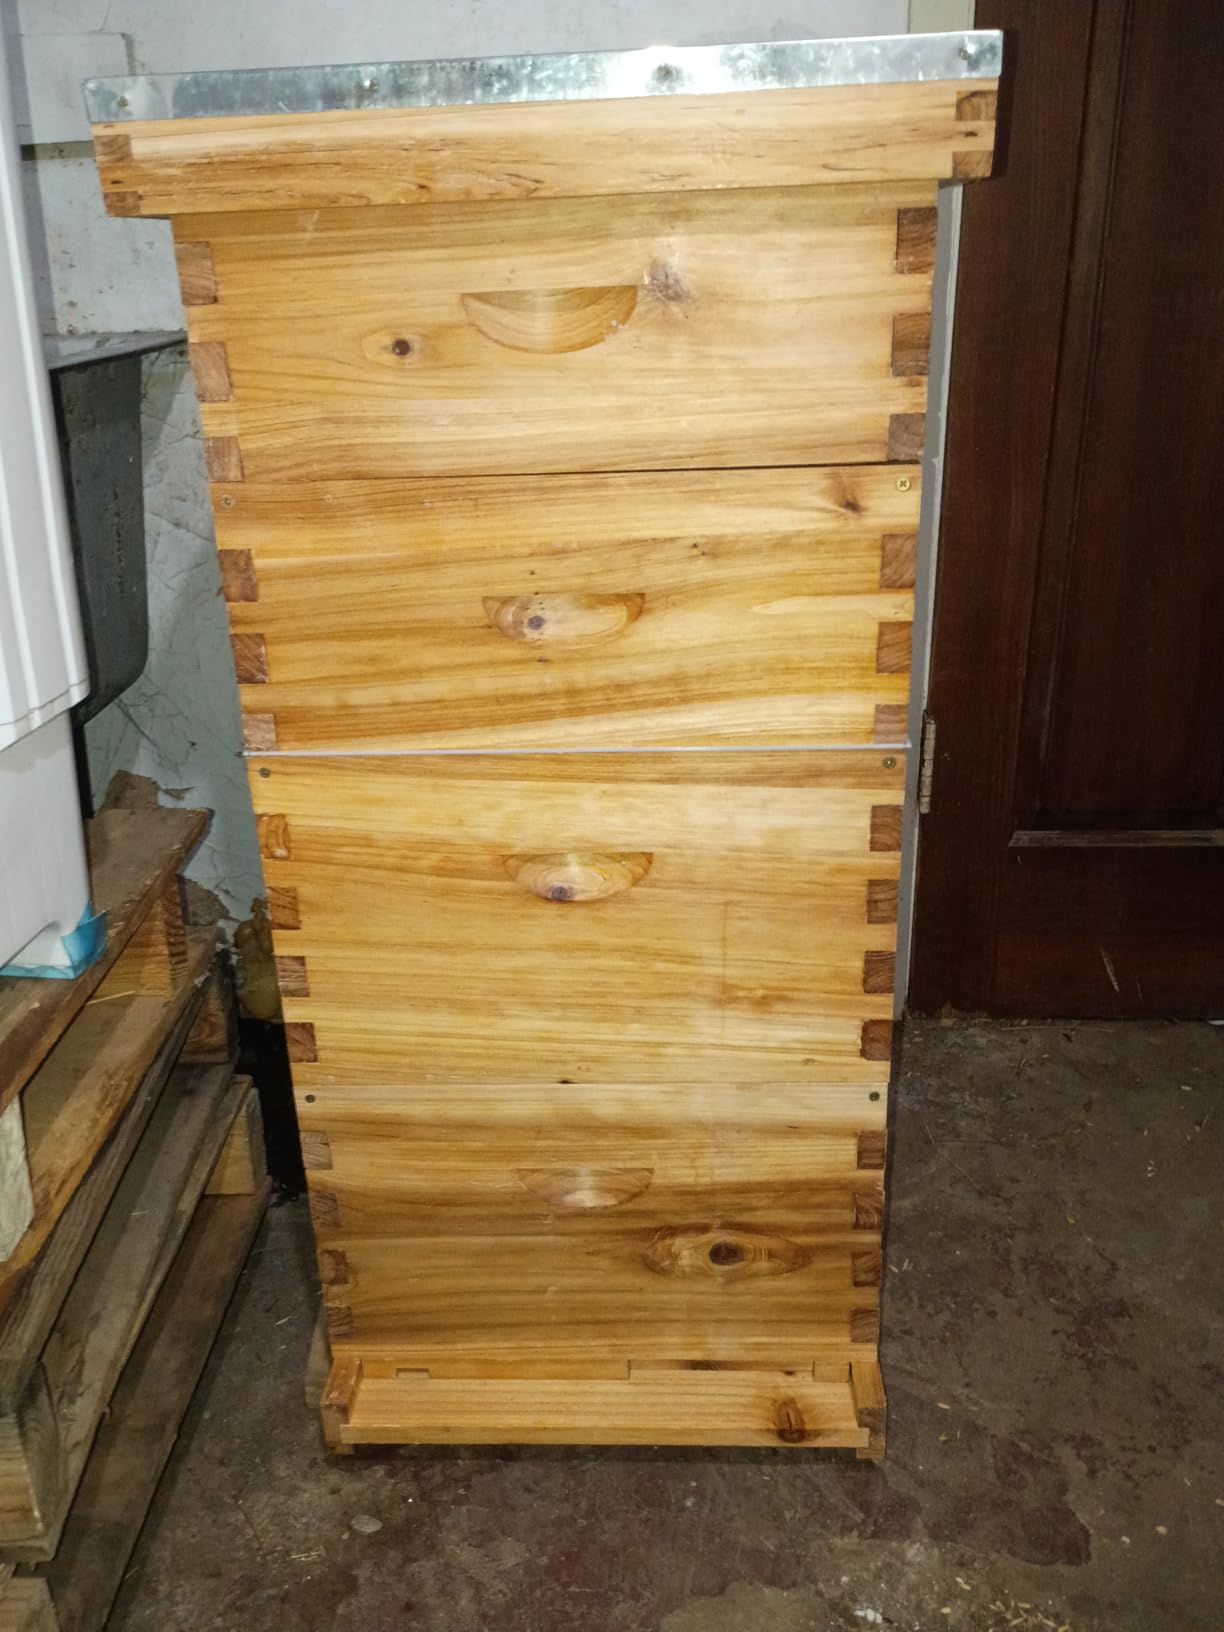
Owners consistently describe this as the best value in the category, and the specific claim is that the complete four-box hive costs less than buying frames alone elsewhere. That is a striking statement, and it is the reason this hive is worth a place on the list even though the review volume is lower than some here.
You get 2 deep brood boxes, 2 medium super boxes, 40 wood frames and 40 plastic foundation sheets, plus a top cover, inner cover, queen excluder, solid bottom board and entrance reducer. Box dimensions are 16-1/4 by 19-7/8 by 9-5/8 inches, which is standard 10-frame Langstroth sizing, so expansion with any other Langstroth box is straightforward.
Construction is wax-dipped cedar with dovetail joints and pre-drilled holes, and screws and nails are supplied. Several owners note the predrilled holes make assembly both quick and precise, which is the part that most separates a good build from a frustrating one.

What nearly every experienced reviewer adds is the same short refinement list. Replace the supplied screws with exterior-grade deck screws, because the included ones corrode quickly outdoors. Staple and glue the frames rather than trusting nails alone to keep them rigid. And re-wax the foundation before installing it, because the factory coating is thin and bees may ignore it.
Those three fixes take an afternoon and turn an already good hive into one that holds together properly. They are also not specific to this brand, and the same advice applies to most unassembled kits in this roundup. Buy a small box of exterior screws and a block of beeswax before you start building and you will not have to think about it again.
The wood is worth an honest mention. The cedar here is knotty and lower grade, and it can look weathered after a few seasons in the sun. That is cosmetic rather than structural, and it is part of why the hive is priced the way it is. If appearance matters to you or you intend to sell anything later, a premium cedar kit is the better look.
Whether four boxes is too much for one colony
It is more than most first colonies need in year one, and that is not a problem, it is planning. Two deeps and two mediums give you 40 frames of comb, which is roughly a full season of growth for a healthy package or nuc with room to spare, plus room for a strong honey crop.
The cost of buying too much equipment up front is money sitting in the shed. The cost of buying too little is a colony out of space in July while you are choosing supers. For most beginners, the second of those is worse, and the box-per-dollar math here is hard to argue with.
Who should skip this hive
Skip it if you want a pristine appearance or the best-grade cedar, because the knotty lower-grade stock shows. Owners who keep hives in visible front yards sometimes prefer a smoother finished kit for that reason.
Skip it if you are not willing to buy hardware. The insufficient nail count and the corrosion-prone screws are the two flaws that most owners fix, and both require a trip to a hardware store first. Bring your own exterior screws and a staple gun and the hive is excellent; buy only what is in the carton and it is frustrating.
8. BeeCastle 5-Frame Nuc Box: Best for a Swarm or Split
BeeCastle 5 Frame Bee Hive Nuc Box Coated with 100% Beeswax Includes Beehive Frames and Waxed Foundations
5-frame Langstroth nuc box, solid cedar, 5 waxed frames
9.45x19.88x9.62 inch box
Pros
- Assembles in minutes with tight well-waxed box fitment
- Cedar deeply soaked in wax which owners credit with deterring wood-boring insects
- Lowest cost per box in this roundup
- Ideal for catching a swarm or building up a small colony
Cons
- Plastic foundation sometimes arrives with little or no wax
- Replacement frames from the seller have arrived needing rebuilding
- Five-frame size is a stepping-stone rather than a permanent home
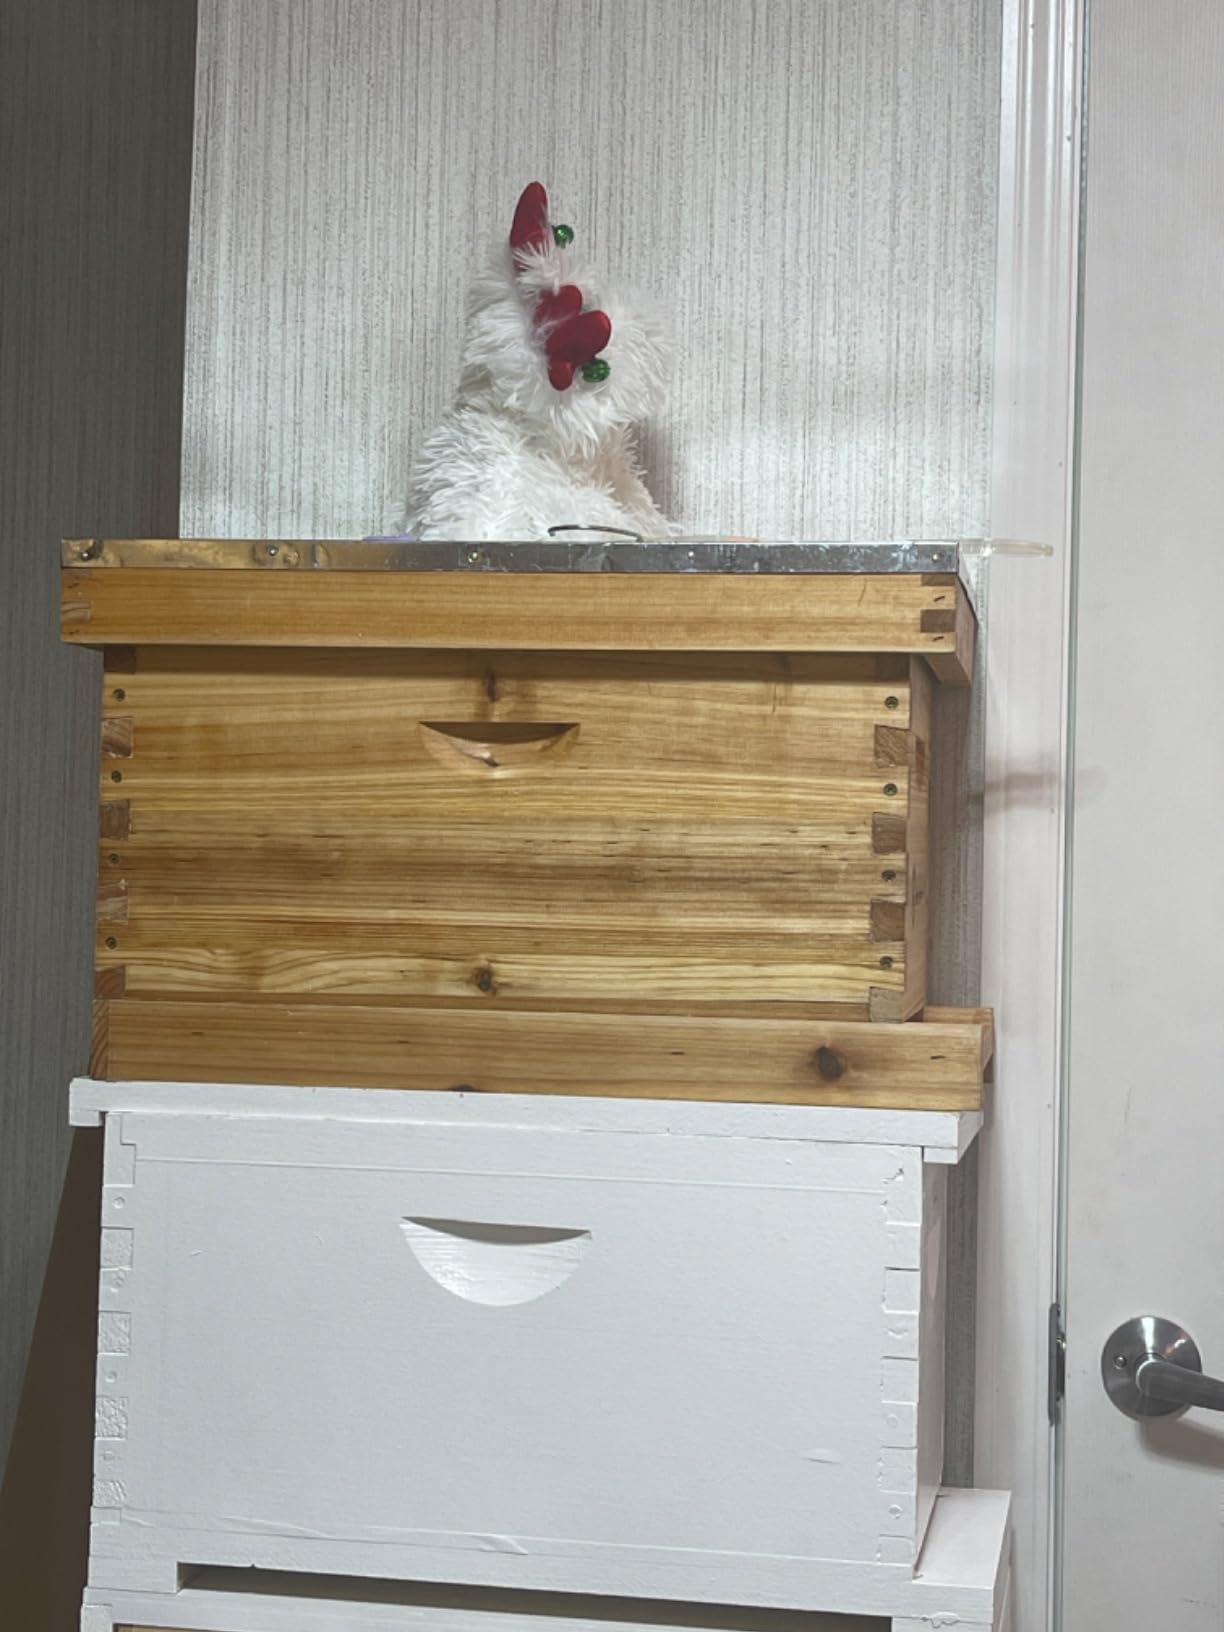
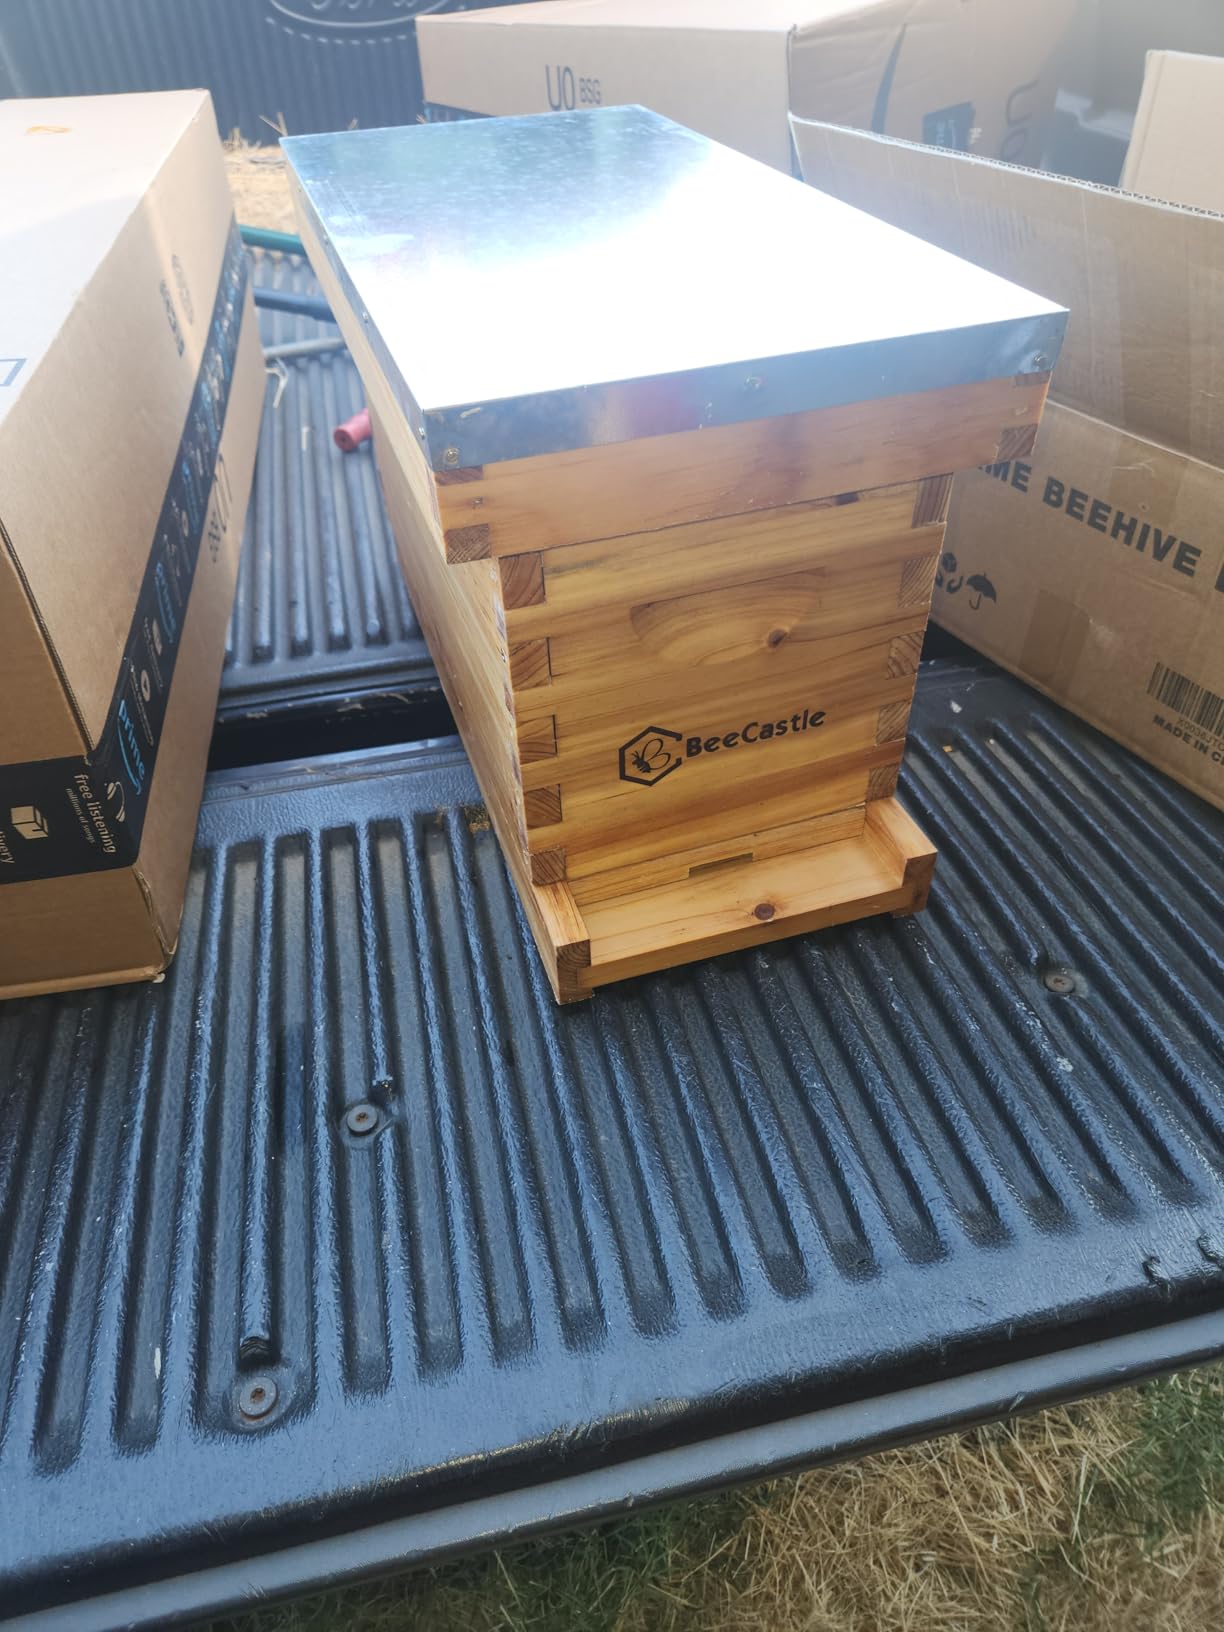
A nuc box is a different job from everything else on this list, and if you are planning to catch a swarm in your first season, you will need one. At 5 frames in a standard Langstroth nuc dimension, this is a small, fast-to-assemble cedar box meant to hold a swarm, a split, or a small colony while it builds strength.
Construction matches the larger BeeCastle kits: a box and frames fully soaked in beeswax, with solid cedar frames, pre-cut dovetail joints and predrilled holes. The kit includes a metal top cover, inner cover, solid bottom board, entrance reducer, screws and nails, one five-frame box and 5 frames with waxed foundations.
Owners credit the wax-soaked cedar with preventing wood-boring insect damage, which matters more in a box that sits on the ground or in an unheated shed than it does in a stacked apiary. The box is also well packaged for something so small and light, and it assembles in minutes.
The recurring defect is foundation wax coverage, and on a small box it matters proportionally more. Some units arrive with plastic foundation that is nearly dry, and bees will not draw comb they do not recognise. The fix is the same as with every other kit here, warm beeswax and work it into the sheets, but on five frames it is a five-minute job rather than an evening.
Worth flagging honestly: a few buyers report that replacement frames sent by the seller have arrived with loose joints and undriven nails, so inspect anything that comes to you, not just what was in the original box. Building a frame properly takes two minutes.
The honest limit is that five frames will not hold a colony long. Brood capacity here is small, and the box is a transition piece. The standard path is to run the swarm or split in the nuc box, let it draw and build for a few weeks until it is strong, then move the frames into a full deep box and retire the nuc box to catching the next one.
How to move a swarm from the nuc box into a real hive
Wait until the frames are drawn and the brood pattern is solid across all five frames, not just the first two. A colony in a small box is warm and safe, so there is no rush to move it early, and moving a colony that has not drawn its comb means re-doing the work.
Then move frames across in their original order and spacing, keep them tight so the bees do not lose their queen in the gap, and install the whole group into a deep box with a full complement of frames around them. Feed if the nectar flow has finished. That is the whole transfer, and doing it in good weather in the middle of the day avoids most of the risk.
Who should skip this hive
Skip it as your only hive. A single 5-frame box will not overwinter a colony, will not produce a meaningful honey crop and will not support a queen through a full season. As a supplementary swarm trap and hive-transfer tool it is excellent, but it is not a backyard apiary on its own.
Skip it if you have never kept bees at all and are not expecting any swarms. A 10-frame kit is what you need to receive a package or a nuc. Buy the full hive, and add this box later once you know you will use it.
9. LANGLANG Auto-Flow Hive: Best for Key-Turn Honey Harvest
LANGLANG Automatic Wooden bee hive House kit with 7 PCS Upgraded Auto Frame Comb-Beehive Box Honey Free harvesting.
7 BPA-free auto-flow frames with metal key and tubes
Wax-coated fir hive with observation windows
Pros
- Flow-style frames avoid crushing comb at harvest
- Heavily waxed wood with no insect invasion reported
- Tight dovetails on the super need no nails or screws
- Costs a fraction of a commercial flow hive for similar performance
Cons
- Brood frames for the lower box are not included
- Instructions are unlabeled diagrams and hard to follow
- Dovetails can be slightly out of alignment
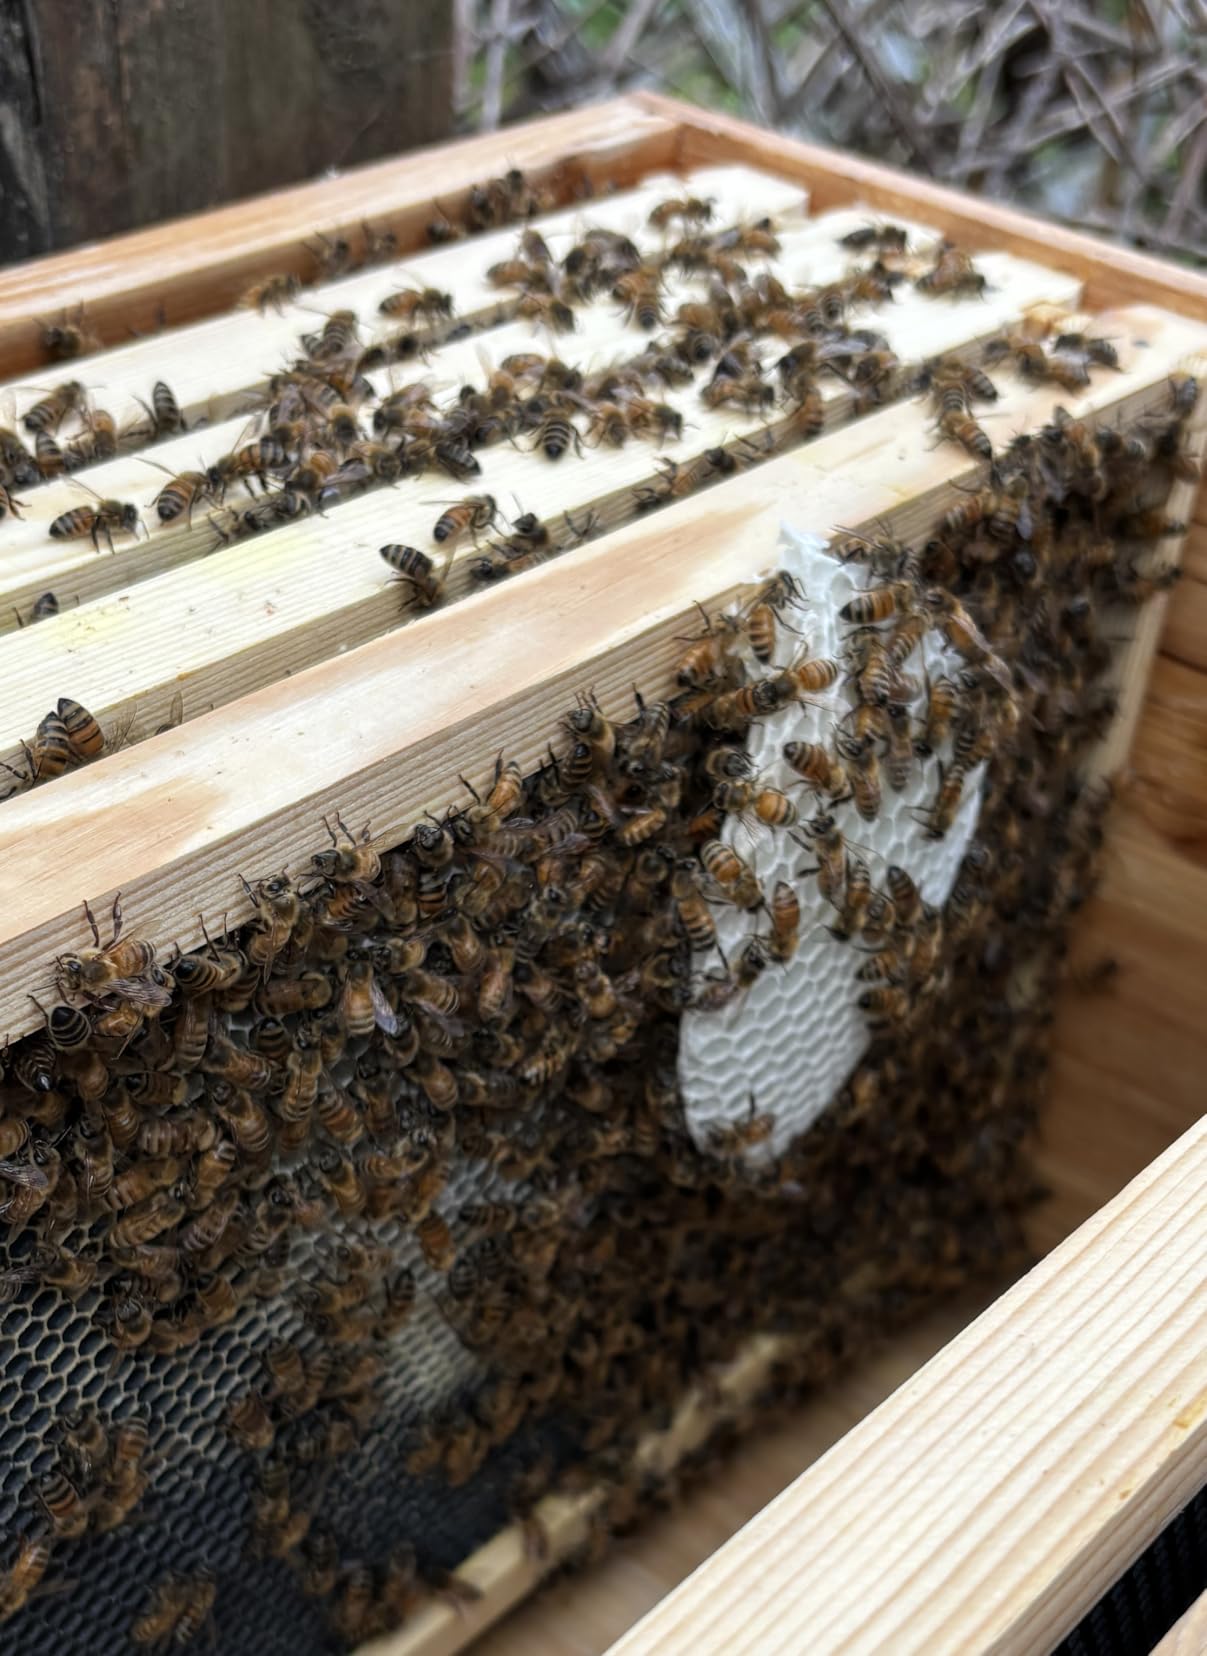
This is the hive at the centre of the biggest argument in beginner beekeeping, so it is worth reading carefully rather than skipping. The idea is simple: fit a metal key to the frame, turn it, and honey flows down through the tubes into your jar. No uncapping, no crushing, no extractor, no sticky kitchen at 11 pm.
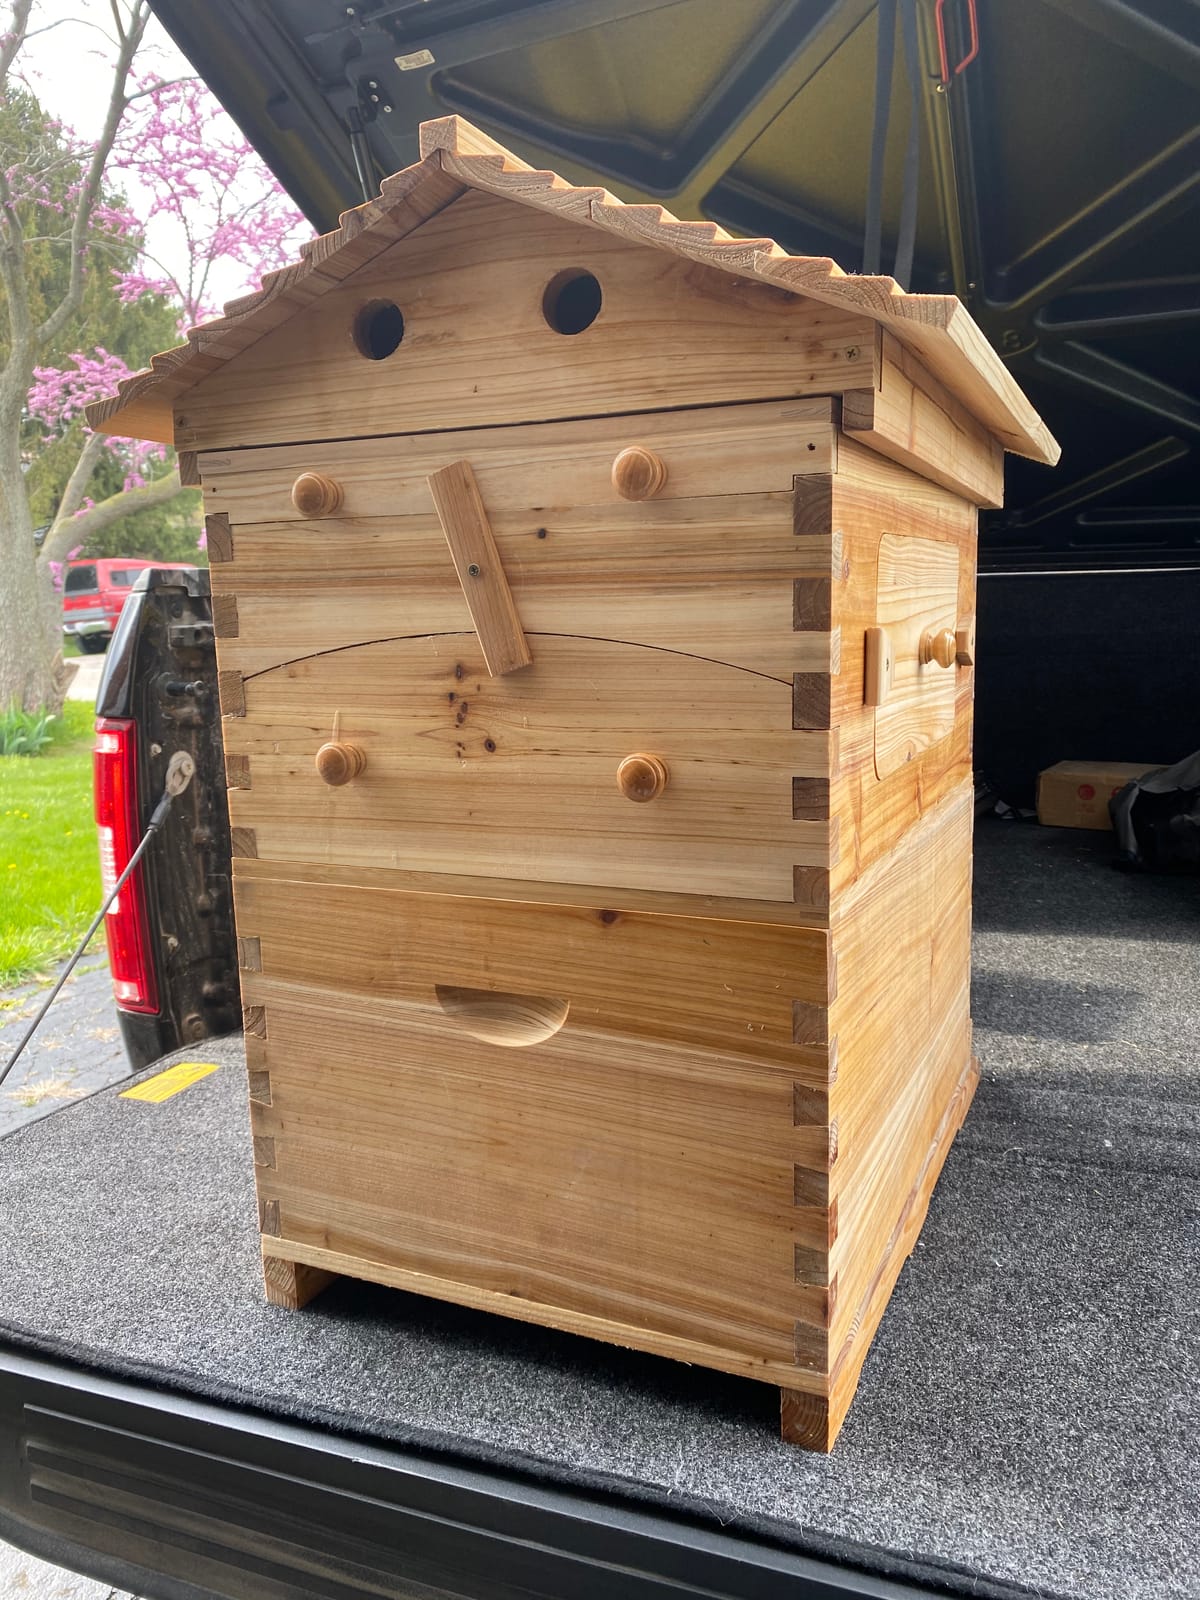
The package includes one wooden hive house, 7 auto-flowing frames, a metal key, 7 honey tubes and a user manual. The hive itself is wax-coated high-grade fir with observation windows on the honey frame box, and the box kit includes a bottom board with entrance reducer, a 10-frame brood box, a wooden queen excluder, a screen board and a ventilated roof.
Owners mostly judge it favorably on value and construction. The wood is heavily wax-saturated, and some owners report no insect invasion where a traditional box next to it was infested. The super uses solid construction with tight-fitting dovetails that need no nails or screws, and it costs a fraction of a commercial flow hive.
The complaints cluster around documentation and completeness, which is the recurring theme across budget hives generally. The instructions are largely unlabeled diagrams and parts are hard to identify and orient. Brood frames for the lower box are not included and have to be bought separately, which is a real cost and a confusing omission. And a few units have arrived without the metal flow key, or with dovetails slightly out of alignment that need trimming or sanding, or with supplied screws too short to fasten the base to the brood box.
Now the honest part, and the reason experienced keepers push back on flow hives. Owners on several community forums make the same point from different angles: even flow hives still require periodic frame inspection to confirm capping before harvest, and the brood box still needs full inspections and mite checks like any other hive. The flow frames remove one task from a list that still has many on it.
That is not a flaw in the design. It is a flaw in the advertising, and it is the reason the hive generates debate. Buyers who expect to never open the hive will be disappointed. Buyers who want to avoid crushing comb, who have back or shoulder limitations, or who genuinely dislike processing sticky supers will find this solves a problem for them.
What you still have to do with a flow hive
Full brood inspections in the lower box, on roughly a weekly schedule through spring and summer. Varroa mite monitoring, which does not care what type of frames you have. Swarm prevention, superspace management, feeding when the flow stops, and winter preparation. None of that changes.
The harvest itself is genuinely simpler, and that is the honest upside. Turning the key and capping a jar is a real reduction in physical work, and for anyone with lifting problems it is the one design change that makes a meaningful difference. Just price the whole system, including the brood frames you must source separately, before deciding.
Who should skip this hive
Skip it if your local club runs standard Langstroth gear. This hive is not standard, so a swarm, a mite problem or a lost queen becomes a harder conversation when nobody nearby has opened this particular box. That is the single strongest argument against any non-standard design as a first hive, and it applies here more than most.
Skip it if you want certainty about what you are buying. The documentation is the weakest of any hive on this list, parts are excluded, and the ratings sit lower than the conventional kits. For a first hive, buying the most-reviewed conventional box is a more reliable way to spend the same money.
10. MayBee 8-Frame Kit With Tools and Suit: Best All-in-One Bundle
MayBee 8-Frame Beehive Starter Kit, Bee Hive Kit Dipped in Beeswax, Bee Hives Boxes Starter Kit Includes Beekeeping Supplies Tool Kit and Bee Suit
8-frame wax-coated cedar deep box, pre-assembled
33.4 lb, 14x19-7/8x9-5/8 inch box
Pros
- Only kit here that bundles a full tool set and protective suit
- Deep brood box arrives pre-assembled so only frames need building
- Sturdy wax-coated cedar that has held up over three years
- 8-frame footprint is compact and easy for one person to handle
Cons
- Included bee suit is thin and runs large
- One review reported the suit missing from the package
- Wax coating must be melted off before refinishing
Every other hive here is a box. This one is a box plus the gear, and for someone who has decided to keep bees this season it removes the most common second-order decision, which is the pile of individual accessories nobody tells a beginner to buy.
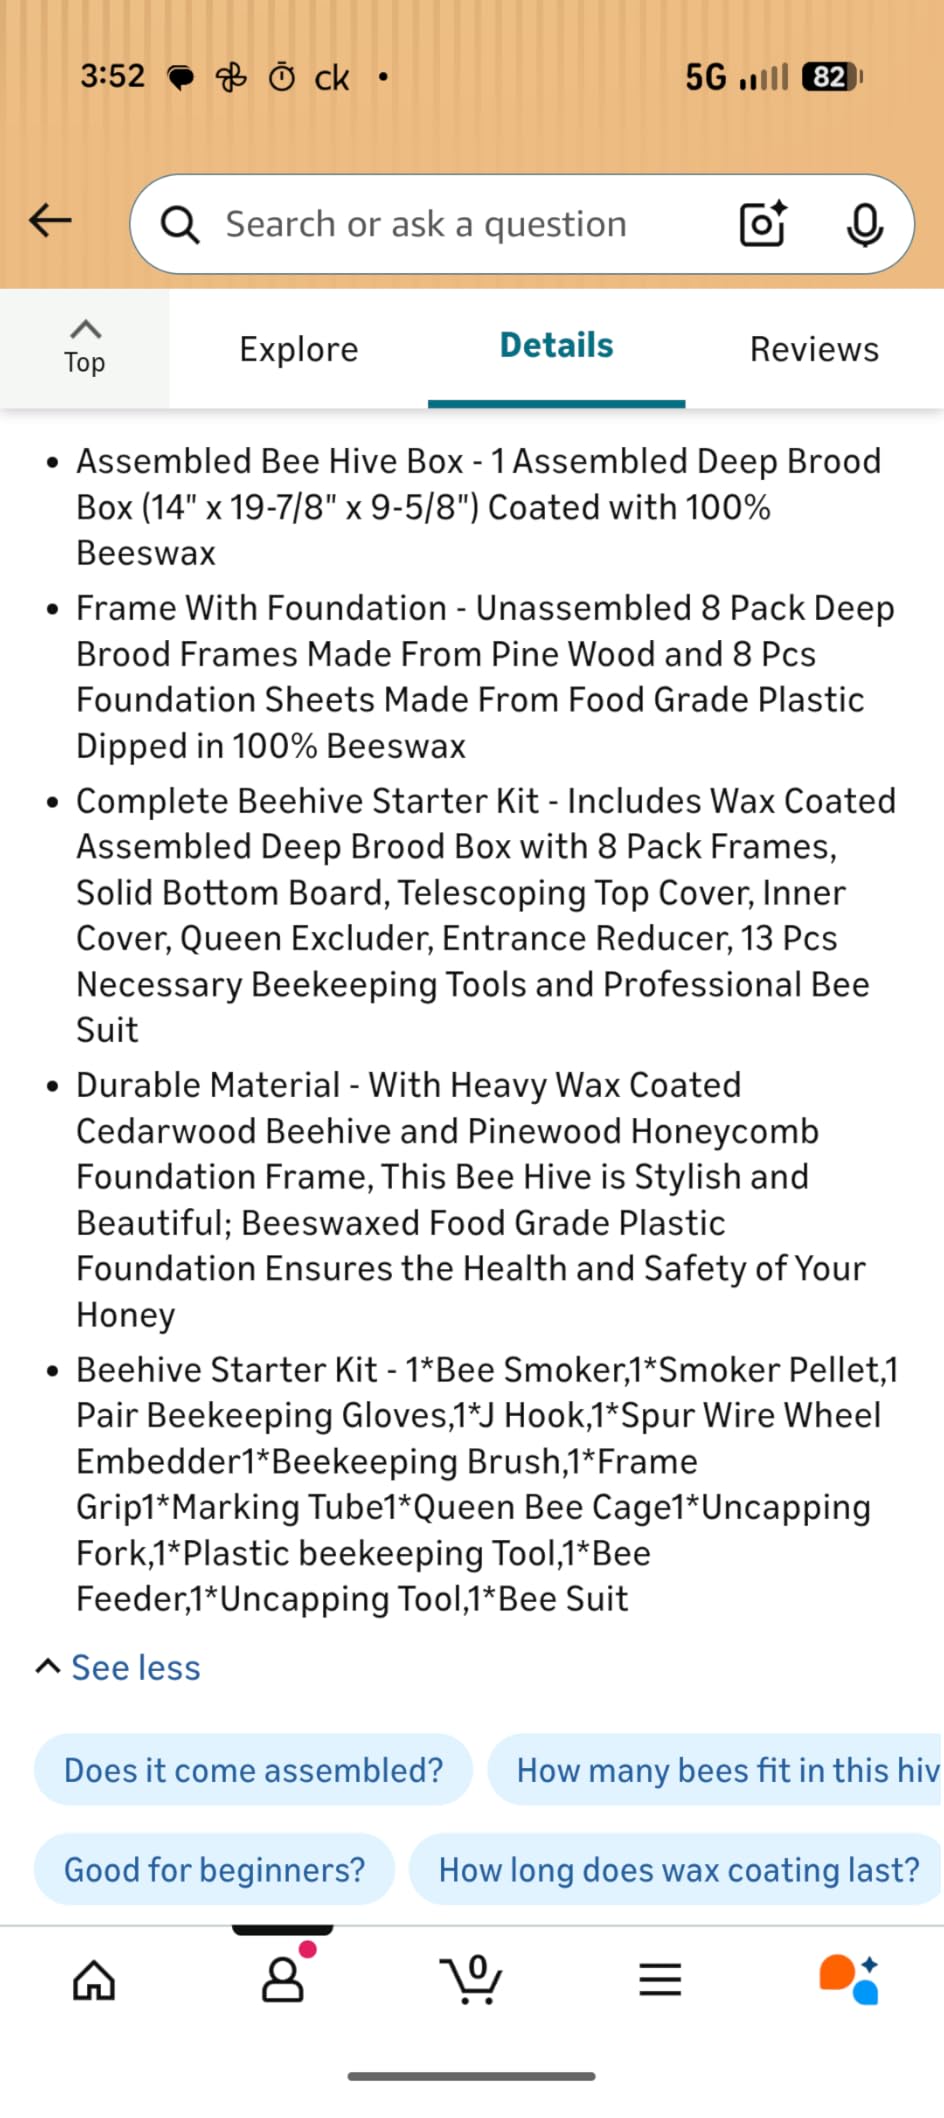
The hive is an 8-frame wax-coated cedarwood deep brood box, 14 by 19-7/8 by 9-5/8 inches assembled, with 8 pinewood deep frames and 8 food-grade plastic foundation sheets dipped in beeswax. You also get a solid bottom board, telescoping top cover, inner cover, queen excluder and entrance reducer. 8-frame and 10-frame variants are offered, so you can pick the footprint you want.
The bundled gear is 13 pieces: a bee smoker, smoker pellets, a pair of beekeeping gloves, a J hook, a spur wire wheel embedder, a beekeeping brush, a frame grip, a marking tube, a queen bee cage, an uncapping fork, a plastic beekeeping tool, a bee feeder, an uncapping tool and a protective bee suit. That list covers the beginner’s first season almost completely.
Because the deep brood box arrives pre-assembled, the only real build task is the 8 frames. That is roughly a quarter of the work of building a two-box kit by hand, and it is the reason the review feedback centres on the accessories rather than the construction. Long-term owners say the wax-coated cedar has stayed solid over three seasons in use.
The criticism lands almost entirely on the suit and the tools. The bee suit is described as thin compared with a 3-layer suit and it runs large in sizing, and at least one buyer reported the suit was not in the package at all despite the listing. Check the contents the moment the box arrives. The tools themselves are entry-level grade, and most owners buy a better smoker and suit soon after, so treat the bundle as a genuine starter rather than a permanent kit.
One more thing to know before you ever want to refinish it: the wax coating has to be melted off with heat before the box can be painted or refinished. That is a weekend job, and it is the reason many owners simply leave the wax alone, which is what the manufacturer intends.
When 8 frames is the right size
An 8-frame box is a genuinely good fit for a single beginner, and it is smaller and lighter than the 10-frame kits without being a toy. It keeps more heat in a smaller volume, it is easier for one person to handle, and it fits a backyard apiary with less clearance than a full 10-frame stack.
The tradeoff is capacity. Eight frames is a smaller brood chamber, so a strong colony will outgrow it sooner and you will be adding boxes earlier than you would in a 10-frame. Plenty of beginners run entirely 8-frame hives for years and are perfectly happy, so this is a preference rather than a compromise.
Who should skip this hive
Skip it if you want a one-order full stack. This kit gives you one deep box. The bundled gear is excellent, but the second brood box and a honey super are still purchases, and if the idea of one supplier shipping everything at once matters to you, a 2-deep kit plus your own gear is the better fit.
Skip it if you have had any reactions to stings. A bundled suit is a reason to buy protective gear, not a substitute for it, and the one here is thin. Buy a proper 3-layer ventilated suit from a beekeeping supplier instead and use the bundled gloves for handling frames at the hive.
How to Buy Your First Hive: A Beginner’s Buying Guide
Now the decisions behind the ranking. The hive style question is settled by your local club, not by this page, so what follows is everything else that determines whether you enjoy year one.
8-frame or 10-frame?
For most beginners, 10-frame. It is the North American standard, so more equipment, more suppliers and more club members speak it, and any box from any brand stacks with any other. 8-frame boxes hold roughly 20 percent less and are a fine choice if your space is tight or you want a lighter hive, but you are joining a smaller parts pool.
The exception is bees in cold climates. A smaller box holds its heat better, which matters more in zones 3 and 4 than the extra frame capacity is worth. If you are north of roughly the 44th parallel and keeping a colony indoors over winter, 8 frames is a defensible choice.
Assembled or unassembled?
Unassembled is cheaper per box and the shipping damage is easier to absorb, because a broken dovetail on a flat panel is not a disaster. Assembled means you spend the money on labour instead, get square boxes you do not have to fight, and the frames may already be built.
Buyers report that a complete 10-frame kit with hardware takes an evening with a drill, and that a pre-assembled box with frames still to build takes about 30 minutes. The deciding question is not skill, it is patience. If you enjoy building things, unassembled is fine. If you do not, pay for the frames pre-built and enjoy the bees instead.
Either way, budget a bottle of wood glue and a box of exterior-grade screws. Nearly every unassembled hive here is improved by both, and the screws included with several kits corrode quickly outdoors.
What material should the boxes be?
Wax-coated wood needs no painting, sheds water well and carries a natural scent that foragers respond to. It is the most common choice among the kits here and the easiest to maintain, because there is no finish to renew. The cost is that wax has to be melted off with heat before you can refinish a box.
Painted wood is the traditional choice, needs no waxing at all, and usually costs less. Raw pine is the cheapest and the least weather-resistant, so it needs painting before it goes outside. Cedar is stable and resists shrinking, expanding and warping better than pine, which is why several of the wax-coated kits here use it. Polystyrene and UV-resistant plastic are worth considering in cold zones for insulation, but their parts are not interchangeable with wood.
What a kit includes and what it does not
This is the gap that produces the sticker shock beginners complain about on forums. A typical kit gives you boxes, frames with foundation, a cover, an inner cover, a bottom board, a queen excluder, an entrance reducer, and sometimes a mouse guard. That is the hive.
None of the ten hives here includes bees, a protective suit, a smoker, a hive tool, an extractor, feeding supplies, or a mite treatment plan. Plan for all of that separately, and expect the hive itself to be the smallest line in the budget. That is normal and it is why we would rather you buy one good box than three cheap ones.
Do you need a queen excluder?
All ten kits here include one, which tells you how standard the answer is. It is a plastic or metal grid sized so a worker bee passes through and a queen does not, placed above the brood chamber. It keeps brood out of your honey supers, which matters for commercial extraction and matters less for a beginner who crushes and strains.
Beginners commonly leave it out in the first season and add one later. The common mistake is the opposite one, though: buying a kit without an excluder and assuming the missing piece is optional. If your kit does not include one, plan to buy it before your first inspection.
How many hives should a beginner start with?
One is a legitimate answer, and for many people it is the best one. A single colony gets all your attention, and there is enough to learn in a season without adding a second opinion you do not yet have. Two is better if your aim is a real honey crop, because a strong colony can be a resource for a weak one, and it gives you a comparison when one hive behaves oddly. Three is where most hobbyists stop.
The odd-number reasoning is not a scientific rule but a practical one. Keeping one, two or three rather than four means no two colonies are directly adjacent, which reduces drifting between neighbouring yards and makes it easier to work on one hive without the neighbour’s bees streaming into your open box.
Whichever number you choose, buy them all from the same supplier and build them identically. Interchangeable boxes save you an enormous amount of pain in year two, and mixed equipment is the most common reason a beginner ends up with two hives that do not fit together.
Where should you buy, and when?
Buy the hive first, in late winter or early spring, so it can sit and season before bees arrive. Order bees next, and order them early: local nucs and package bees sell out well before the season starts, and bees sold by a supplier in your own region are already acclimated to your climate. A nuc arrives as a started colony in a small box with a laying queen, which is the easiest first purchase for a beginner. A package is a swarm in a screened box with a mated queen, cheaper but harder to get going.
For equipment, a local beekeeping supply store is worth the drive even with online options available. You can ask them whether they run a club, they can confirm what your local members actually use, and if something is wrong you can describe the problem to a person. Local clubs and county associations are also where beginners get mentors, and that matters more than the sticker price.
Buy gear last, after the hive and the bees are settled, so you are not overbuying. At minimum you need a smoker, a hive tool, gloves, a veil or suit, and a way to feed. A tangential extractor can be rented from most clubs before you buy one, and many beginners never buy one because they crush and strain.
Does climate change the hive you should buy?
Yes, more than most pages admit. In zones 3 to 5, insulation and a smaller brood chamber matter most, so an 8-frame box, a windbreak and a wind wrap around the stack are worth more than a fancier lid. In zones 6 to 8, a standard 10-frame deep with a good telescoping outer cover is the classic, proven answer. In zones 9 and 10, shade, airflow and ventilation become the priority, which is where a hive with vented inner boards and a detachable bottom board is the better buy.
Insulated double-wall hives make sense in the coldest zones and are unnecessary elsewhere. Buying one in a mild climate is spending money on insulation you will never use.
What colour should you paint a hive, and what should you avoid?
If you are painting, light colours are the safe choice, and white and pale colours reflect summer heat that darker boxes absorb. A common piece of advice is to avoid very dark colours such as black, deep blue or dark brown in hot climates, because the box acts as a solar oven in July. Outdated advice also says never paint a hive white, on the theory that it reflects UV and confuses foragers. Current guidance treats that as largely a myth, so the practical rule is simpler: in hot climates keep it light, in cold climates any colour is fine, and wax-coated hives do not need paint at all.
Whatever colour you use, paint the outside of the box rather than the inside, and let it cure fully before the bees go in. Several of the hives here are wax-coated precisely so this question never comes up.
What durability failures do budget hives actually have?
Boxes usually survive. Frames usually do not, and the reports are consistent. A first-year keeper in southern Ohio describes a hive body that held up well but frames that failed, which is the argument for spending care on frame quality over box quality. Nail pull-out in frame joints under the weight of honey and propolis is the recurring failure across every price band here.
The other documented failures are uneven joinery and thin hardware. Boards glued from uneven strips leave gaps at the top and bottom boards. Screws that are too large split thin wood, screws that are not exterior grade corrode within a season, and nails supplied in insufficient numbers stop the build halfway through. None of these are exotic problems, and all of them are avoidable with glue, a staple gun and a box of deck screws.
Follow bee space and burr comb cause the remaining headaches, and these come from the bees rather than the manufacturer. A frame with a wider or narrower gap than the system allows gets glued down with propolis, and bees fill the wrong space with wax. Get the box corners square and the frames tight, and the hive will behave the way the design intends.
Frequently Asked Questions
What is the easiest bee hive for beginners?
A standard 10-frame Langstroth hive is the easiest for beginners, because parts, frames, supers and mentor support all exist for it. Our top pick is a wax-coated 10-frame kit that arrives complete, with wooden frames, covers, a queen excluder and an entrance reducer, so nothing structural has to be bought separately afterwards.
What is the best beehive kit for beginners?
The best kit is a 10-frame Langstroth bundle that includes two deep brood boxes, at least one medium super, wooden frames with waxed foundation, a telescoping or metal cover, an inner cover, a bottom board, an entrance reducer and a queen excluder. Add a mouse guard if squirrels are a problem. Buy frames pre-built if you would rather not assemble them.
Can I start a bee hive in my backyard?
Usually yes, within limits. Check your municipal or HOA rules first, since requirements on setback from the property line, number of colonies, permits and water sources vary widely. Face the entrance southeast, set the hive behind a windbreak on dry level ground, give it light shade, and make sure the flight path rises over a fence or screen rather than into a neighbour’s yard.
Is it cheaper to buy or build a bee hive?
Buying unassembled is usually cheaper per box and easier to absorb shipping damage, since a broken dovetail on a flat panel is not a problem. Building from a flat-pack is cheaper still but the savings go into your time and tools. Assembled kits cost more and save an evening of work. Either way, add wood glue and exterior-grade deck screws, which most kits do not supply in useful quantities.
How many beehives should a beginner start with?
One is enough to learn everything, and two is better if you want a real honey crop and a comparison when one colony behaves oddly. Keep one, two or three rather than four, since no two hives sit adjacent and it is easier to work on one without the neighbour’s bees streaming into your open box. Buy all of them from the same supplier so every box is interchangeable.
What are the disadvantages of Langstroth hives?
The main disadvantages are lifting and processing. A full deep brood box is the heaviest thing a beekeeper handles regularly, supers must be stacked high as the colony grows, and honey normally needs an extractor and sticky processing. Langstroth gear is also not compatible with top bar, Warre or Flow frames, so the choice is effectively permanent once you commit.
Which Beehive Should You Buy First?
Buy the Hoover Hives 2-Deep 1-Medium kit if you want the most examined complete hive available: 2 deep brood boxes, a medium super, 10 wax-coated wooden frames, and a full accessory set including the queen excluder and mouse guard, on a wax-coated fir box that will never need painting. If you want the strongest owner rating in the set, the BeeCastle 2-Deep 1-Medium is the one to beat, and it holds its finish better than paint does.
If you would rather not nail frames together, the Mann Lake kit arrives with its 10 frames already built, which removes the step beginners abandon most. If you want the smallest possible footprint and gear in a single order, the MayBee 8-Frame kit bundles a 13-piece tool set and a suit with a pre-assembled box. The BeeCastle 5-Frame nuc box is a supplement rather than a first hive, for swarms and splits.
Two decisions outrank the brand. Buy the hive style your local club already runs, because a queenless colony on a Sunday evening needs a mentor rather than a manual. And buy standard 10-frame equipment, because a hive is close to irreversible and the parts ecosystem is what makes year two easier than year one.
This is general guidance about equipment, not veterinary or hive-management advice. A colony showing queenlessness, unusual clustering or a sudden change in behaviour should be evaluated by a qualified local mentor. We re-check these hives and the design landscape every year for 2026, and the parts and box designs here change more slowly than the pricing does.