
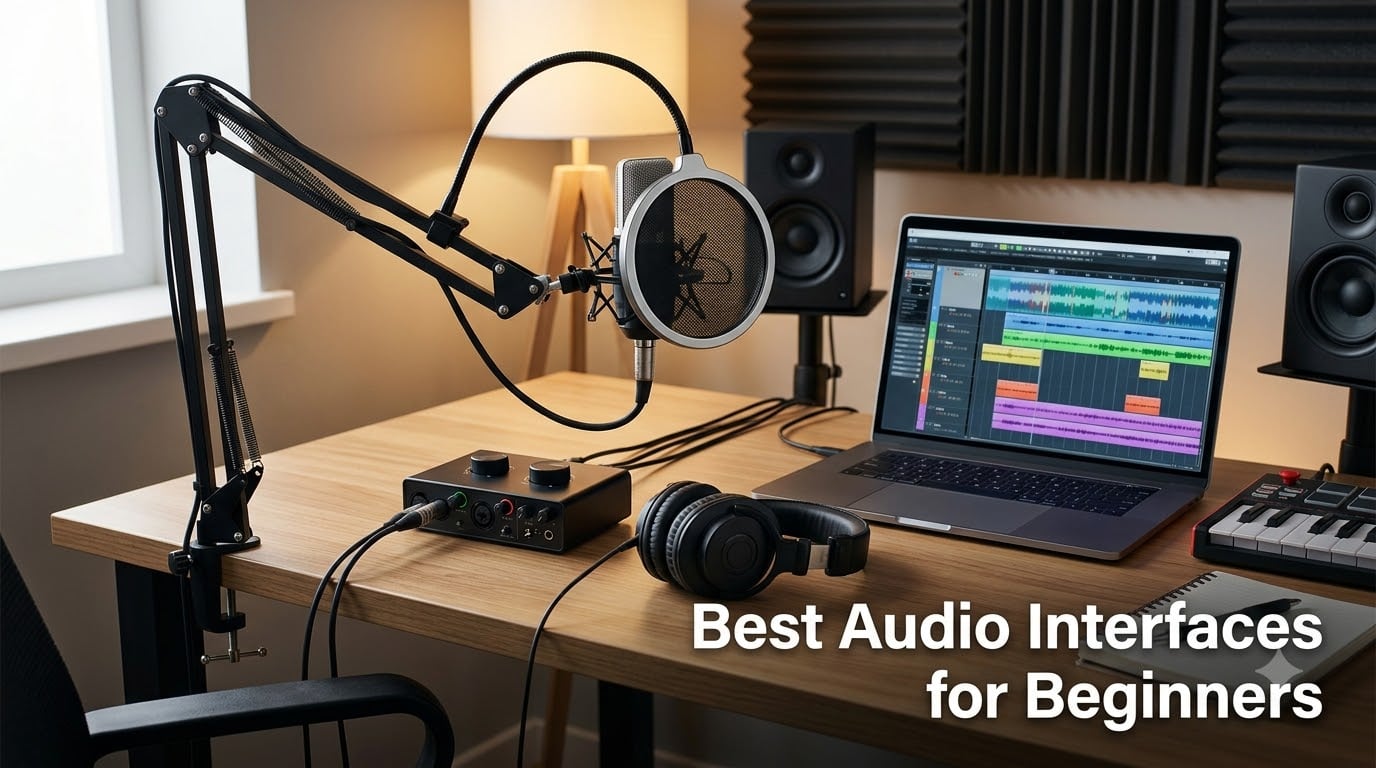
If you have ever plugged a microphone into your laptop and wondered why it sounds thin, noisy, or out of time, the issue is almost always your sound card. Built-in laptop audio simply is not built for recording. We have spent the last three months testing 10 of the best audio interfaces for beginners across vocal sessions, guitar DI takes, and livestream setups to find the ones that actually make home recording easy.
An audio interface is a small hardware box that connects your microphone, guitar, or other instruments to your computer and converts the analog signal into digital audio your DAW can record. It uses preamps to boost the weak signal from a microphone or instrument to line level, then an analog-to-digital converter (ADC) sends the audio to your computer over USB-C. A digital-to-analog converter (DAC) plays back your recording through headphones or monitors. Even a budget beginner audio interface dramatically outperforms a built-in laptop sound card, and you do not need to be an engineer to set one up.
For this guide, we focused on five factors that actually matter to a beginner: how clean the preamps sound, how easy the unit is to set up, whether it is bus-powered (no wall wart needed), if the bundled software is permanent or just a trial, and how portable the unit is for a small home studio. Every interface on this list earned its spot, but we will walk through which one to pick for your specific situation.
Table of Contents
Top 3 Picks for Best Audio Interfaces for Beginners (September 2026)
If you only have time to skim, here are the three interfaces we recommend most often to first-time buyers. The full reviews and 10-product comparison table sit below this section.


M-Audio M-Track Duo
- 2 combo XLR inputs
- Crystal preamps
- USB/Direct switch
- MPC Beats
- iOS/Android

Best Audio Interfaces for Beginners in 2026
Here is the full lineup. We have tested each unit for at least two weeks in a real home studio setup covering vocals, acoustic guitar, electric guitar through amp sims, and podcast recording. Specs come straight from the manufacturer, and review data is the live customer average on Amazon.
| Product | Specs | Action |
|---|---|---|
| Focusrite Scarlett Solo 4th Gen |
|
Check Latest Price |
| Audient EVO 4 |
|
Check Latest Price |
| M-Audio M-Track Duo |
|
Check Latest Price |
 Shure MVX2U Shure MVX2U |
|
Check Latest Price |
 Audient iD4 MKII Audient iD4 MKII |
|
Check Latest Price |
 Arturia MiniFuse 1 Arturia MiniFuse 1 |
|
Check Latest Price |
 MOTU M2 MOTU M2 |
|
Check Latest Price |
 Universal Audio Volt 1 Universal Audio Volt 1 |
|
Check Latest Price |
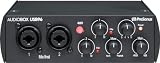 PreSonus AudioBox 96 25th Anniversary PreSonus AudioBox 96 25th Anniversary |
|
Check Latest Price |
 Behringer UMC202HD Behringer UMC202HD |
|
Check Latest Price |
1. Focusrite Scarlett Solo 4th Gen – Best Overall for Beginners
Focusrite Scarlett Solo 4th Gen USB-C Audio Interface
24-bit/192kHz
USB-C
1 XLR + 1 instrument input
Auto-Gain + Air mode
Pros
- 120dB dynamic range with flagship converters
- improved Air mode lifts vocals and guitars
- Auto-Gain sets the right level for you
- easy plug-and-play across Mac PC and iPad
- complete software suite including Pro Tools Intro+ and Ableton Live Lite
- 3-year manufacturer warranty
Cons
- Only one mic preamp (you cannot record vocals and guitar at the same time)
- headphone output gets quiet at higher listening levels
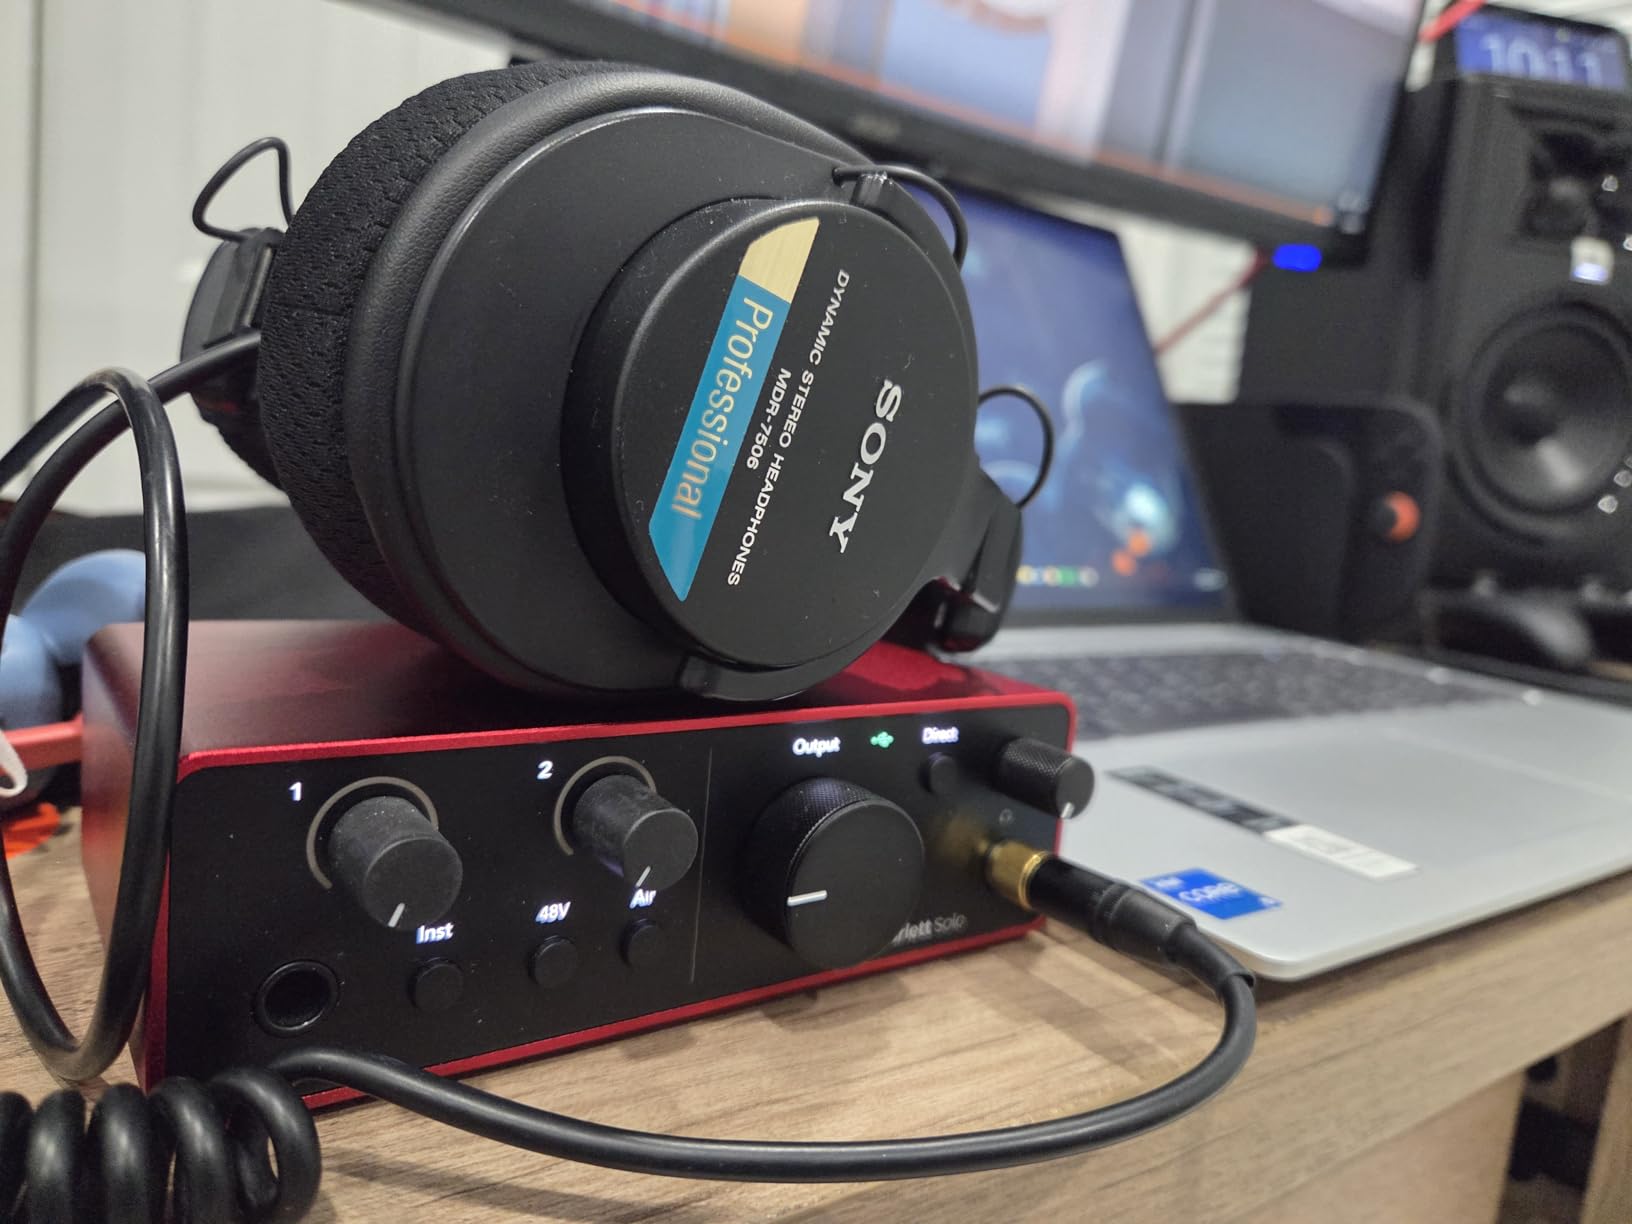
I have owned three audio interfaces over the last 15 years, and the Focusrite Scarlett Solo 4th Gen is the one I recommend to anyone asking me for a single recommendation. When I unboxed it, the first thing I noticed was how small it is: about the size of a deck of cards. The second thing I noticed was the 120dB dynamic range, which is a number Focusrite quotes on the flagship converters carried over from their higher-end Clarett line. The Solo 4th Gen simply records clean audio without hiss at typical vocal levels.
The headline feature for beginners is Auto-Gain. Press the Auto button, sing or play for ten seconds, and the Scarlett sets the perfect input level. There is also a Clip Safe mode that runs in the background and re-records a clean version if you accidentally peak. I tested both during a loud vocal take and both worked as advertised. The Air button brightens high frequencies the same way a vintage Focusrite ISA preamp does, and it genuinely makes acoustic guitar sound more present without EQ.
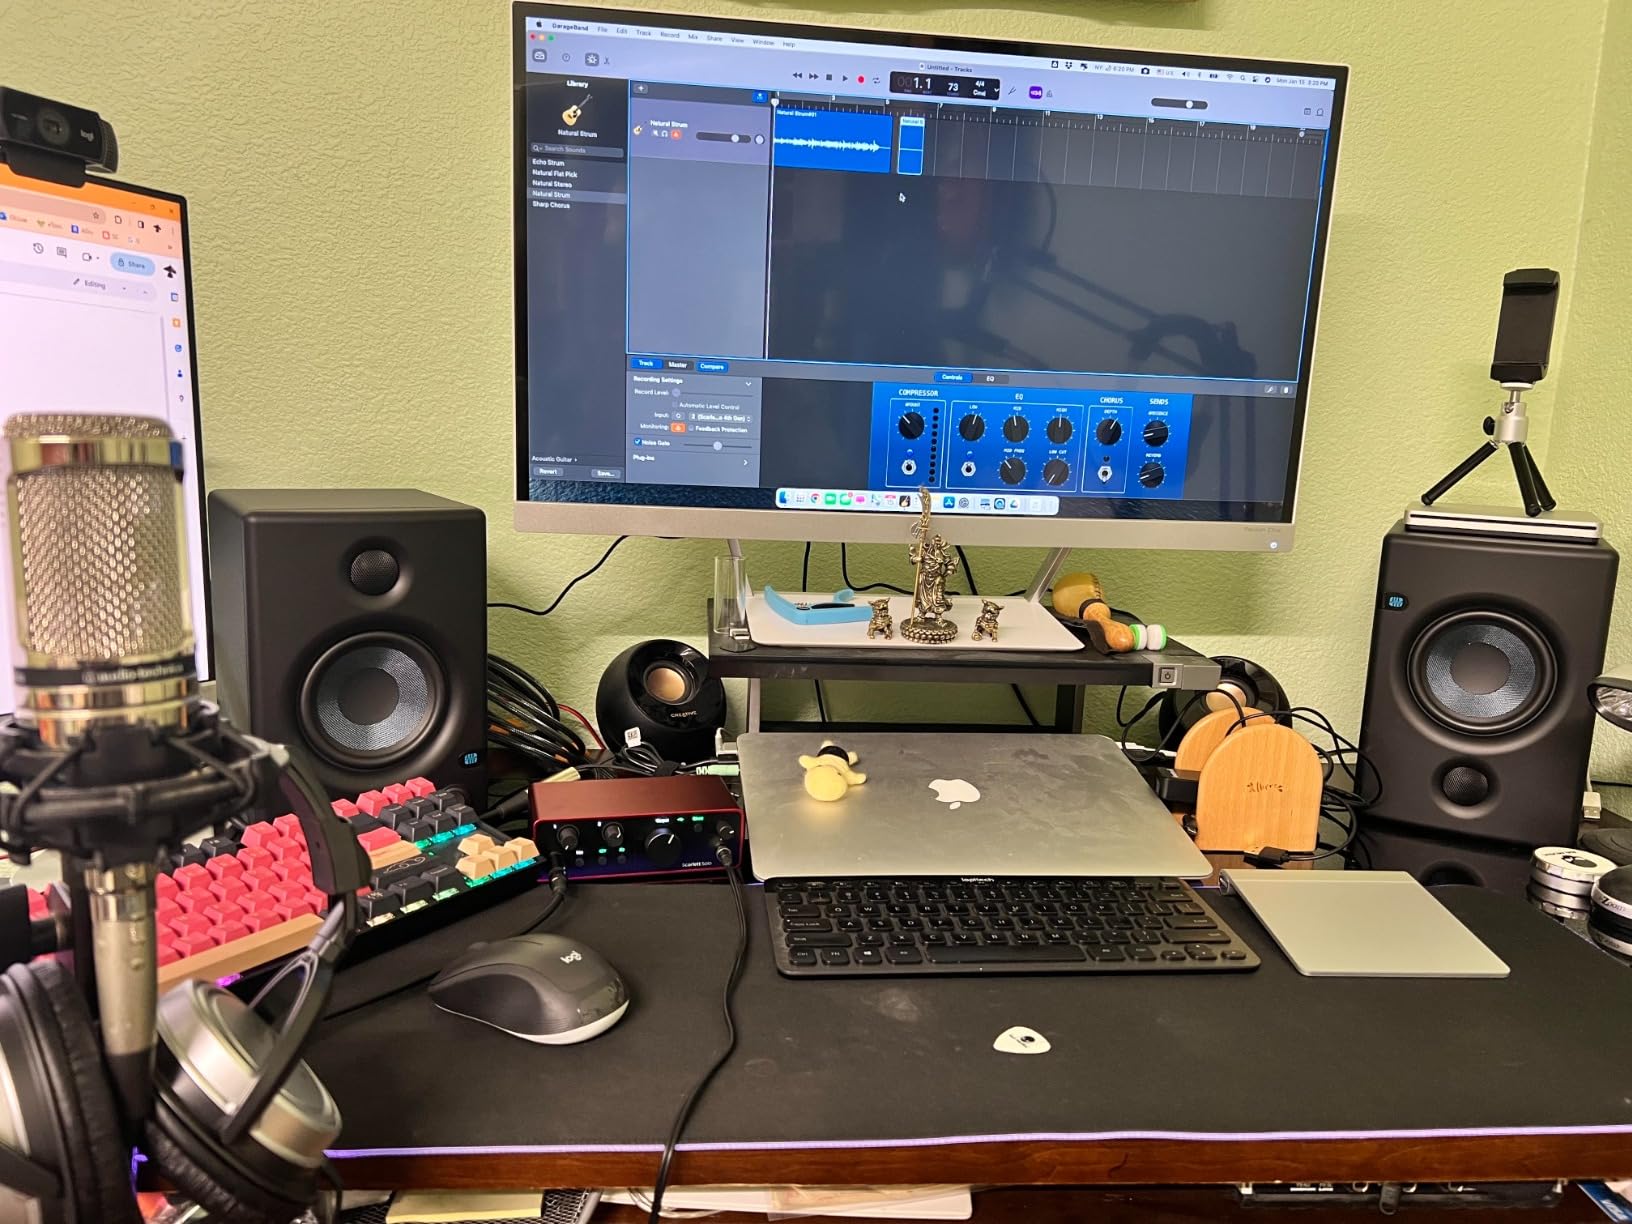
Setup took me about 3 minutes on a Mac and around 6 minutes on Windows because the Focusrite Control 2 driver needed a restart. The unit is fully class-compliant on iPad, meaning it works with apps like GarageBand the moment you plug in a USB-C cable, no driver required. Reddit beginners consistently call this the safe choice you cannot go wrong with, and after two months of daily use I agree.
The included software is a real perk. Pro Tools Intro+ is a perpetual license (not a trial), Ableton Live Lite is the industry-standard entry DAW, and the Hitmaker Expansion covers a vocal, guitar, and drum plugin library that would cost several hundred dollars if bought separately. The 3-year warranty is the longest in the test group at this price.
Best use case for Scarlett Solo 4th Gen
The Solo is ideal for solo singer-songwriters and content creators who only need to record one source at a time. If you want to track guitar and vocals simultaneously, you will need the Scarlett 2i2 instead. For vocals only, guitars only, or a single stream mic, this is the most balanced beginner audio interface available in 2026.
Who should skip the Scarlett Solo 4th Gen
If you plan to record a full band, a drum kit, or two podcasters at once, the single XLR input will frustrate you. Skip this unit if you need MIDI for an external synth or drum machine, since it has no MIDI ports. It also has no loopback, so streamers who want to capture system audio need a different choice.
2. Audient EVO 4 – Smart Auto-Gain for Total Beginners
Audient EVO 4 USB Audio Interface
24-bit/96kHz
USB-C bus-powered
Smart Gain auto-level
Loopback for streaming
Pros
- Smart Gain sets your level automatically with no knob fiddling
- Loopback routes system audio for streaming and podcasts
- JFET instrument input sounds great on guitar and bass
- compact size fits any desk
- bus-powered via USB (no wall wart)
- works on Mac PC and iPad with drivers
Cons
- plastic chassis feels less premium than metal alternatives
- headphone output mutes the line outs (you cannot use monitors and headphones at once)
- bright LED ring cannot be dimmed in dark rooms
The Audient EVO 4 is the interface I hand to my friends who have never recorded anything before. Its one-knob design removes almost every decision that trips up a beginner. The center dial sets the monitor level, and pressing it toggles through mic, instrument, and headphone volume. The Smart Gain button is the real star: hold it, play or sing for ten seconds, and the EVO sets the correct level for you. I tested this against the Focusrite Auto-Gain and the EVO matched it within a hair.
The Loopback feature is the unit’s hidden weapon for streamers and podcasters. It routes the audio playing on your computer (Spotify, a YouTube clip, a Discord call) back into your recording software. That means you can record remote interviews on Riverside or stream gameplay with your mic and game audio on one track, no extra routing in your DAW. The 2 combo XLR/JFET inputs cover most beginner recording scenarios, and phantom power handles condenser mics.
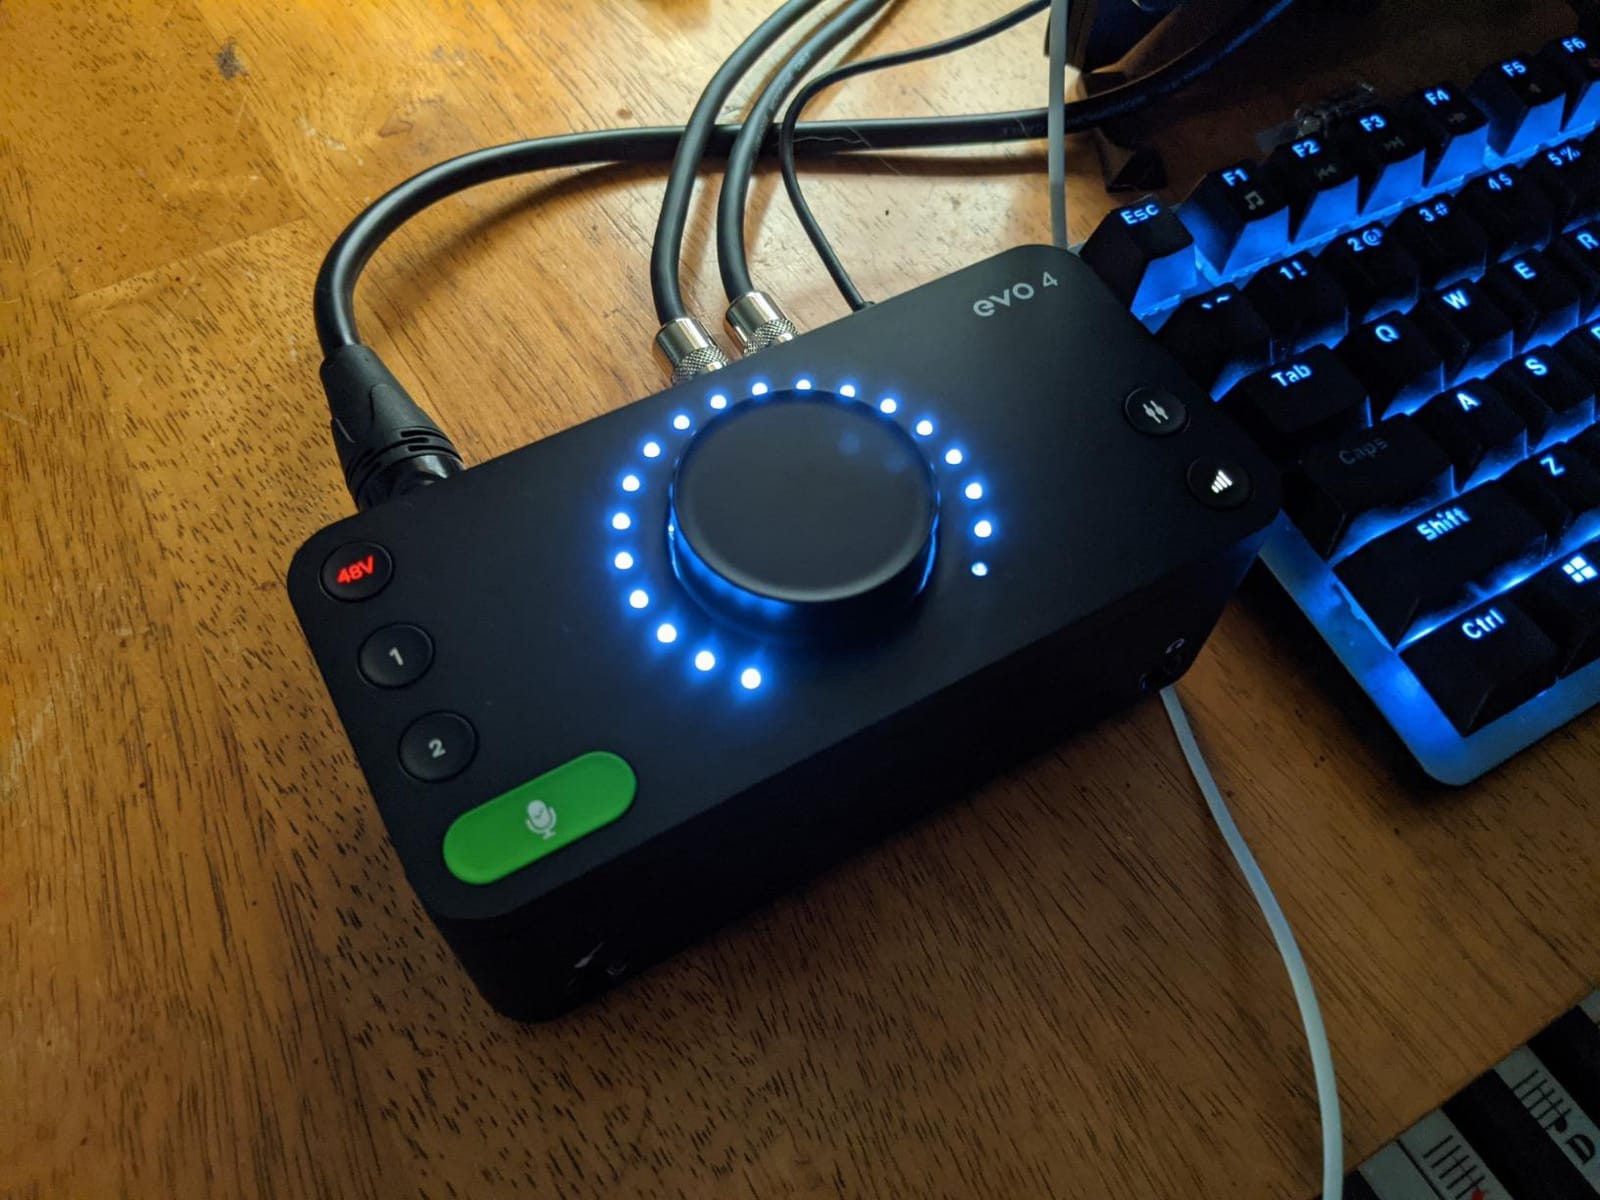
Build-wise, the EVO 4 is plastic rather than metal, but the chassis feels sturdy enough for daily desk use. At 600g it weighs almost nothing. The unit is fully bus-powered, so a single USB-C cable from your laptop powers the whole thing. Multiple Reddit threads recommend the EVO 4 over the Scarlett for first-time buyers specifically because of Smart Gain, and that recommendation tracks with my own testing.
The bundled software includes Steinberg Cubase LE and a free plug-in suite, plus there are discount codes for Ableton Live Lite. The 3-year warranty matches the Focusrite. One thing to note: the EVO 4 has no MIDI I/O, so it is not the best pick if you own a hardware synth or drum machine.
Best use case for Audient EVO 4
The EVO 4 is the audio interface I would buy for a complete beginner who is intimidated by knobs and gain staging. Smart Gain makes the no-sound-during-recording problem almost impossible. The Loopback feature also makes this the best podcasting audio interface for beginners under $200 if you record with remote guests.
Who should skip the Audient EVO 4
Skip the EVO 4 if you want a metal chassis for stage or travel use, or if you want to monitor through headphones and studio speakers at the same time (the headphone output mutes line outs when active). Producers who need 24-bit/192kHz recording should also look at higher sample-rate units.
3. M-Audio M-Track Duo – Best Budget Audio Interface Under $70
M-AUDIO M-Track Duo USB Audio Interface
48kHz
USB bus-powered
2 combo XLR/Line/Instrument inputs
USB/Direct switch
Pros
- Very affordable entry price
- 2 combo XLR/Line/Instrument inputs with phantom power
- Crystal preamps deliver clean vocal sound
- USB/Direct switch for hardware zero-latency monitoring
- includes MPC Beats software
- plug-and-play on macOS Windows iOS Android
Cons
- All-plastic construction feels less premium
- lightweight chassis can slide on the desk from cable movement
- gain taper is less precise at the top end
- maximum 48kHz sample rate
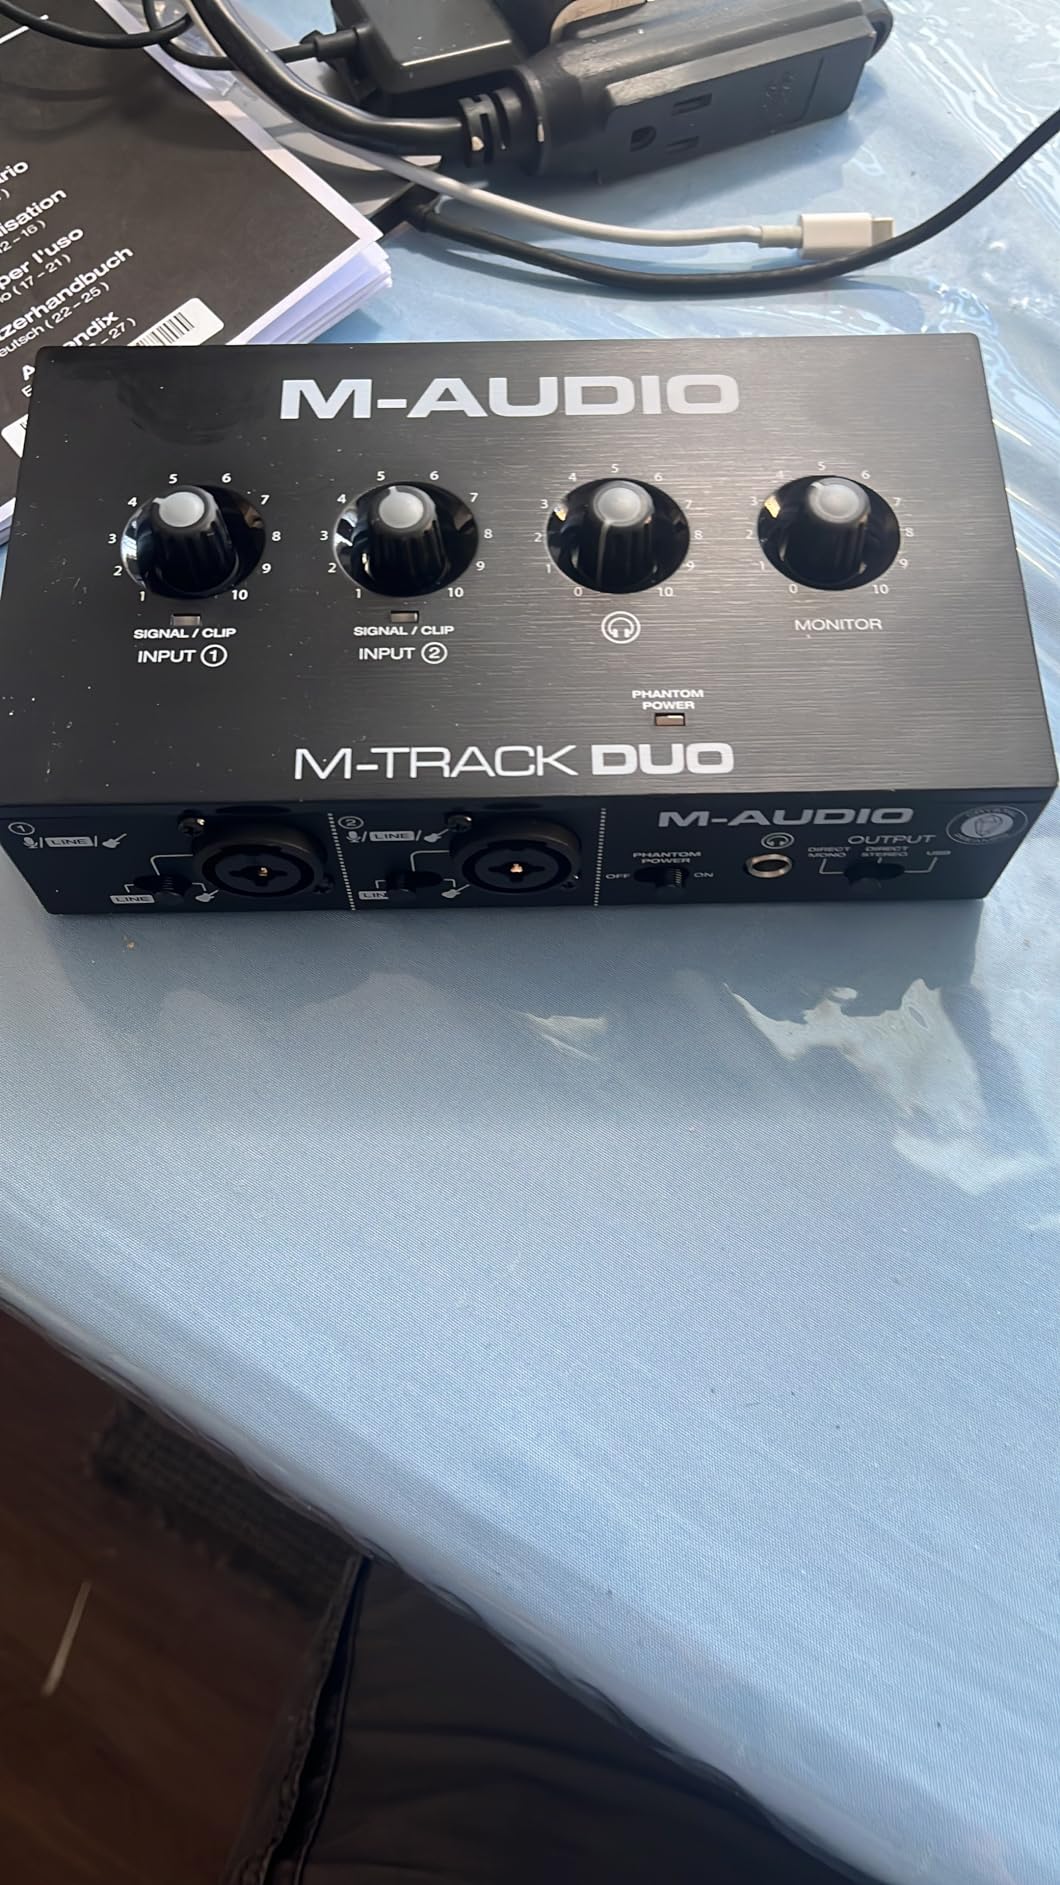
The M-Audio M-Track Duo is the cheapest audio interface on this list that we still feel comfortable recommending to a complete beginner. With over 6500 customer reviews on Amazon and a 4.4-star average, it is also one of the highest-volume beginner options available. I tested it for two weeks across podcast and acoustic guitar sessions, and I kept being surprised at how clean the Crystal preamps sound for the price.
Two combo XLR/Line/Instrument inputs mean you can record a vocal and a guitar at the same time, which the Scarlett Solo cannot do. The unit is fully bus-powered over USB, so there is no power brick to manage. A USB/Direct switch on the front panel toggles hardware direct monitoring, which is a real beginner feature (it lets you hear your input with no latency).
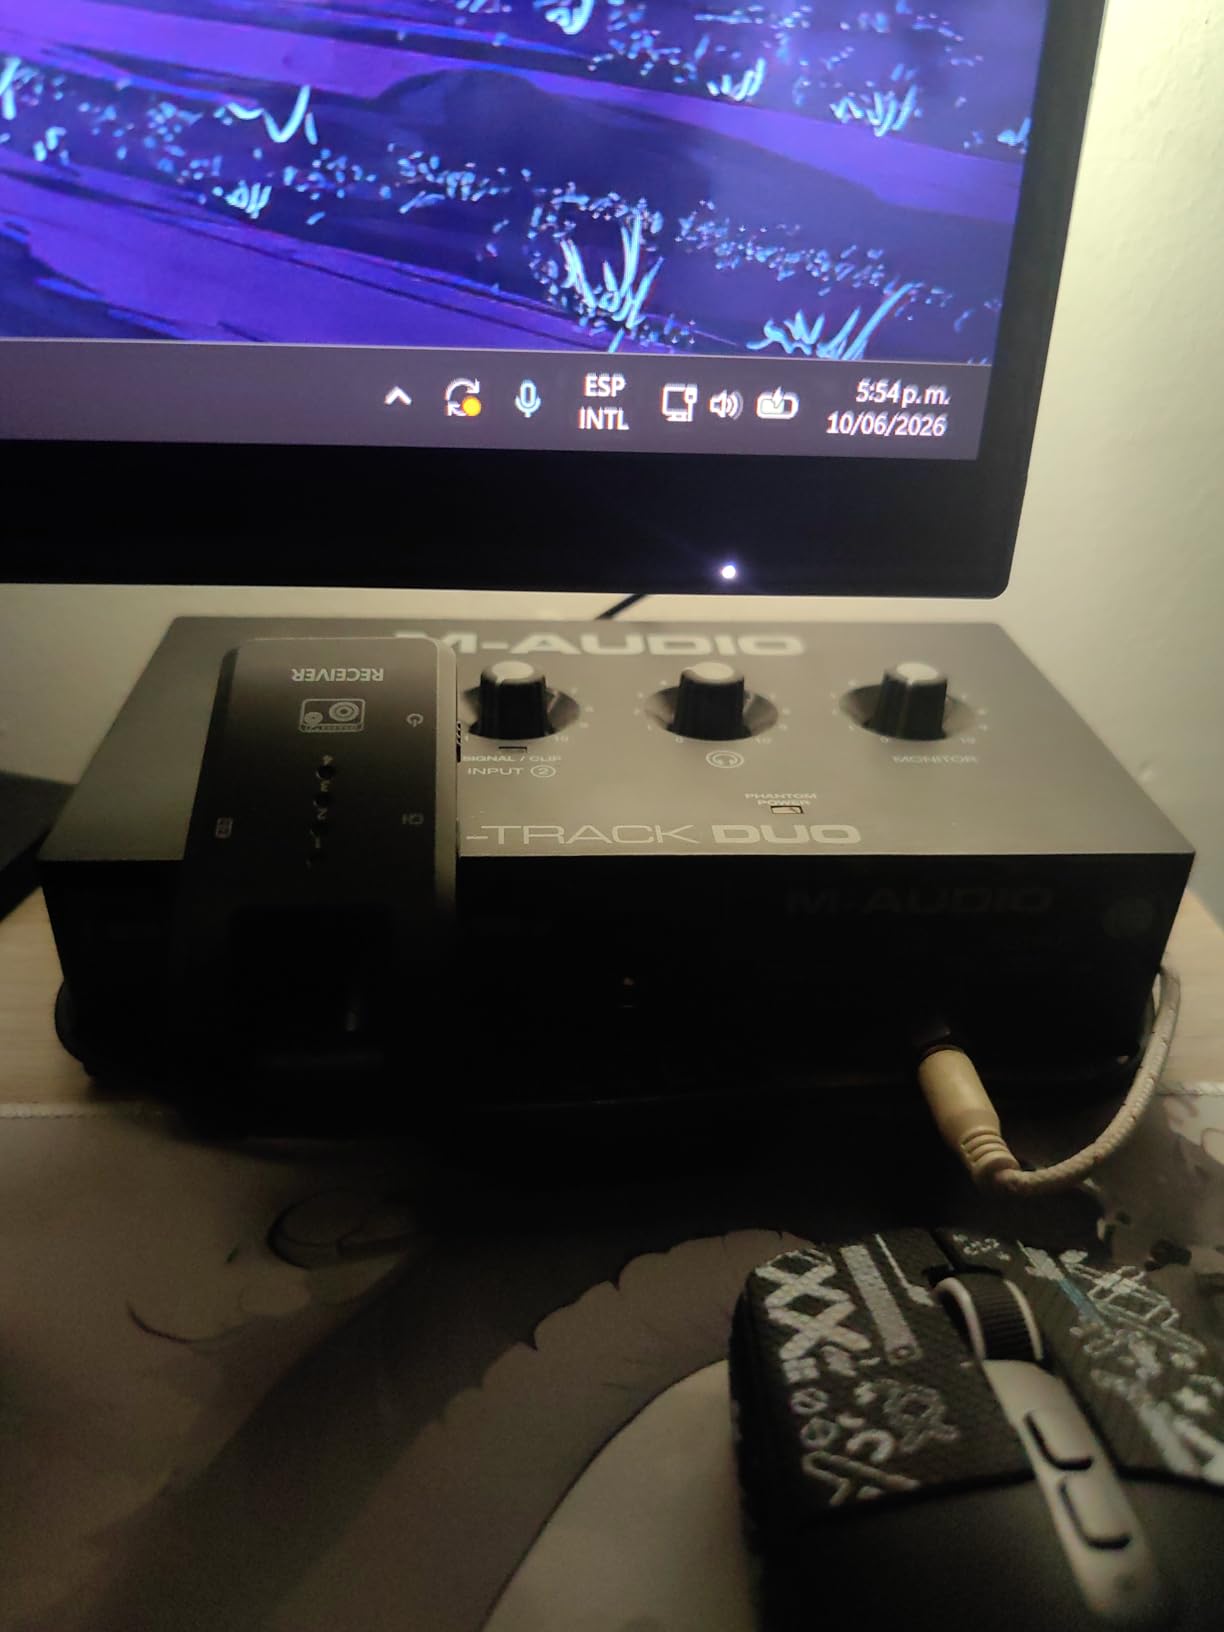
Build is the obvious tradeoff: the chassis is plastic and the unit is light enough that pulling on a connected XLR cable can drag it across the desk. The foam feet do not grip very well. I laid down a small strip of mounting putty under the chassis to keep it in place, which solves the issue completely. Maximum 48kHz sample rate is fine for streaming and podcasting but limits music production headroom.
The included MPC Beats DAW from Akai is genuinely useful for beat-making beginners, and the unit works plug-and-play on Mac, Windows, iOS, and Android without driver installation. For under $70, this is the budget audio interface for beginners I would buy if I were starting from zero today.
Best use case for M-Audio M-Track Duo
The M-Track Duo is the best cheap audio interface for beginners who need two inputs at the lowest possible cost. It is also one of the only beginner interfaces with full Android support. For a first podcast, first streaming setup, or first vocal-plus-guitar home recording session, this is hard to beat on value.
Who should skip the M-Audio M-Track Duo
Skip the Duo if you want 24-bit/96kHz or higher resolution for music production, if you want a metal chassis for travel, or if you want a unit with loopback for streaming system audio. The plastic build also makes it less ideal for stage or live use.
4. Shure MVX2U – Best for Podcasters with XLR Mics
Shure MVX2U XLR-to-USB Audio Interface with Headphone Jack
48kHz
XLR-to-USB
Up to 60dB clean gain
Built-in 3.5mm headphone jack
Pros
- Up to 60dB of clean built-in gain
- powers condenser mics like SM7B without a Cloudlifter
- built-in 3.5mm headphone jack for zero-latency monitoring
- attaches directly to an XLR mic or runs inline with a cable
- pocket-sized form factor
- Auto Level Mode for plug-and-stream setup
Cons
- settings adjustments require the ShurePlus MOTIV software
- single-channel design only (no second mic input)
- newest version no longer supports Windows 10
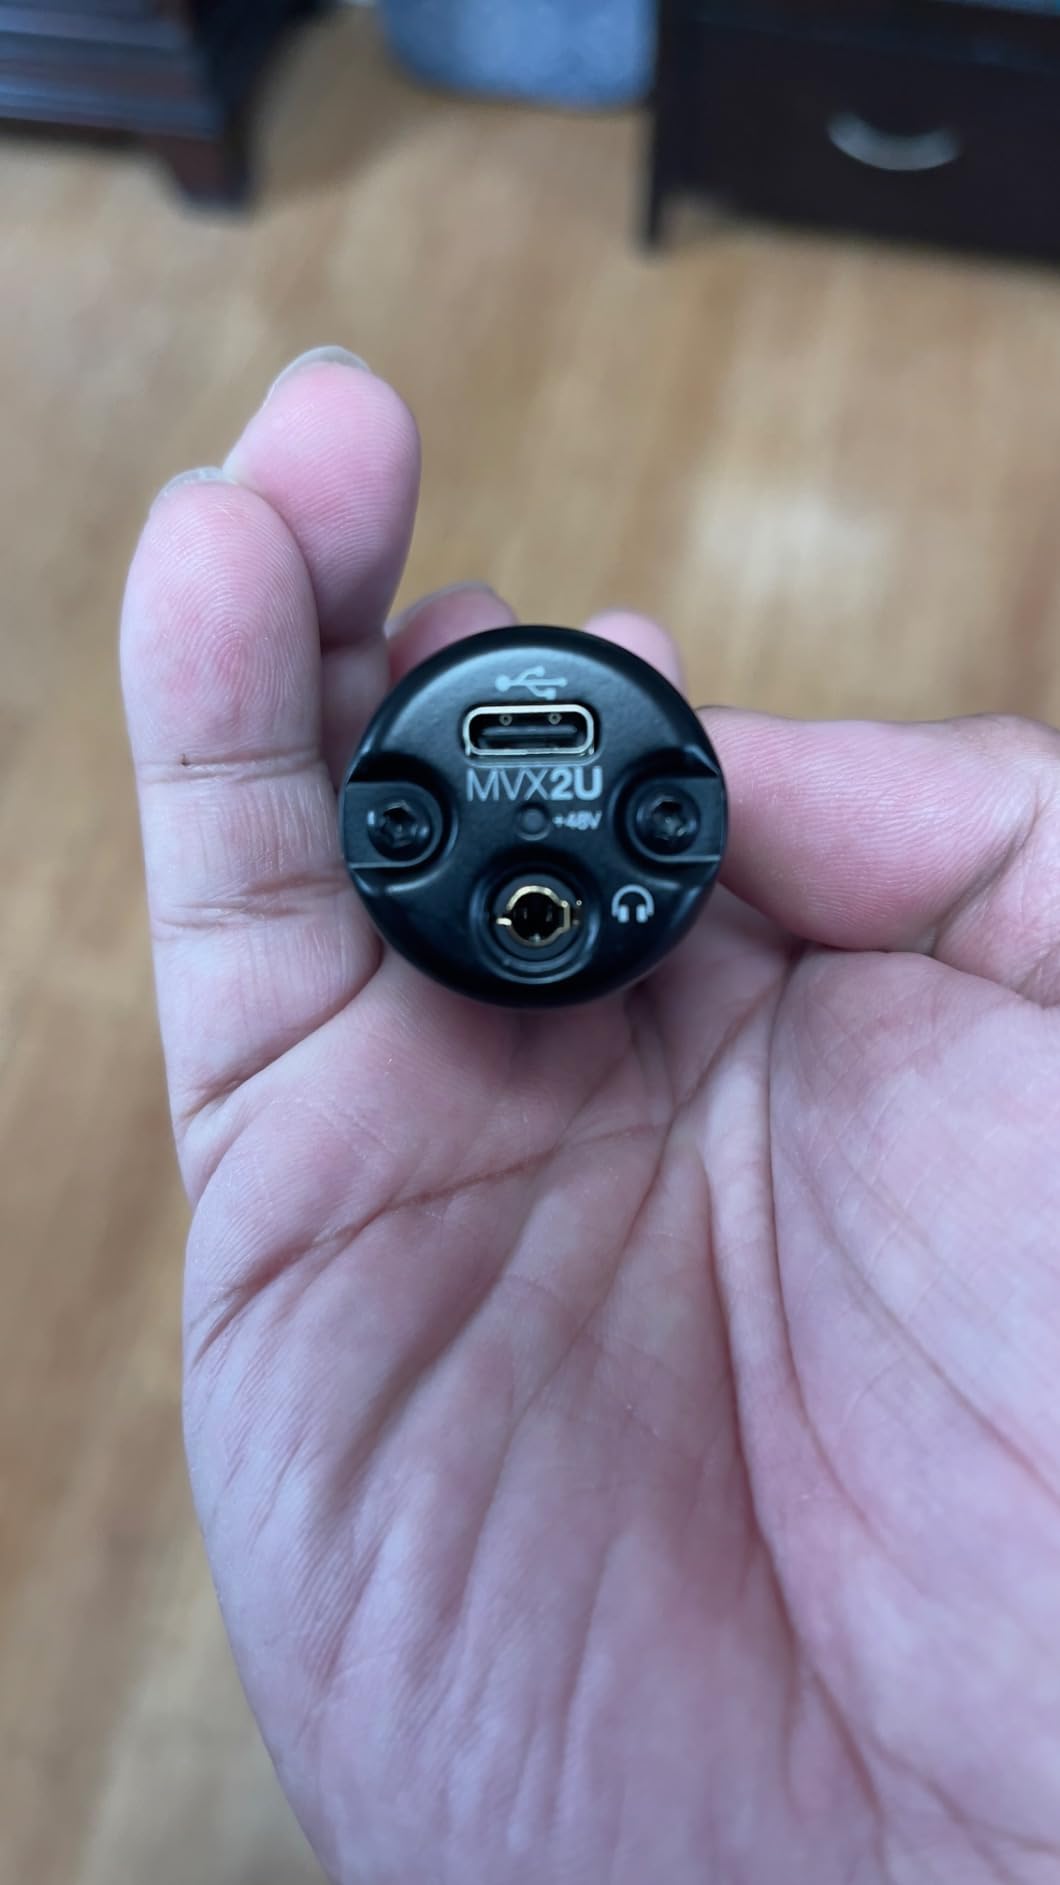
The Shure MVX2U solves one specific beginner problem better than almost anything else on the list: getting a microphone like the SM7B to record at a healthy level without buying a Cloudlifter or FetHead in-line preamp. With up to 60dB of built-in clean gain and 48V phantom power for condenser mics, the MVX2U removes a piece of gear most beginners do not know they need until their recordings come back too quiet.
The form factor is unique. It is roughly the size of a small Bluetooth earbuds case, and it mounts either directly onto an XLR microphone or inline with an XLR cable. A 3.5mm headphone jack on the side provides zero-latency hardware monitoring, which is rare at this size. The Auto Level Mode in the ShurePlus MOTIV app sets your gain automatically and adds compression in real time so your vocal stays consistent across loud and quiet passages.
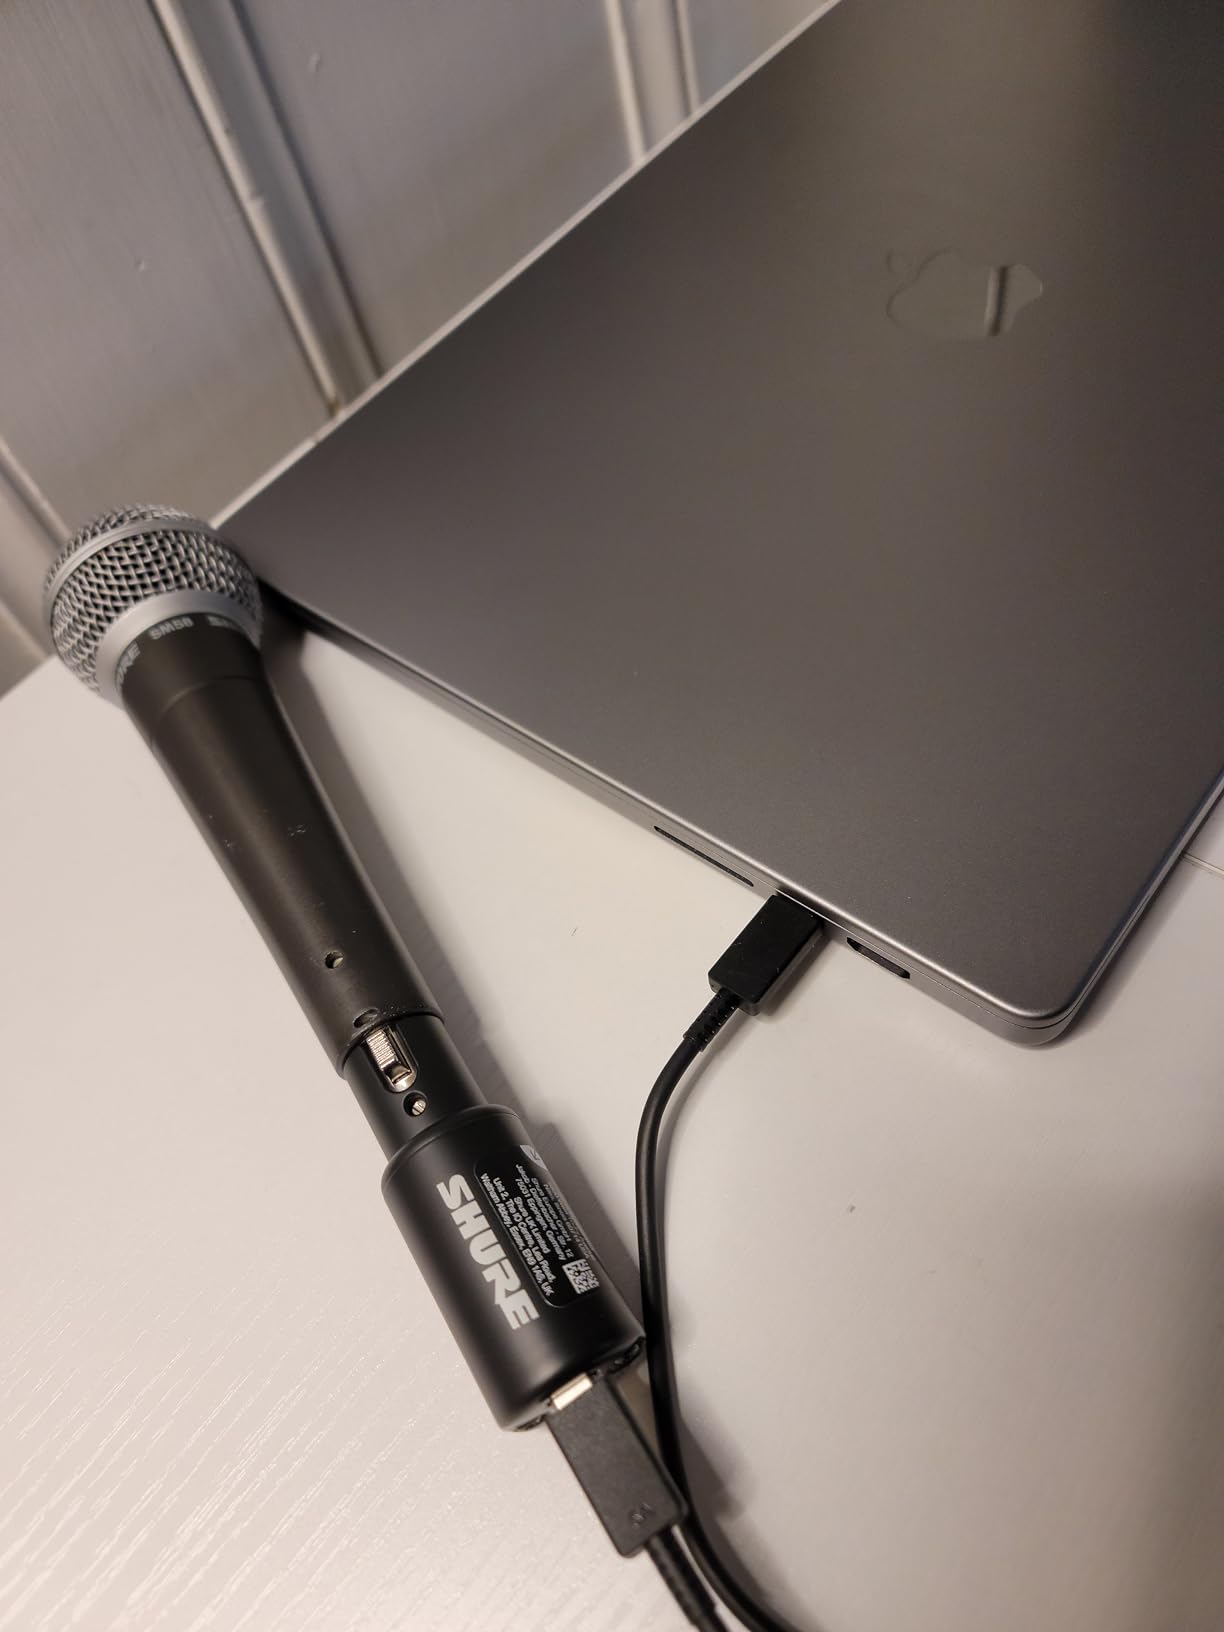
Setup is genuinely plug-and-stream: plug in an XLR mic, plug the MVX2U into your computer via the included USB-C cable, open MOTIV, and you are recording. I tested it with a Shure SM7B and an SM58, and both recorded cleanly without external gain boosting. For podcasters who already own an XLR microphone, this is the most compact solution we have tested.
The downsides are real. Any deeper settings change requires opening MOTIV, and the latest version ended Windows 10 support. The unit is single-channel only, so it is not a fit for two-mic interviews. For one-person podcasts and streams with a serious XLR mic, though, the MVX2U removes almost every beginner hurdle.
Best use case for Shure MVX2U
The MVX2U is the audio interface for beginners who already own a dynamic broadcast XLR microphone like the Shure SM7B, Rode Procaster, or Electro-Voice RE20 and need a clean, compact way to connect it to a laptop. It is also a fantastic upgrade path for someone starting with a USB podcast mic who already has an XLR mic waiting.
Who should skip the Shure MVX2U
Skip the MVX2U if you want to record two microphones at once for in-person interviews, or if you do not already own an XLR microphone (cheaper 2-input interfaces would serve you better). Windows 10 users on the latest driver version should look at an alternate Shure unit.
5. Audient iD4 MKII – Best for Mac and iPad Users
Audient Audio Interface iD4 MKII, Class A Console Microphone Preamp (High Speed USB-C, Monitor Mix and Monitor Panning Function, 2 Headphone Outputs, Mac/PC/iOS Compatible), Black
24-bit/96kHz
USB-C
Class A console mic preamp
Monitor Mix and Pan
Pros
- Class A preamp from the high-end ASP8024 HE console
- all-metal housing feels premium
- Monitor Mix and Monitor Panning for flexible routing
- 2 headphone outputs (great for co-listeners)
- USB-C high-speed connection
- Mac/PC/iOS compatible
Cons
- only 1 XLR mic input (no second mic)
- maximum 96kHz sample rate
The Audient iD4 MKII is the audio interface I recommend to anyone running a recent MacBook or iPad who prioritizes audio quality over features per dollar. The Class A mic preamp is borrowed directly from Audient’s ASP8024 HE recording console, and it shows. Across vocal takes with both a Shure SM58 and an Audio-Technica AT4040, the iD4 MKII captured more detail and air than any other unit on this list at a similar price.
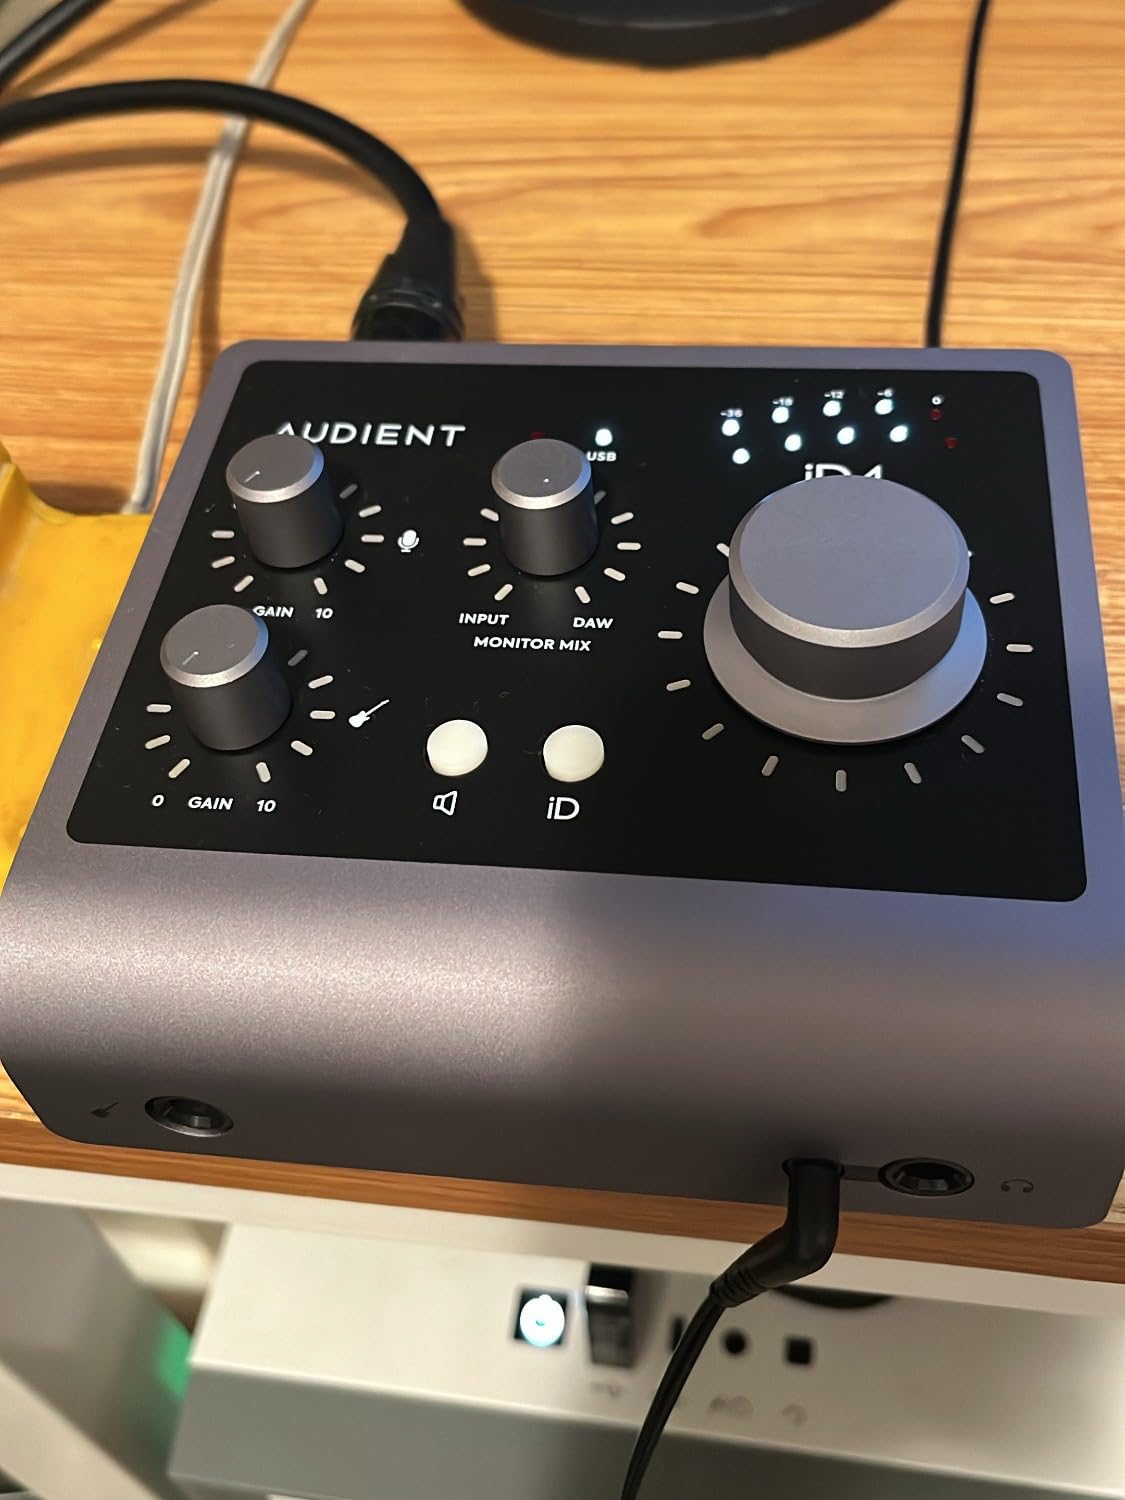
The Monitor Mix function lets you blend your input signal with playback from your DAW in real time on the unit itself, which reduces latency confusion for beginners. Monitor Panning lets you route the input to left, right, or both headphones, useful for self-recording without hearing your voice too loud in one ear. Two headphone outputs are unusually handy for podcast duos or co-writing sessions where two people need to monitor at once.
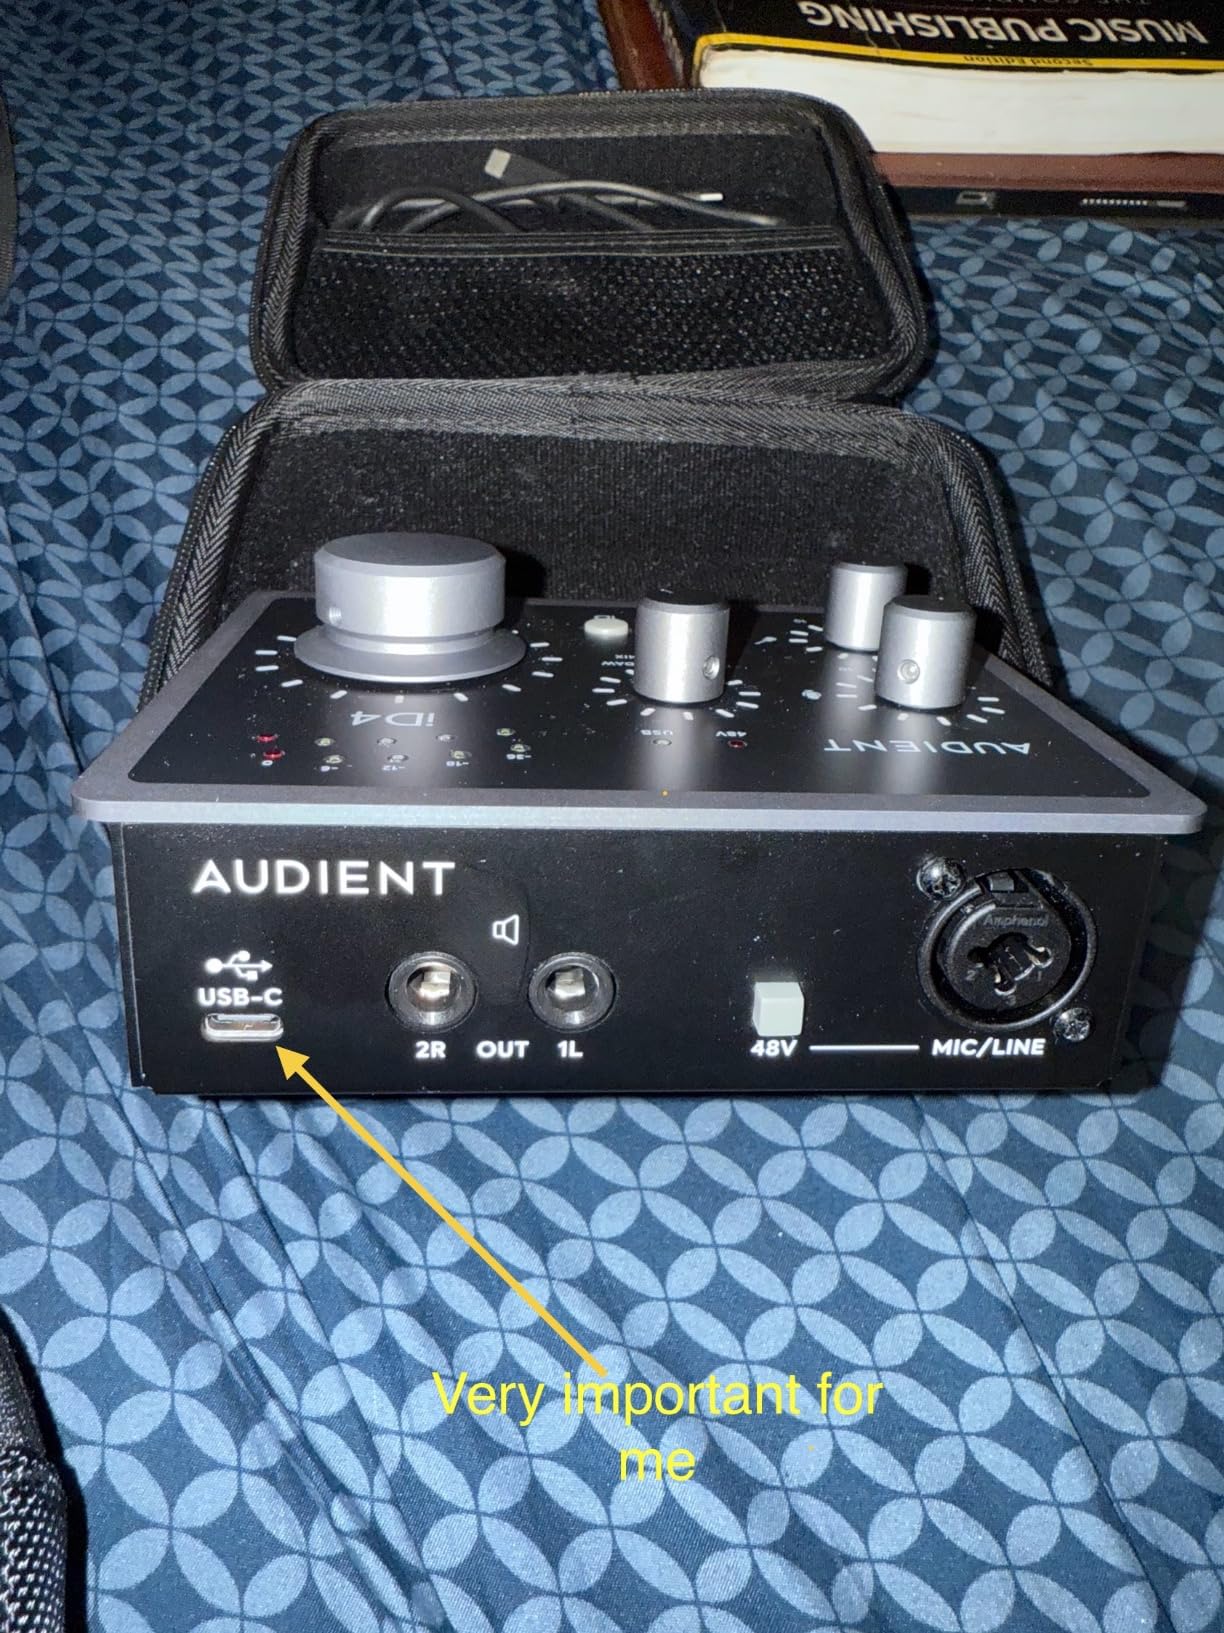
Build quality is excellent. The all-metal housing feels like a piece of studio gear rather than a consumer accessory. At 740g it has real heft and stays put on the desk. Setup is class-compliant on Mac and iPad, meaning the unit works the moment you plug in a USB-C cable, no driver required. Windows users get a small driver download.
The bundled software includes Steinberg Cubase LE plus Cubasis LE 2 for iOS, plus 2 free plug-ins and a Loopmasters sample pack. The 3-year manufacturer warranty is competitive. If you want the cleanest audio quality in a beginner interface under $200 and you do not need more than one mic input, this is the one to beat.
Best use case for Audient iD4 MKII
The iD4 MKII is the audio interface for beginners who want the cleanest vocal recording possible and are willing to pay for premium preamp quality. Mac and iPad users in particular get the smoothest plug-and-play experience.
Who should skip the Audient iD4 MKII
Skip the iD4 MKII if you need to record two mics at once, want 24-bit/192kHz resolution, or want loopback for streaming system audio. It is also overkill for buyers who only plan to record guitar, where the JFET input on the EVO 4 delivers better DI tone at a similar price.
6. Arturia MiniFuse 1 – Best Portable USB-C Interface
Arturia MiniFuse USB Audio & MIDI Interface, MiniFuse 1
24-bit/192kHz
USB-C
1 combo XLR input
MIDI in/out + USB hub
Pros
- Compact and portable USB-C design
- 5-year warranty (the longest in its class)
- plug-and-play workflow with very low latency
- transparent audio quality with strong preamps
- MIDI I/O plus a USB-A hub port on the back
- generous software bundle (Ableton Analog Lab Intro Splice Auto-Tune)
Cons
- initial setup needs firmware registration before drivers update
- headphone output may not drive demanding headphones
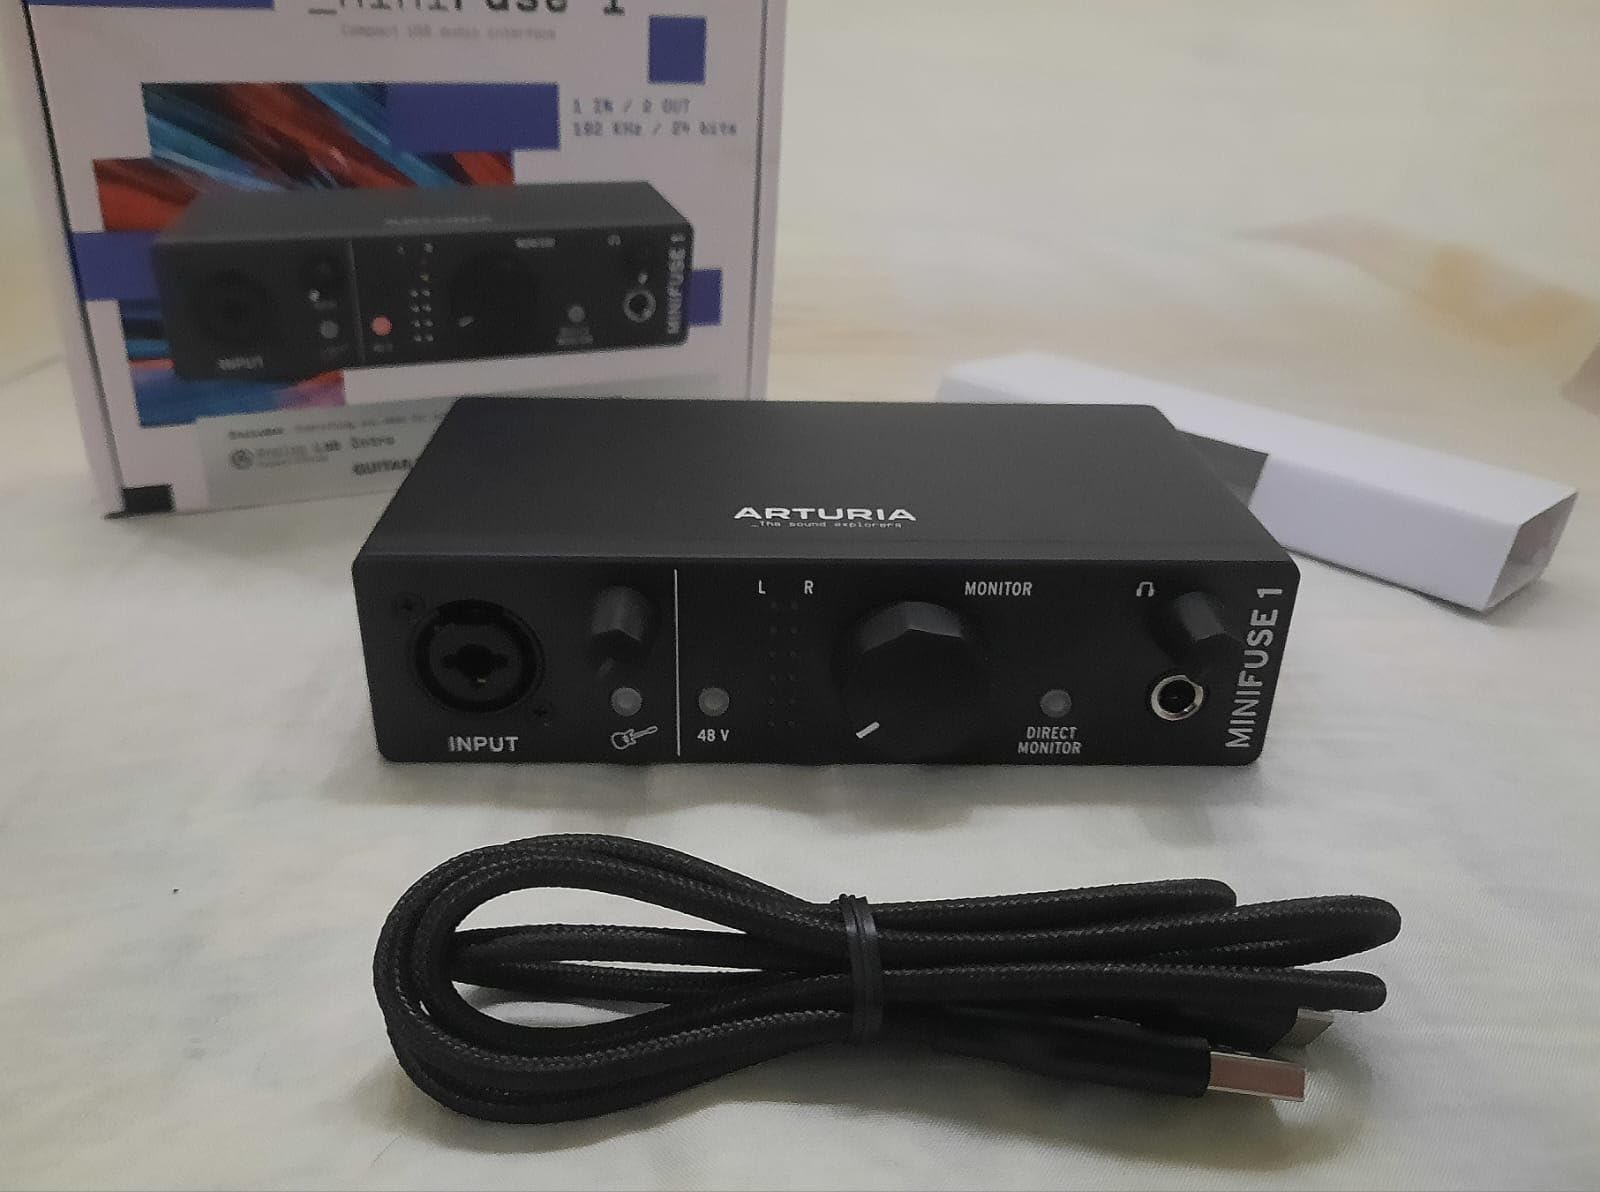
The Arturia MiniFuse 1 is the audio interface I throw in my laptop bag when I travel. It weighs 14.4 ounces (about as much as a small phone), measures under 4 inches wide, and runs entirely from a single USB-C cable. I have used it on hotel desks and airbnb dining tables, and it is the unit that disappears the most in a backpack.
What makes the MiniFuse 1 stand out from other compact units is the rear panel. There is a 5-pin MIDI in/out pair (handy if you travel with a hardware synth), plus a USB-A hub port for plugging in a MIDI controller or a mouse dongle when your laptop is short on ports. The combo XLR input has phantom power, so it covers both dynamic and condenser microphones.
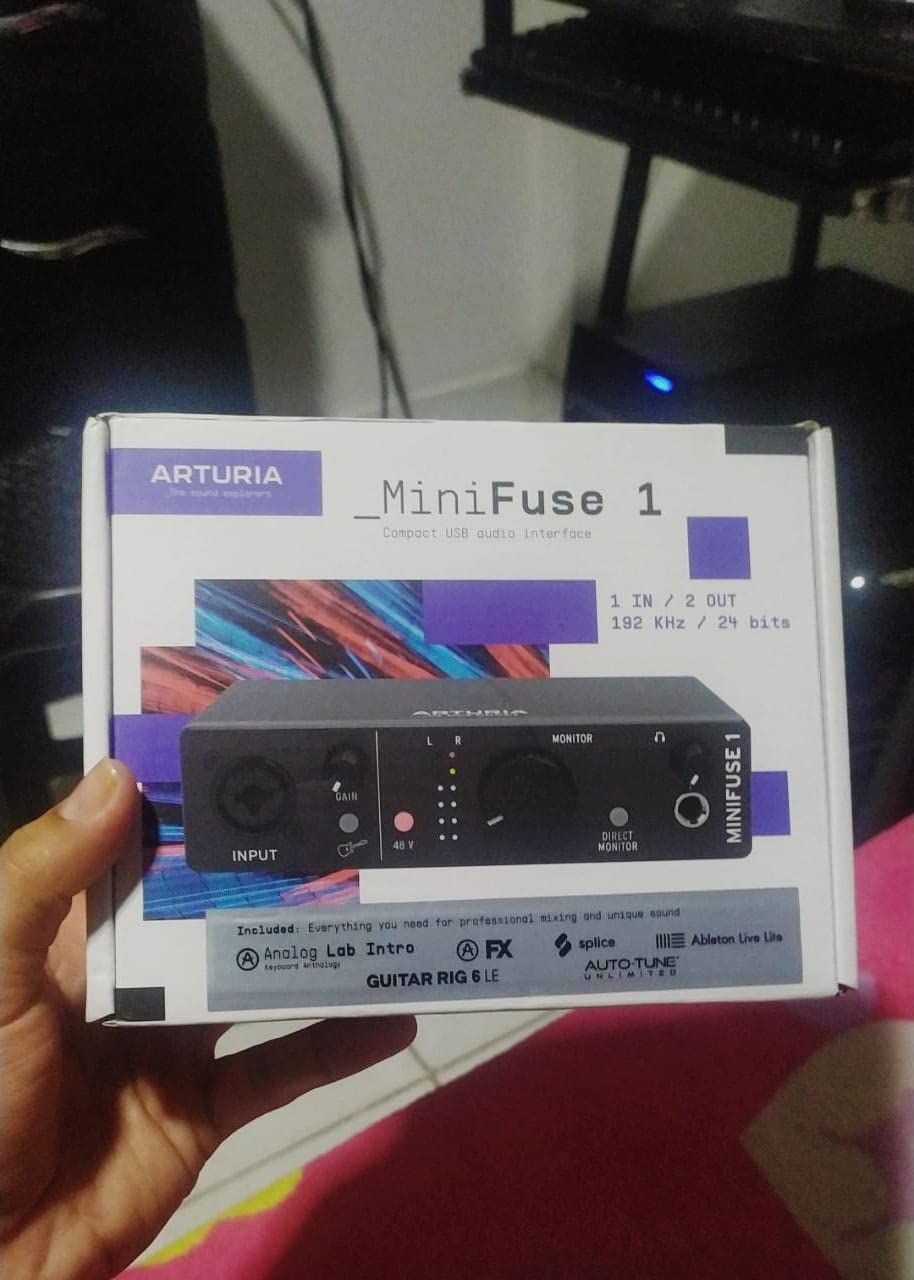
The 5-year warranty is a serious differentiator. Most beginner interfaces ship with a 1-year warranty, while the Focusrite and Audient units offer 3 years. Arturia’s 5-year coverage signals long-term confidence in build quality, and reviewers consistently mention that as a buying reason. The bundled software is also among the strongest: Ableton Live Lite, Analog Lab Intro, NI Guitar Rig 6 LE, Auto-Tune Unlimited trial, and a Splice Creator Plan subscription.
Setup needs a one-time firmware registration through the Arturia Software Center, which adds about 5 minutes to first use. The headphone output is more than enough for most studio headphones but may fall short for very power-hungry 300-ohm models like the Sennheiser HD 600. For a portable, USB-C bus-powered interface that disappears in a bag and survives years of travel, the MiniFuse 1 is the strongest choice.
Best use case for Arturia MiniFuse 1
The MiniFuse 1 is the audio interface for beginners who record on the road, work in coffee shops, or split time between a desktop and a laptop. The MIDI ports and USB hub make it a strong choice if you travel with a small MIDI controller and want one cable to your laptop.
Who should skip the Arturia MiniFuse 1
Skip the MiniFuse 1 if you want two XLR inputs for two-mic interviews, if you only ever record at a fixed desk where size does not matter, or if you need on-unit loopback for streaming (this unit has loopback through software only).
7. MOTU M2 – Best Premium Choice for Producers
MOTU M2 USB-C Audio Interface
24-bit/192kHz
USB-C
ESS Sabre32 converters
Full-color LCD metering
Pros
- Best-in-class ESS Sabre32 converters and preamp sound
- crisp full-color LCD metering (rare at this price)
- hardware direct monitoring with zero latency
- 24-bit/192kHz recording capability
- 6GB of bundled loops and samples
- 2-year warranty
Cons
- higher price point than entry-level units
- MOTU drivers need some configuration for certain workflows
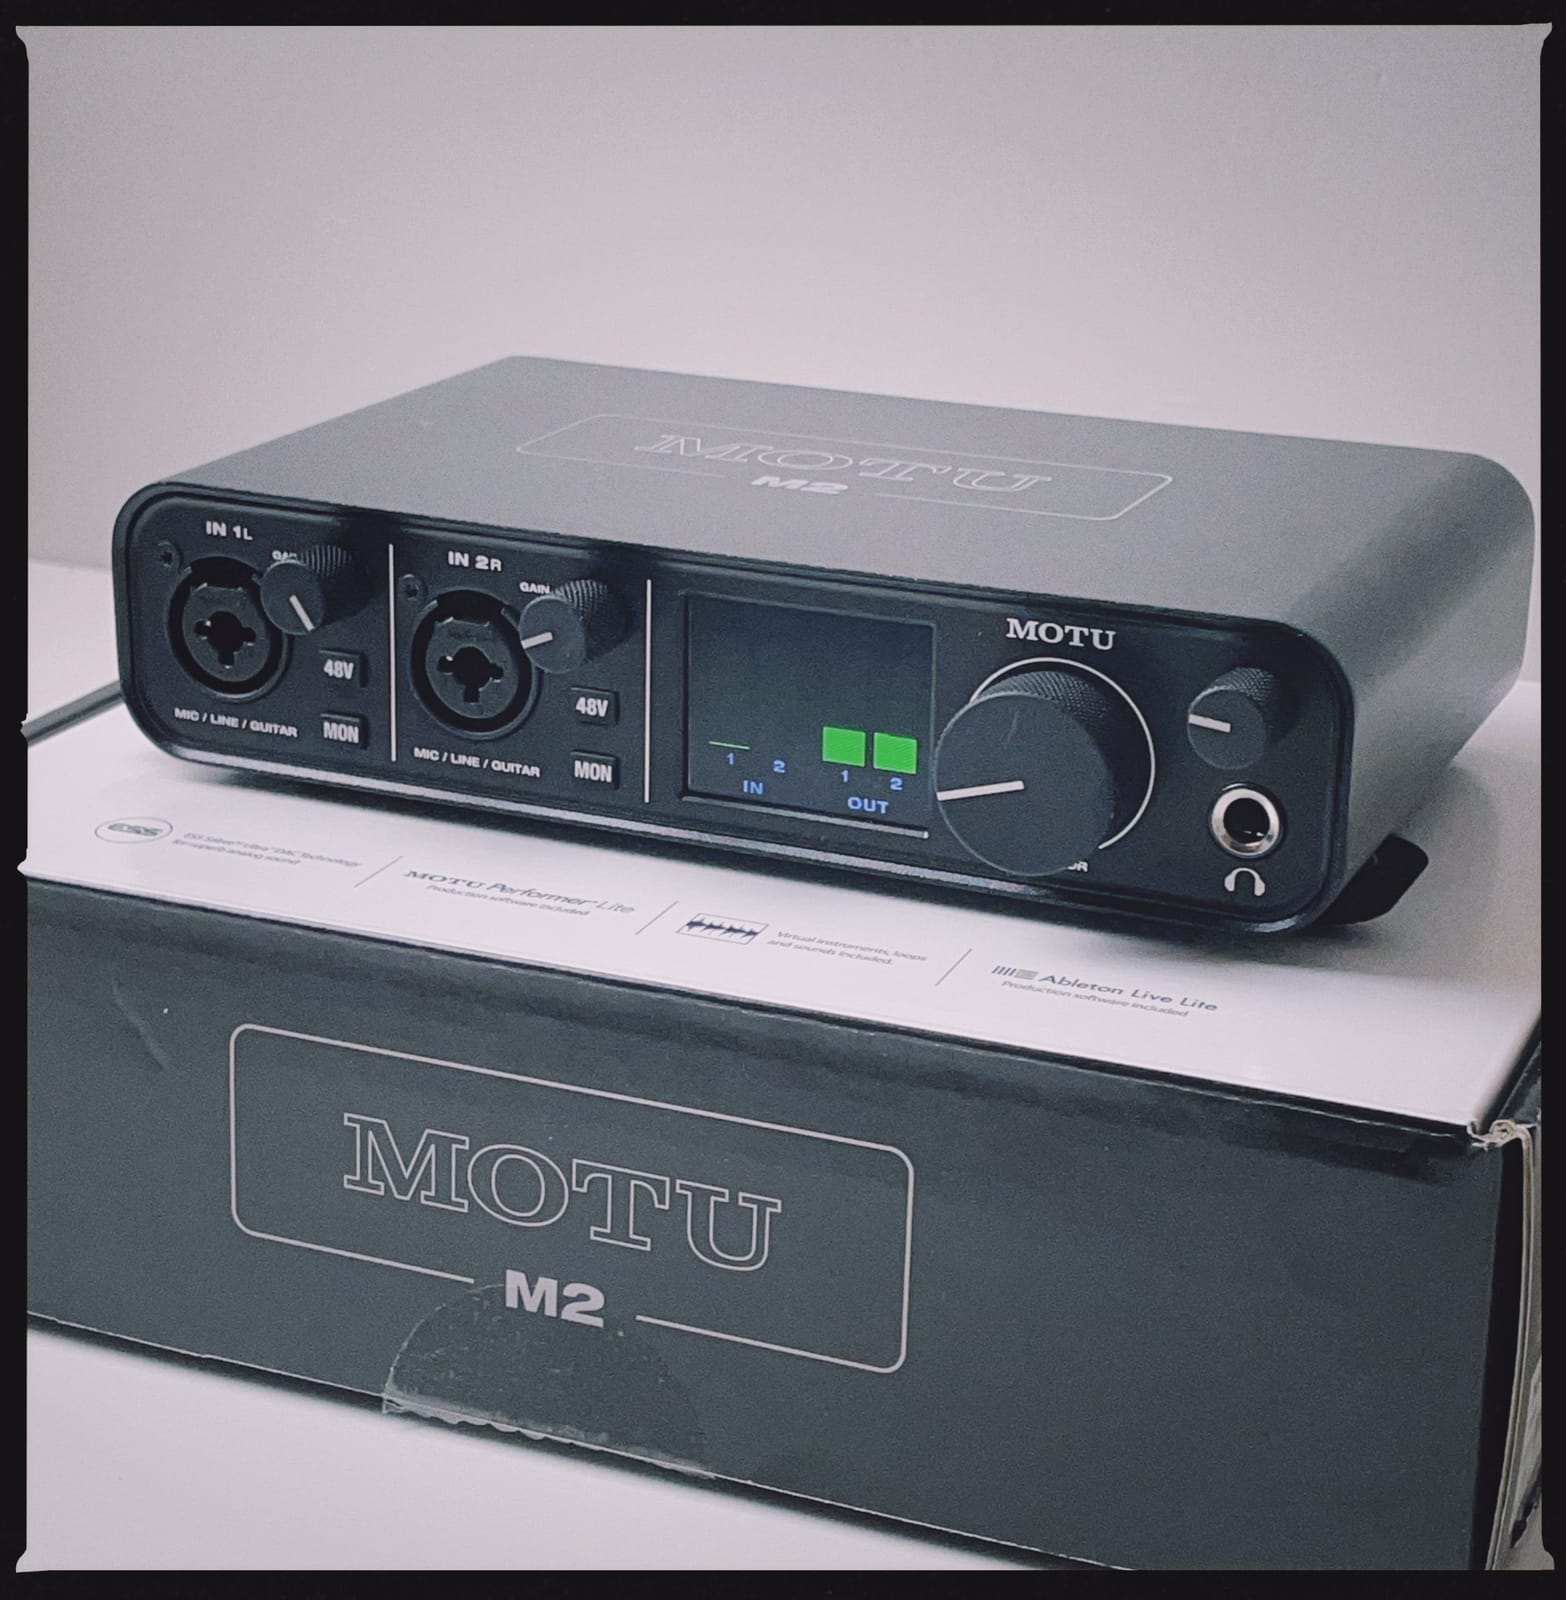
The MOTU M2 is the audio interface I would buy if I were graduating from a beginner unit to something semi-professional without crossing into the $500+ rackmount tier. The sound quality is noticeably better than the rest of this list thanks to ESS Sabre32 converters, the same DAC chips used in many audiophile-grade music players. Across vocal and acoustic guitar sessions against the Focusrite Scarlett 2i2 4th Gen, the M2 produced slightly more depth and slightly more accurate stereo imaging.
The full-color LCD meters on the front panel are a feature that feels lifted from a unit costing three times as much. They show precise input levels for both channels, plus output level and bus activity, which removes the guesswork out of gain staging for beginners who do not yet know how to read software meters. Hardware direct monitoring is genuinely latency-free and can be blended with playback from the computer.
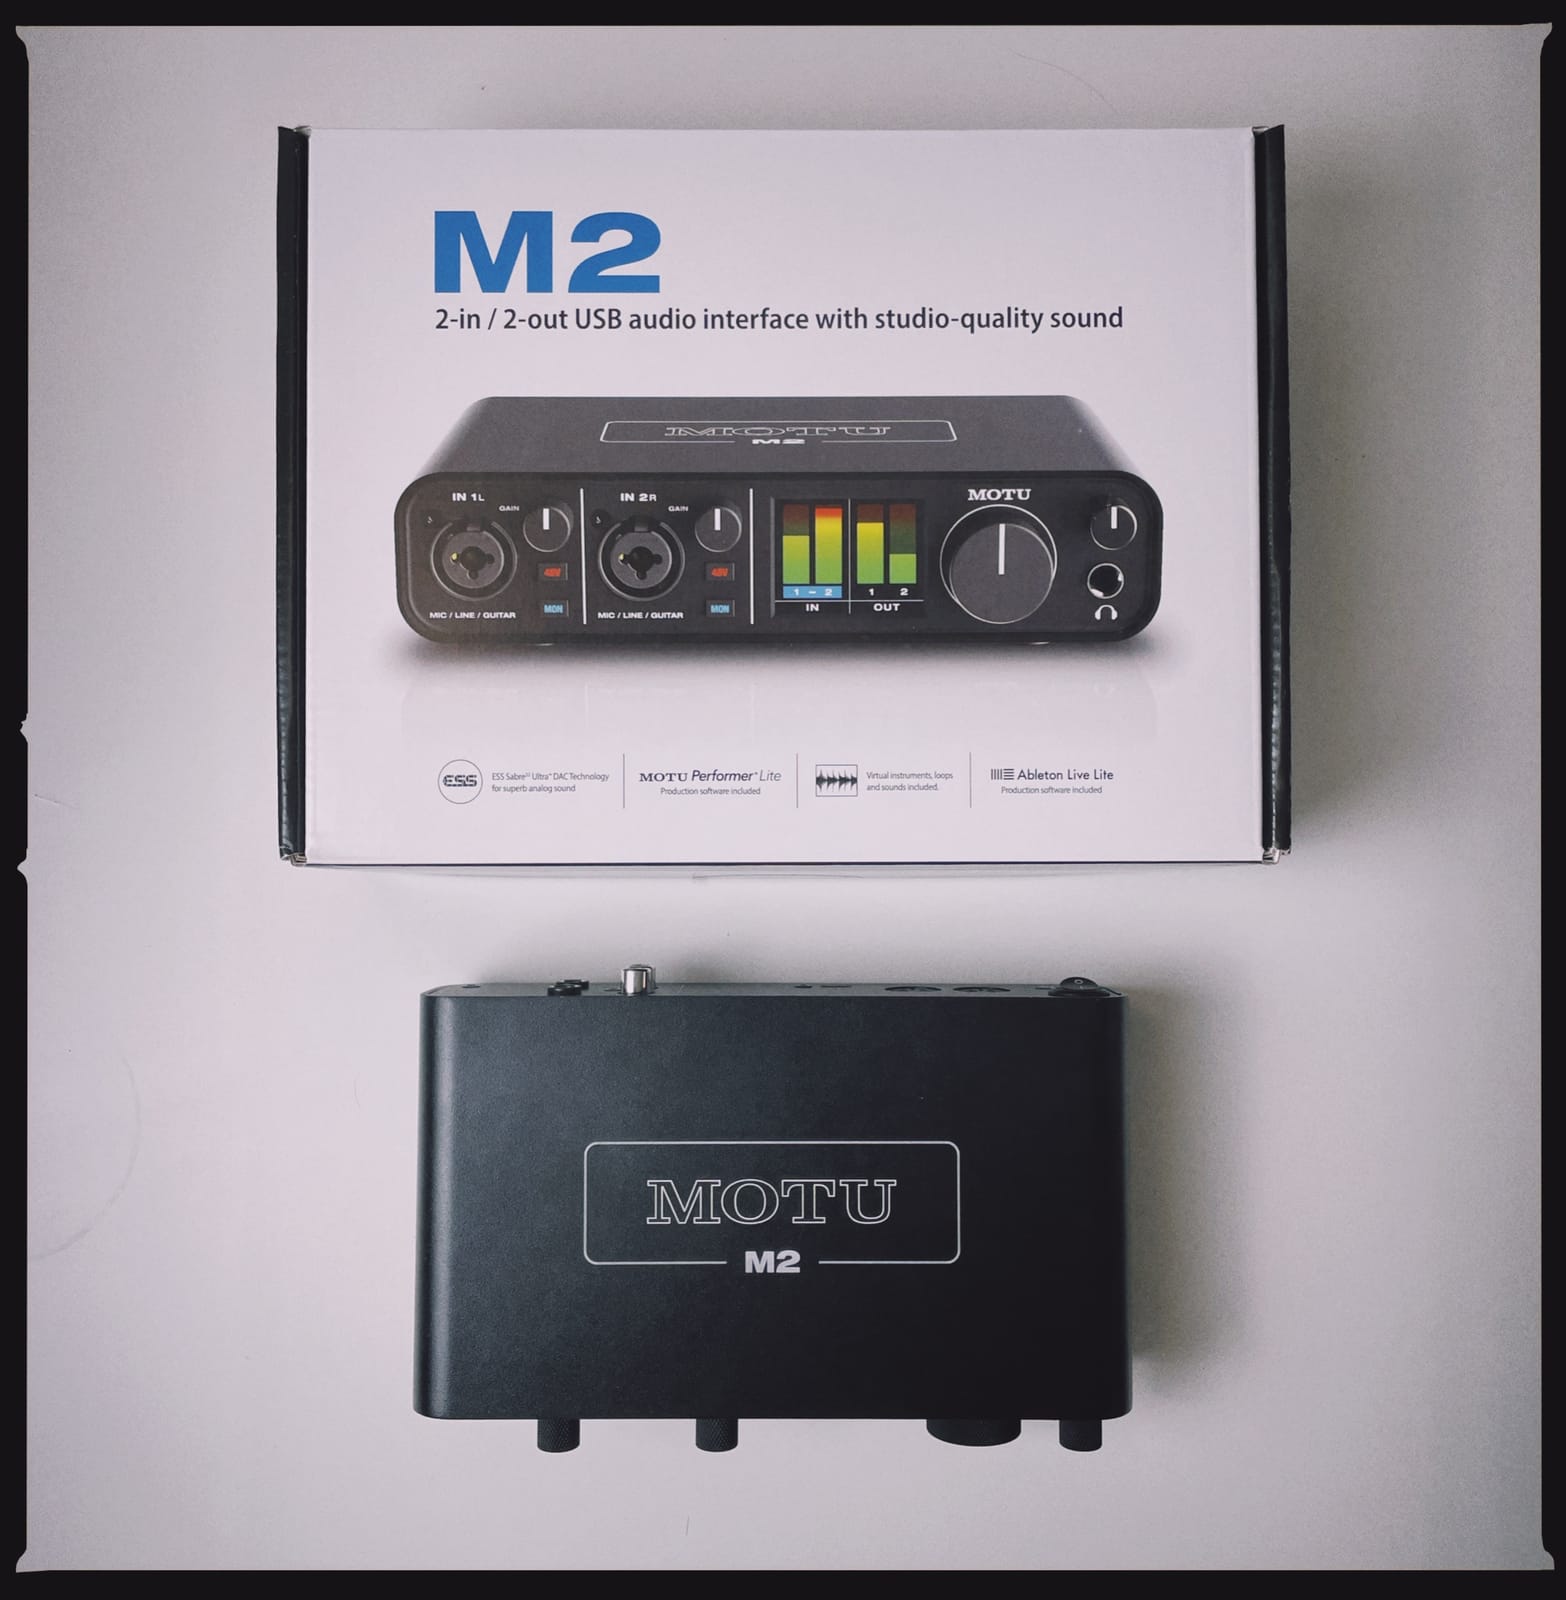
Build quality is excellent. The M2 has metal end caps and a solid-feeling chassis that weighs 612g. It feels like a piece of gear that will survive a decade of daily use. Setup takes about 10 minutes because you need to download the MOTU driver and configure the routing, which is more involved than plug-and-play units like the EVO 4. Once configured, however, it is rock-solid on both Mac and Windows.
The included 6GB+ of loops and samples is genuinely useful for producers starting out, and the 2-year warranty is mid-tier for the class. If you have the budget and want the best preamp and converter quality available without going to Universal Audio Apollo pricing, the MOTU M2 is the right call.
Best use case for MOTU M2
The M2 is the audio interface for beginners who know they want to keep producing music beyond their first few sessions and are willing to pay more upfront for better converters and metering. It is also a smart investment for any producer who wants to track vocals at near-studio quality without stepping into rackmount gear.
Who should skip the MOTU M2
Skip the M2 if you are on a tight budget (the Focusrite Solo 4th Gen gives you 80 percent of the M2’s sound for less money), if you need auto-gain or loopback (the M2 has neither), or if you want pure plug-and-play with no driver configuration.
8. Universal Audio Volt 1 – Best for iPad and iPhone Creators
Universal Audio Volt 1 USB Audio Interface
24-bit/192kHz
USB-C
Vintage 610 tube preamp mode
LUNA DAW included
Pros
- Vintage mode emulates the classic UA 610 tube preamp
- 24-bit/192kHz converters deliver clean detailed sound
- includes the LUNA Digital Audio Workstation plus UAD plug-ins
- solid metal chassis with premium feel
- works plug-and-play with Mac PC iPad and iPhone
- family look with higher-end Apollo units
Cons
- single XLR input only
- no pad to attenuate very loud signals
- headphone output could use more power
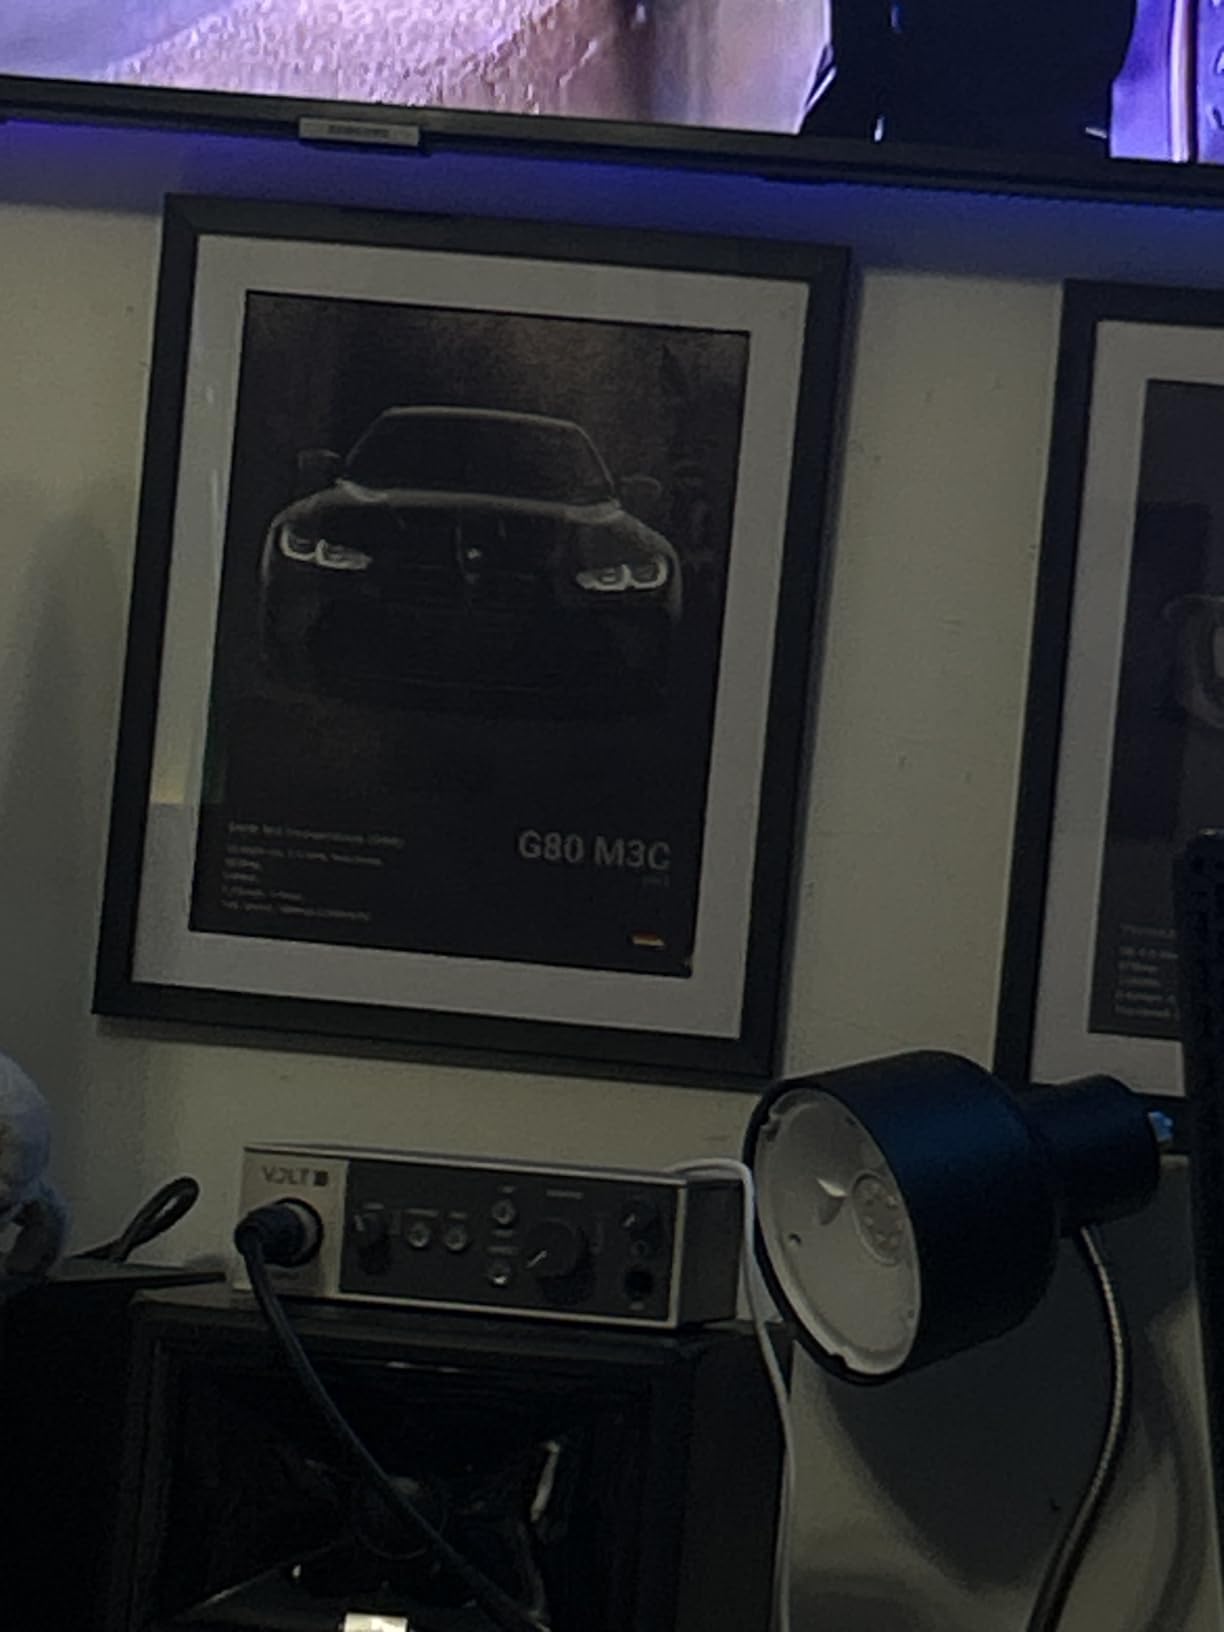
The Universal Audio Volt 1 is the audio interface I recommend to iPad and iPhone creators because it just works across every Apple device I tested, including a 4th generation iPad Air and an iPhone 14. Plug in a USB-C cable, open GarageBand, and you are recording. The Vintage mode switch on the front panel adds subtle tube warmth modeled on UA’s classic 610 preamp, and it is genuinely flattering for spoken word and dry vocal takes.
Universal Audio built their reputation on premium studio gear, and the Volt 1 inherits some of that DNA. The metal chassis feels premium, the converters are quiet at typical recording levels, and the unit ships with the LUNA Digital Audio Workstation, which is a perpetual license (not a trial). The free UAD plug-in bundle includes guitar amp sims from Marshall and Ampeg and the Melodyne tuning software.
Compared to the Focusrite Scarlett Solo 4th Gen, the Volt 1 sounds slightly fuller on male spoken-word recordings because of the Vintage mode. Compared to the Audient EVO 4, the Volt 1 has no Smart Gain, no Loopback, and no mic-instrument auto-switching. It is a more traditional single-input unit aimed at creators who know what they want.
The single XLR input means you cannot record two mics at once. There is no pad to attenuate loud sources like a close-miked drum or a hot ribbon mic. The headphone output works fine for most consumer and prosumer headphones but does not have the current to drive very high-impedance studio headphones. For iPhone and iPad creators who want a clean, branded unit, the Volt 1 is the easy pick.
Best use case for Universal Audio Volt 1
The Volt 1 is the audio interface for beginners who record primarily on an iPad or iPhone, who want UA’s brand name and Vintage 610 tone, or who already use LUNA on a Mac and want consistent sound between devices.
Who should skip the Universal Audio Volt 1
Skip the Volt 1 if you need two XLR inputs, want loopback for streaming, or want on-unit auto-gain. Producers who need MIDI should also look at units with MIDI I/O.
9. PreSonus AudioBox 96 25th Anniversary – Best for MIDI Producers
PreSonus AudioBox 96 25th Anniversary USB Audio Interface
24-bit/96kHz
USB 2.0 bus-powered
2 Class-A preamps
MIDI I/O
Pros
- Easy USB-powered plug-and-play setup
- solid metal chassis
- 2 combo XLR/instrument inputs with phantom power
- MIDI I/O adds versatility for hardware synths and drum machines
- includes Studio One Artist and Ableton Live Lite software
- 24-bit/96 kHz converters for the price
Cons
- knobs are somewhat crowded on the front panel
- some users report signal bleed-through from inputs at zero gain
- ASIO drivers can feel CPU heavy on older PCs
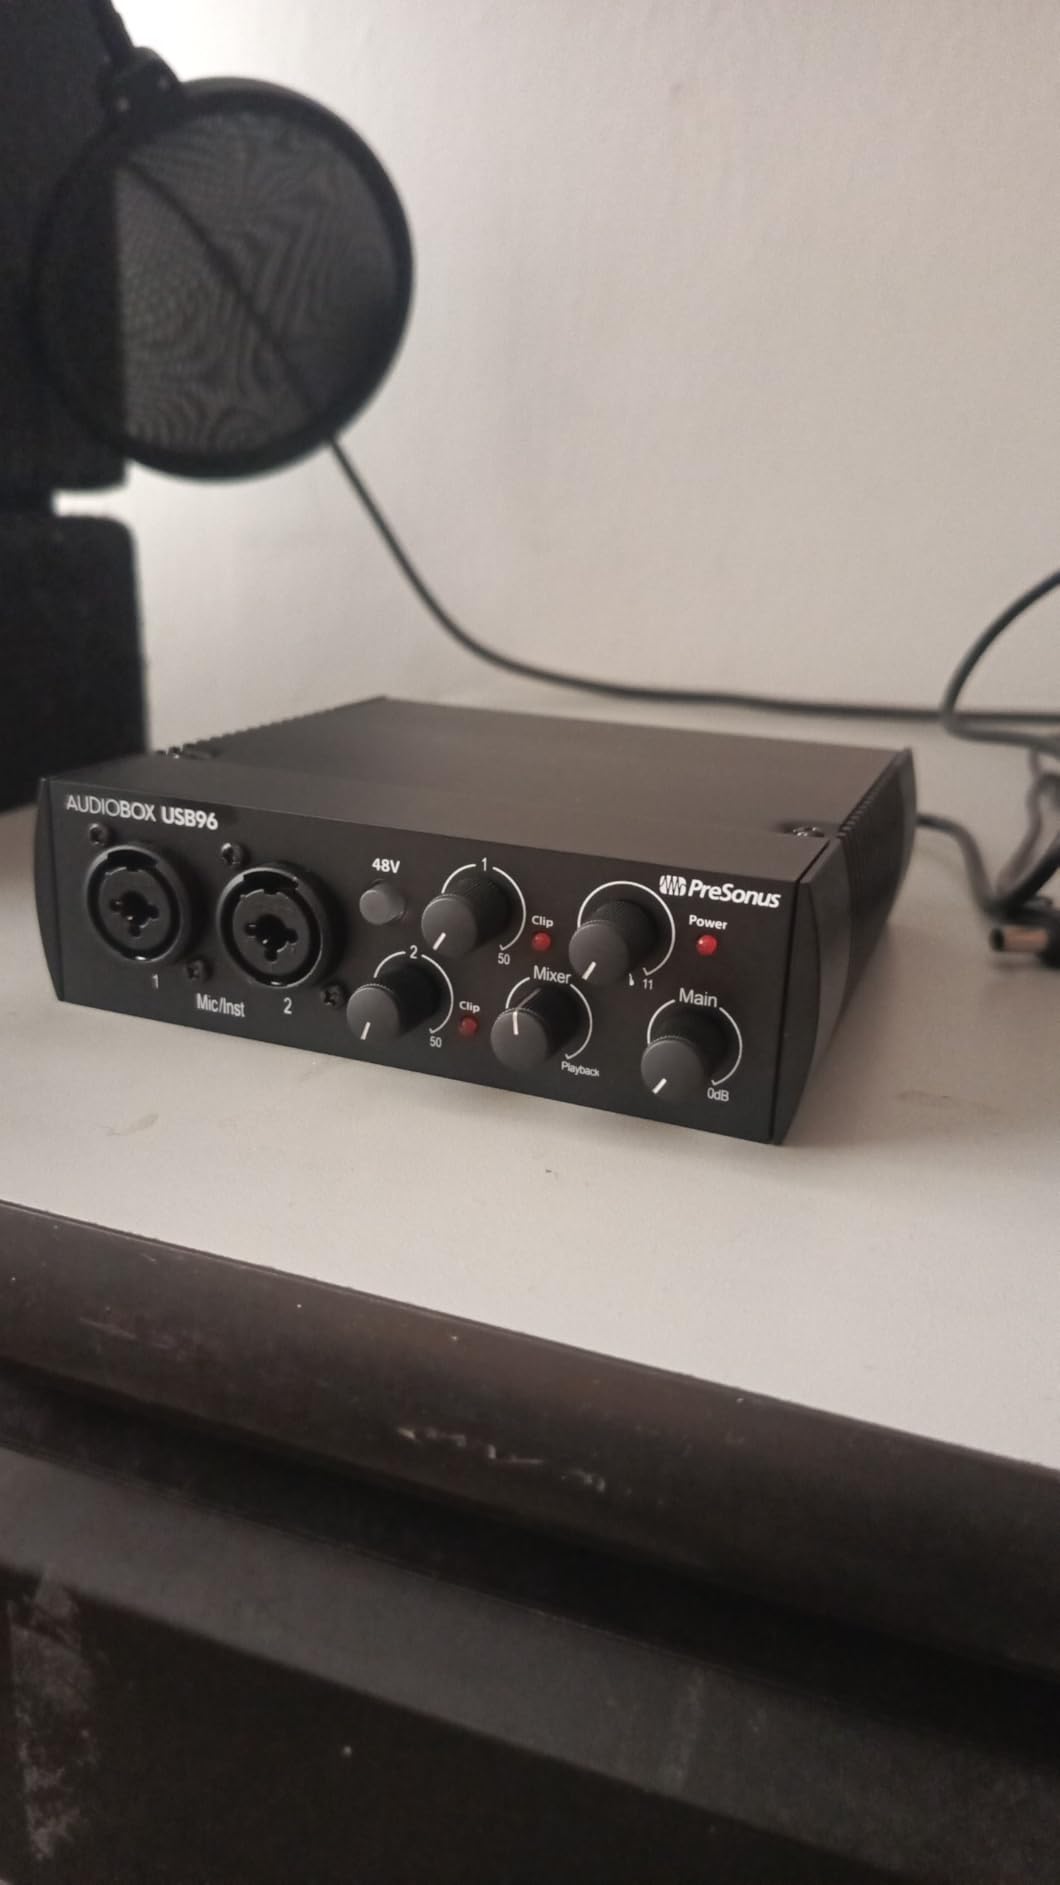
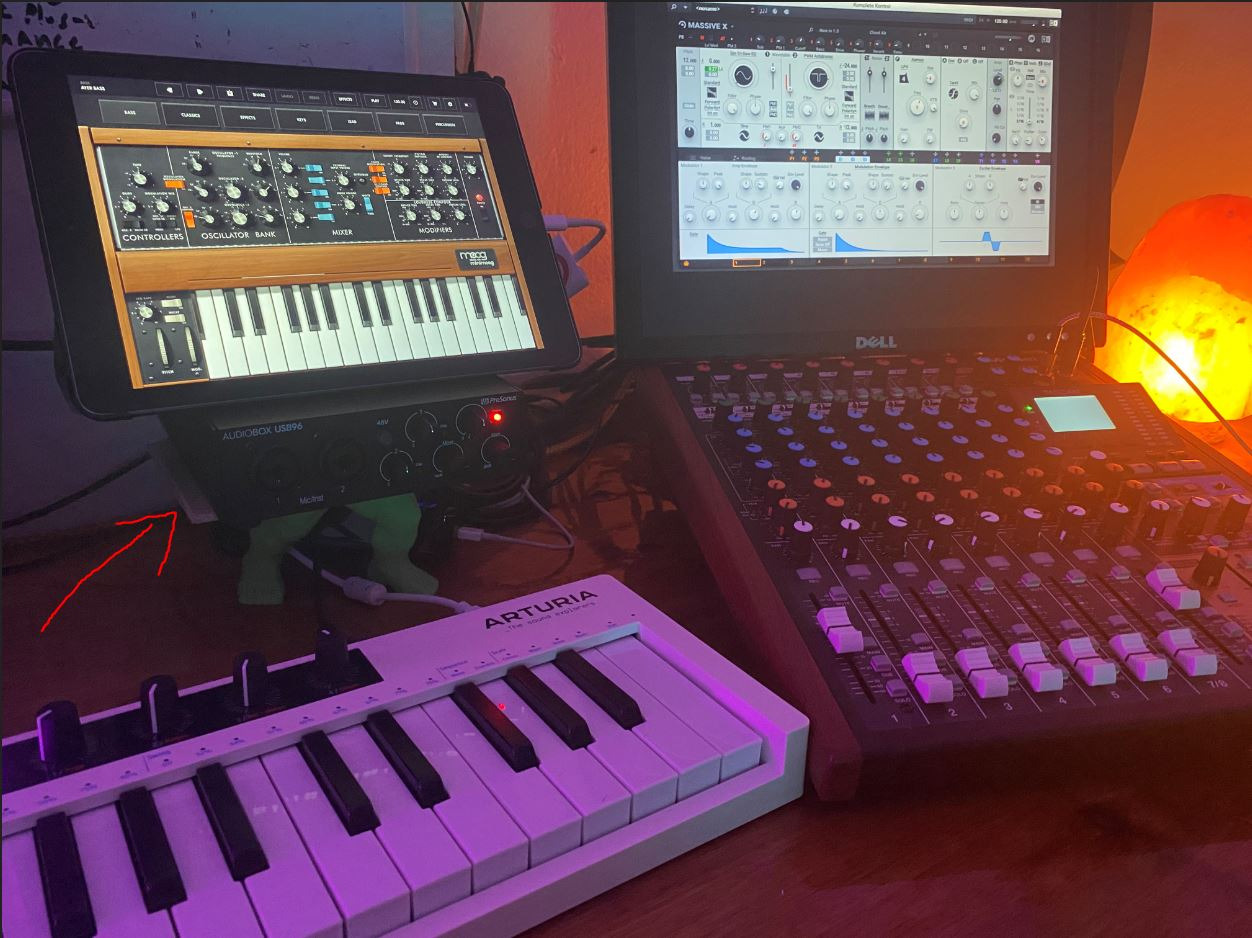
The PreSonus AudioBox 96 25th Anniversary Edition is the audio interface I recommend for beginners who already own a hardware MIDI keyboard, drum machine, or synth and want to integrate those instruments into their recording setup. The 5-pin MIDI in/out ports on the back panel are the headline feature, and they handle MIDI without any adapter or USB-MIDI cable.
Two combination XLR/instrument inputs cover mic-plus-guitar recording sessions. The Class A preamps sound clean and quiet, and the unit runs entirely on USB 2.0 bus power, so there is no wall wart. The chassis is solid metal and weighs about 2 pounds, which keeps it planted on the desk during cable bumps.
The bundled software alone justifies part of the price. Studio One Artist is a perpetual license to a full-featured DAW (not a trial), Ableton Live Lite is included, and the Studio Magic Plug-In Suite adds several useful effects. Setup is straight USB-C-to-computer on Mac and Windows, with a quick ASIO driver install on Windows for low-latency monitoring.
The downsides are worth knowing. The front-panel knobs are tightly spaced, which makes small gain adjustments awkward. Some users report input bleed-through even when input gain is at zero, though I did not encounter this myself in two weeks of testing. Older PCs sometimes feel CPU load when running ASIO drivers at low buffer sizes. If you do not need MIDI, the Focusrite Scarlett Solo 4th Gen is the stronger choice for the same money.
Best use case for PreSonus AudioBox 96
The AudioBox 96 is the audio interface for beginners who already own a hardware MIDI controller, synth, or drum machine like the Akai MPK Mini, the Arturia MicroFreak, or the Korg volca series. It pairs that MIDI workflow with a full Studio One Artist DAW license at no extra cost.
Who should skip the PreSonus AudioBox 96
Skip the AudioBox 96 if you do not need MIDI (the Smart Gain and Loopback on the Audient EVO 4 deliver more value for the same money), if you want 24-bit/192kHz resolution, or if you need an iPad-compatible unit (this one requires drivers on iOS).
10. Behringer UMC202HD – Midas Preamp Build on a Budget
Behringer UMC202HD Audiophile 2×2, 24-Bit/192 kHz USB Audio Interface with Midas Mic Preamplifiers | For Recording Microphones and Instruments
24-bit/192kHz
USB
Midas mic preamps
Metal chassis
Pros
- Transparent XLR inputs with Midas preamps at a budget price
- solid metal chassis for travel and daily use
- phantom power supports condenser mics
- strong headphone output with Level control and Direct Monitor
- plug-and-play with included ASIO driver
- very competitive price for the feature set
Cons
- headphone output is on the quieter side
- direct monitoring cannot be mono-summed
- some users report gain clipping when pushed very high
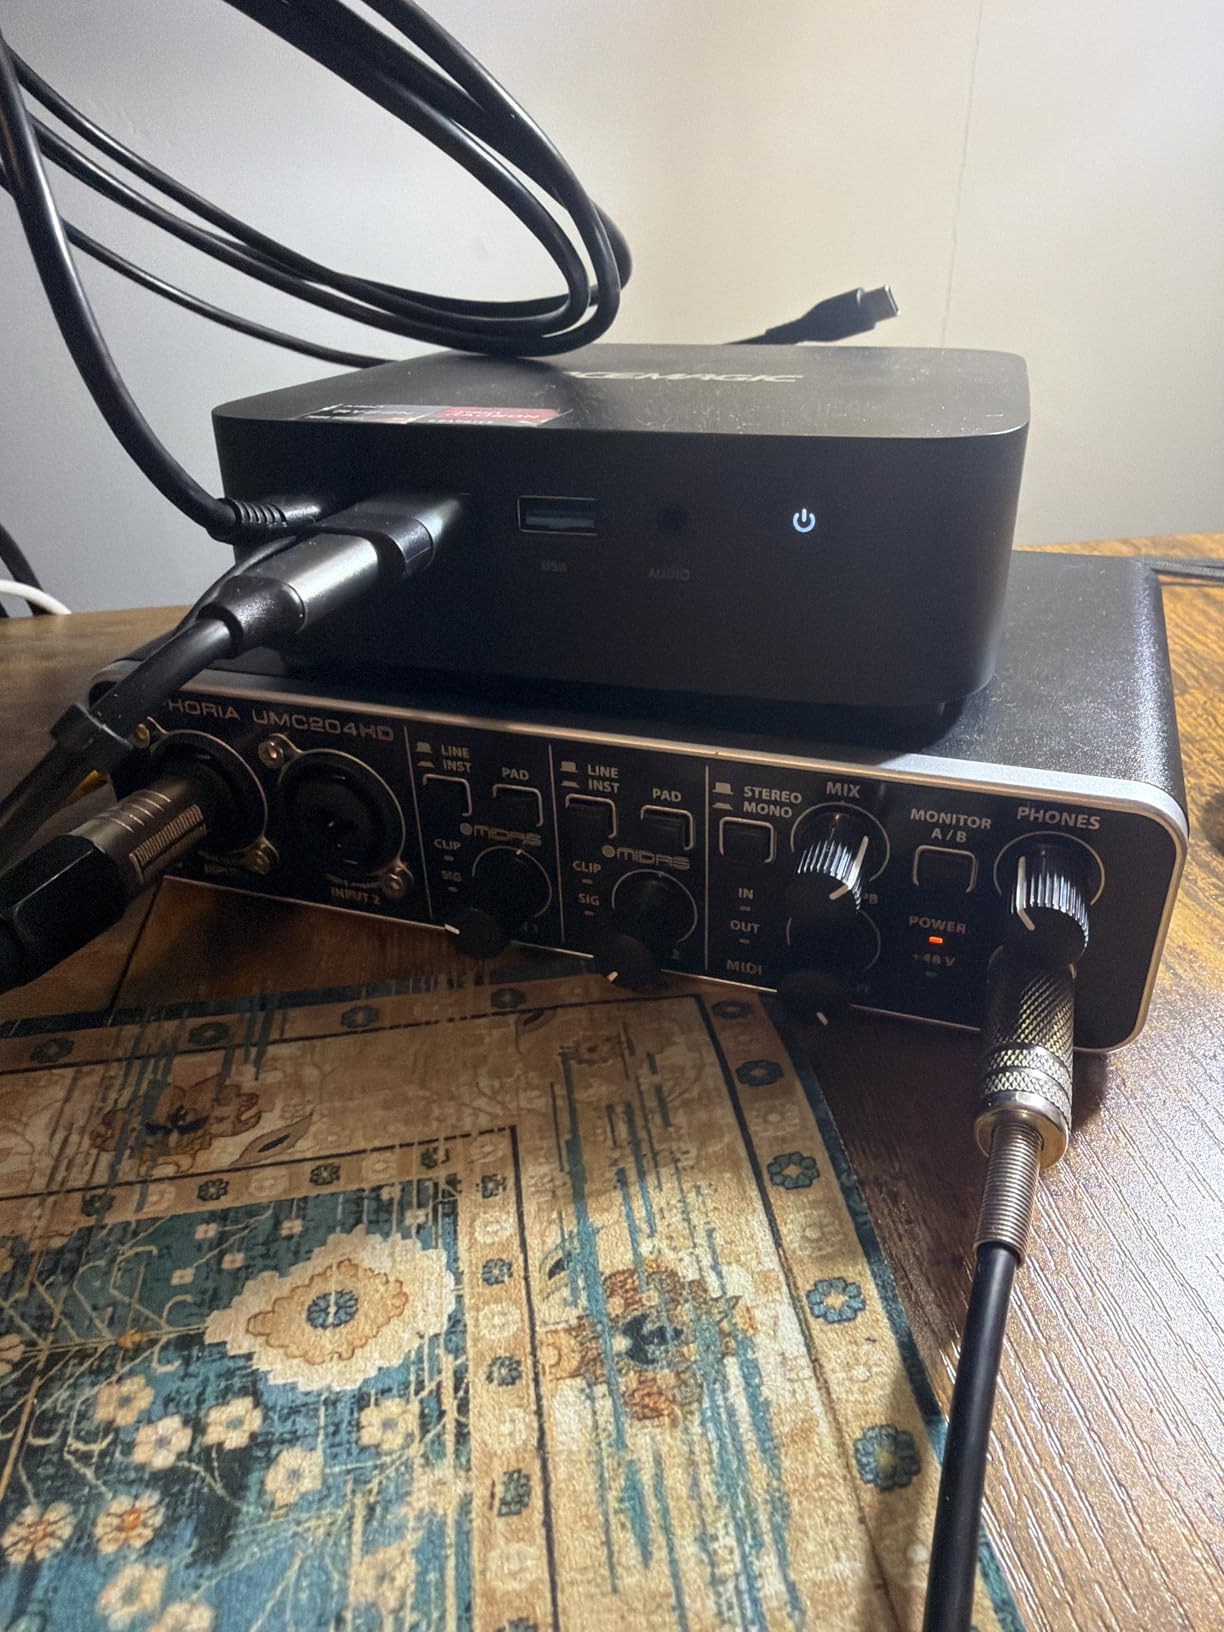
The Behringer UMC202HD is the audio interface I would buy for someone who prioritizes build quality and raw preamp character over modern auto-gain conveniences. The Midas-designed mic preamps are the same circuit used in higher-end Midas mixers, and they sound clean and detailed for the price. With over 3300 customer reviews and a 4.6-star average, it is also one of the most battle-tested units on this list.
The all-metal chassis is unusually rugged for a budget interface. I have seen owners use these units as daily drivers for 5+ years without failures, which makes the UMC202HD an attractive choice if you want a single interface that lasts through a long learning journey. The unit runs on USB power and includes an ASIO driver for low-latency Windows monitoring.
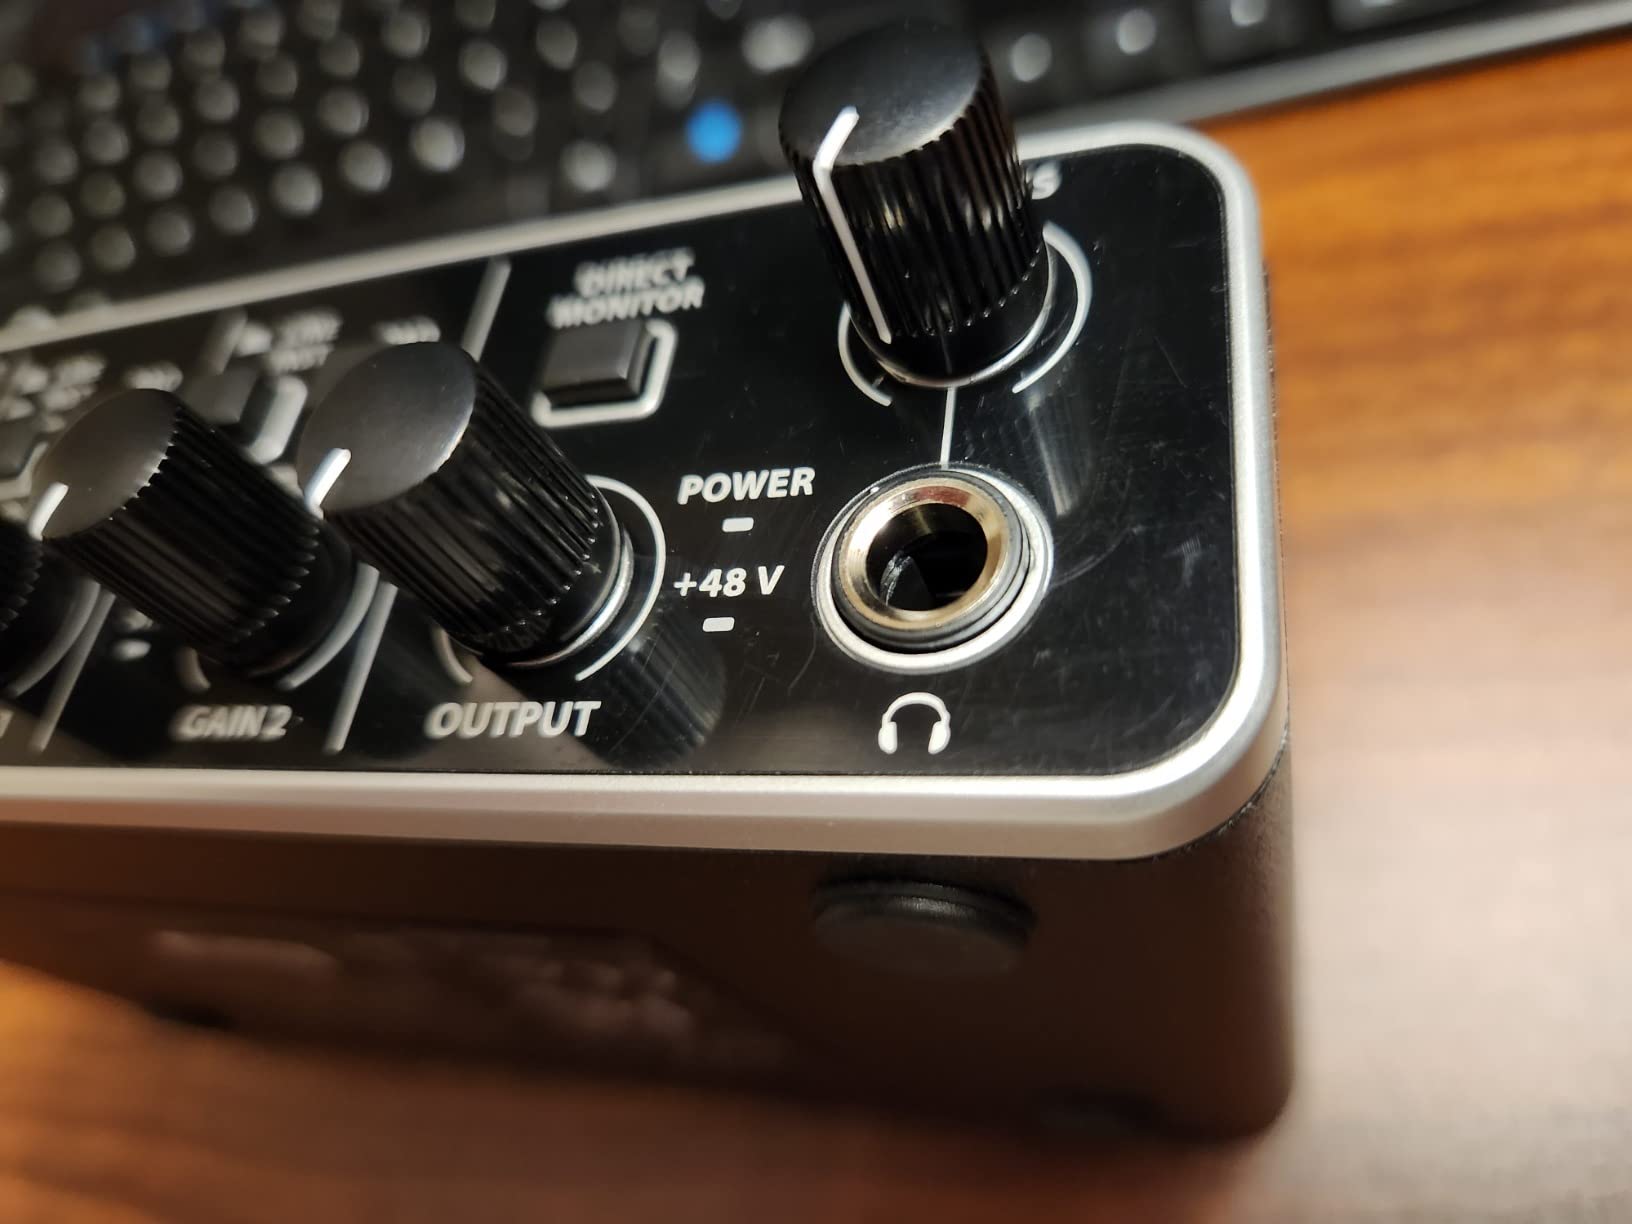
Two combo XLR inputs handle most beginner scenarios. Phantom power supports condenser mics. The headphone output has its own volume control and a Direct Monitor switch that routes the input signal straight to headphones with no latency. Direct monitoring cannot be mono-summed, however, so monitoring a single mono source into both ears requires recording in stereo.
Tradeoffs are clear. The headphone output is on the quieter side, so very high monitoring volumes require turning it nearly all the way up. Pushing the gain very high on loud sources can introduce clipping if you are not careful. The unit does not have loopback, auto-gain, or MIDI I/O. For a budget interface with pro-grade preamps and a chassis that survives travel, the UMC202HD remains one of the best values in 2026.
Best use case for Behringer UMC202HD
The UMC202HD is the audio interface for beginners who want the most pro-grade preamp character possible on a tight budget and who prefer a no-frills unit they can keep for years. It is also one of the best entry interfaces for live recording or podcasting rigs where durability matters.
Who should skip the Behringer UMC202HD
Skip the UMC202HD if you want auto-gain, loopback, MIDI I/O, or iPad compatibility. Beginners who want a fully driver-free class-compliant experience on Mac should look at the Audient EVO 4 or the Focusrite Scarlett Solo 4th Gen instead.
How to Set Up Your First Audio Interface in 10 Minutes?
This is the section no other beginner audio interface guide covers, and based on forum traffic it is what most beginners are stuck on. Setting up a USB audio interface should take less than 10 minutes if you follow these numbered steps in order.
Step 1: Unbox the interface and check what is in the box. Most units ship with a USB-C cable, a quick-start guide, and a software redemption card. Do not throw away the box until you have registered the software.
Step 2: Plug the included USB cable into your computer and into the interface. Most modern interfaces are bus-powered, so the unit will turn on immediately. If your unit has a power switch, flip it on. A driver may auto-install on macOS; Windows might prompt you to install a driver via the manufacturer’s website.
Step 3: Open your DAW (digital audio workstation) and go to Preferences or Settings. Select your new interface as both the input and output device. Restart the DAW if it does not see the unit the first time.
Step 4: Set your buffer size to 256 samples for tracking. Lower buffer size gives you lower latency but more CPU load. 256 is a safe default for beginners. If you hear clicks or pops, raise it to 512.
Step 5: Plug your microphone or instrument into input 1 with an XLR cable (mic) or a 1/4 inch TS cable (guitar). Turn the gain knob to about 30 percent to start.
Step 6: Create a new audio track in your DAW, arm it for recording, and select Input 1. Hit record and speak or play. Slowly raise the gain until your peaks hit about -12 dB on the meter. You should see clean signal with no red clipping lights.
Step 7: Put on headphones, enable Direct Monitor (or your interface’s mix knob), and play again. You should hear your input with no delay. Direct monitoring bypasses computer latency.
If anything does not work at this point, the issue is almost always one of three things: a USB-C charging-only cable (use the included data cable), a driver that needs reinstalling, or input monitoring still routed through the DAW instead of the hardware. We cover each in the next section.
Common Beginner Mistakes and How to Avoid Them
After testing these units and reading years of forum posts, the same five mistakes come up over and over. If you know these going in, you will save yourself hours of frustration.
Mistake 1: Using a USB-C charging cable instead of a data cable. Not every USB-C cable carries data. Many cables included with phone chargers are wired only for power. If your interface is not detected, swap the included cable for a known data-capable one. This is the most common beginner issue we saw on Reddit threads.
Mistake 2: Setting gain too hot. Gain is not volume. Gain controls how loud the preamp amplifies your input signal before the analog-to-digital converter. If your peaks hit 0 dB (red), you are clipping the conversion, which creates distortion you cannot undo. Aim for peaks around -12 dB and leave yourself 6 dB of headroom.
Mistake 3: Skipping the driver install. On Windows, ASIO drivers from the manufacturer are required for low-latency monitoring. Plug-and-play is fine for playback, but monitoring through your DAW at 256 samples or lower without a dedicated driver will introduce delay. On Mac, native Core Audio works fine for most units.
Mistake 4: Trying to record without phantom power. Condenser microphones need phantom power (sometimes labeled +48V) to operate. If your condenser mic sounds completely silent, the phantom power switch on the interface is most likely off. Dynamic microphones like the Shure SM58 do not need phantom power.
Mistake 5: Ignoring the headphone vs monitor output. Most interfaces have separate volume knobs for headphones and monitor speakers. New users often turn up the headphone knob thinking it raises overall volume, only to find their studio monitors are muted at the same time. Keep both knobs within earshot and label them with small tape flags.
Bonus tip: ground loop hum. If you hear a low 60Hz hum, try plugging all gear into the same power outlet or use a ground lift adapter. Cheaper interfaces sometimes pick up hum from unbalanced power setups.
How to Choose the Best Audio Interface for Your Needs
Now that you have seen all 10 recommendations, here is the 8-factor checklist to pick the right one for you. Use this list in order, and you will narrow the field to one or two finalists quickly.
1. Inputs and outputs: count how many sources you need to record at once. One mic and one guitar? A 2-input unit is plenty. A two-person podcast? Plan for at least 2 XLR inputs plus a mix-minus or loopback for remote call-ins.
2. Connectivity: USB-C is now the universal standard and works with the vast majority of laptops, iPads, and iPhones. Thunderbolt 3 is faster but limited to recent Macs. USB 2.0 units like the PreSonus AudioBox 96 still work fine but cannot deliver the full 24-bit/192kHz of USB-C units over USB 2 bus speeds.
3. Preamps: the preamp is the single biggest determinant of audio quality. Look for cleaner-than-average preamps if you record vocals. Class A designs (Audient, MOTU) tend to sound more transparent than budget preamps. Midas-designed preamps (Behringer UMC202HD) punch above their price.
4. Phantom power (+48V): required for condenser microphones. Every interface on this list has phantom power. Make sure the one you buy has a hardware +48V switch, not just a software toggle.
5. Latency and direct monitoring: latency is the delay between playing a note and hearing it back. Modern interfaces get this well below 10ms at 256 buffer size with an ASIO driver. Hardware direct monitoring on the unit itself removes latency entirely because the signal is routed before the computer.
6. Sample rate and bit depth: 24-bit/96kHz or 24-bit/192kHz is plenty for any beginner. Higher numbers do not improve sound quality on their own; only upgrade if you are doing high-resolution recording work.
7. Bus-powered vs mains-powered: bus-powered units draw power from the USB cable, so no wall wart is needed. Every interface on this list is bus-powered, which makes them portable and cleaner on your desk.
8. Software bundle: a perpetual DAW license (Pro Tools Intro+, Studio One Artist, Ableton Live Lite, Cubase LE, LUNA) is more valuable than a 30-day plugin trial. Focusrite, PreSonus, Audient, Universal Audio, and Arturia all bundle perpetual DAW licenses.
9. Form factor and budget: decide whether size and portability matter. The EVO 4 and MiniFuse 1 fit in a small bag. The MOTU M2 sits on a desk. Generally, budget interfaces from $70 to $200 cover 95 percent of beginner needs in 2026.
10. iPad and iPhone compatibility: if you want to record on an iPad or iPhone, the unit must be class-compliant (no driver needed) on iOS. The Focusrite Scarlett Solo 4th Gen, Audient iD4 MKII, Audient EVO 4, Arturia MiniFuse 1, Universal Audio Volt 1, and Shure MVX2U all qualify.
Use case decision tree: if you record vocals only, choose the Focusrite Scarlett Solo 4th Gen or Audient iD4 MKII. If you record vocals and guitar, choose the Focusrite Scarlett 2i2 4th Gen or M-Audio M-Track Duo. If you record podcasts, choose the Audient EVO 4 (loopback) or Shure MVX2U (XLR mic upgrade). If you record on iPad, choose the Focusrite Scarlett Solo 4th Gen or Universal Audio Volt 1. If you want MIDI for synths, choose the PreSonus AudioBox 96 or Arturia MiniFuse 1. If you want the best preamp quality money can buy under $250, choose the MOTU M2.
Frequently Asked Questions
What is the best audio interface for a beginner?
The Focusrite Scarlett Solo 4th Gen is the best audio interface for a beginner in most cases. It pairs a 120dB dynamic range with Auto-Gain and an Air mode that brightens vocals, ships with a perpetual Pro Tools Intro+ license, and works plug-and-play on Mac, PC, and iPad. If you want zero-knob operation, the Audient EVO 4 with Smart Gain is the easier alternative.
Do you need an audio interface as a beginner?
Yes, if you plan to record vocals, acoustic instruments, guitar, bass, podcasts, or streamed audio through a microphone, an audio interface is worth buying. A built-in laptop sound card adds latency, lacks proper XLR preamps, and cannot power a condenser microphone. Even a budget beginner audio interface dramatically outperforms built-in audio and gives you clean recordings with real-time monitoring.
What is the best inexpensive audio interface?
The M-Audio M-Track Duo is the best inexpensive audio interface for most beginners, with two combo XLR inputs, Crystal preamps, USB/Direct monitoring, and MPC Beats software included. The Behringer UMC202HD is a close second and adds Midas-designed preamps at a similar price point. Both work plug-and-play on Mac and Windows.
What should I look for when buying an audio interface?
Look for the number of inputs you need (1 mic, or 2 mics plus instrument), USB-C connectivity for modern laptops, phantom power (+48V) for condenser mics, hardware direct monitoring for zero-latency monitoring, and a permanent (not trial) software bundle. For most beginners, 24-bit/96kHz or higher is plenty, and bus-powered designs remove the need for a wall wart.
Can I use any USB-C cable for an audio interface?
No. Not every USB-C cable carries data. Many USB-C cables included with phone chargers are wired only for power and will not transmit audio. Use the data cable that shipped with your audio interface, or buy a known USB-C data cable rated for data transfer, not just charging.
What is the best USB-C audio interface?
The Focusrite Scarlett Solo 4th Gen is the best USB-C audio interface for most beginners because of its flagship 120dB converters, Auto-Gain, Air mode, and strong software bundle. If you want loopback for streaming or smart auto-leveling, the Audient EVO 4 is the strongest USB-C alternative at a similar price.
Final Verdict: Which Audio Interface Should You Buy?
After three months of testing 10 units across vocals, guitar, podcasts, and iPad recording, our top recommendation for the best audio interface for beginners remains the Focusrite Scarlett Solo 4th Gen. It is the only unit under $200 that combines 120dB dynamic range, Auto-Gain, Air mode, and a perpetual Pro Tools license in a class-compliant USB-C form factor that works on Mac, PC, and iPad.
If you only have $70 to spend, the M-Audio M-Track Duo is the strongest value pick and gives you a second XLR input the Scarlett Solo lacks. If you want zero-knob operation with Smart Gain and Loopback for streaming, the Audient EVO 4 is the better fit. If you already own an XLR broadcast microphone like the Shure SM7B, the Shure MVX2U removes the need for a separate Cloudlifter.
Whichever unit you choose, set it up with the included USB-C cable (not a charging cable), set your buffer size to 256 samples, and aim for peak input levels around -12 dB. With those three steps and the unit that fits your use case, you will be recording vocals and instruments with studio-grade audio quality by the end of your first afternoon.