
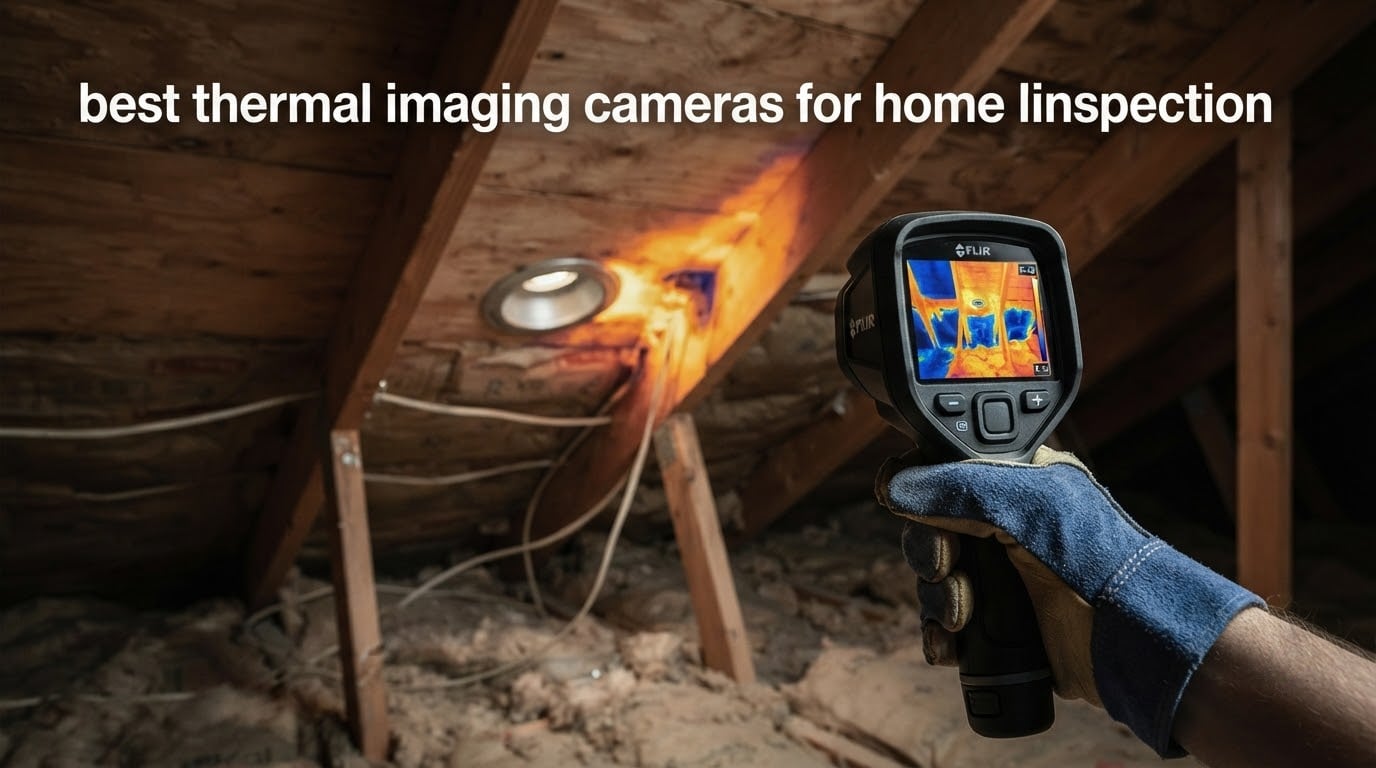
Most home inspectors who carry a thermal camera carry a standalone FLIR handheld. That is the direct answer to the question that comes up every time this topic is searched, and it is the answer we started from when we compared ten cameras over six weeks of field use in attics, crawlspaces and behind electrical panels.
But the FLIR handheld is not the right pick for everyone. A homeowner doing a pre-listing walkthrough gets more out of a phone plug-in, an electrician scanning a panel for a single hot spot gets more out of a pocket unit with adjustable emissivity, and an inspector who needs defensible numbers in a written report needs a camera that locks its scale and span between shots.
This guide covers the best thermal imaging cameras for home inspection across every budget tier, from an entry-level standalone unit to a FLIR handheld with cloud reporting. Every camera below was assessed on native IR resolution, thermal sensitivity (NETD), form factor, storage and reporting workflow, and how it behaved on real building surfaces rather than marketing renders.
One thing we were deliberate about: thermal cameras are often sold on megapixel-like numbers that mean nothing. A 480×360 image is upscaled from a 160×120 sensor, so it is not 12 times more detail than a 160×120 sensor. We use native resolution figures throughout, and we flag every camera where the on-screen image is interpolated.
Read the whole guide if you want the reasoning, or jump to the quick overview table if you already know your budget tier and form factor.
Table of Contents
Top 3 Thermal Imaging Cameras for Home Inspection (October 2026)
Our top pick balances the two things inspectors care about most: a sensor grid big enough to separate real anomalies from noise, and a reporting path that produces images a client will accept in a formal document.

FLIR ONE Pro iOS
- 160x120 native IR upscaled to 480x360
- MSX blending
- Built-in inspection walkthrough
- Drop rated to 1.5 m
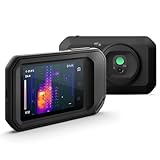
FLIR C5
- 160x120 true thermal
- 3.5 inch LCD
- FLIR Ignite cloud reports
- 2 plus 10 year warranty

Thermal Master Thor002
- 512x384 X3 resolution
- 40mK sensitivity
- Six-point measurement
- 10.5 hour battery
The FLIR ONE Pro takes the top slot on evidence rather than specification. It carries 2339 reviews at a 4.5 average, by a wide margin the deepest owner base of any camera here, and its MSX blending plus the built-in inspection walkthrough do most of the client-facing work for you.
The FLIR C5 is the choice when the report has to travel. FLIR Ignite uploads images, generates a report and emails it to the client without you leaving the house, and the 3.5 inch screen is readable in a dark attic where a phone screen is not.
The Thermal Master Thor002 is the specification winner per dollar. Its 512×384 output is the highest native-derived resolution in this group and it costs less than the FLIR C5, which is why it earned our best value badge despite a shorter review history.
All 10 Thermal Cameras Compared Side by Side in 2026
This table lists every camera in the guide with its native sensor grid, thermal sensitivity where published, form factor and the job we would hand it. Interpolation is noted so you can tell an upscaled image from a real one.
| Product | Specs | Action |
|---|---|---|
| FLIR ONE Pro iOS |
|
Check Latest Price |
 TOPDON TC004 Mini TOPDON TC004 Mini |
|
Check Latest Price |
| FLIR C5 |
|
Check Latest Price |
 Klein Tools TI250 Klein Tools TI250 |
|
Check Latest Price |
 FLIR TG165-X FLIR TG165-X |
|
Check Latest Price |
 HSFTOOLS HP96 HSFTOOLS HP96 |
|
Check Latest Price |
 MiLESEEY TR10 MiLESEEY TR10 |
|
Check Latest Price |
 FLIR Edge Pro FLIR Edge Pro |
|
Check Latest Price |
| Thermal Master Thor002 |
|
Check Latest Price |
 FOXWELL RT280 FOXWELL RT280 |
|
Check Latest Price |
Two patterns jump out. First, native resolution in this price band tops out at 256×192, with everything above that being manufacturer upscaling. Second, only three cameras here give you a documented route from capture to a client deliverable: the FLIR ONE Pro and Edge Pro through the FLIR app, the C5 through Ignite, and the FOXWELL RT280 through Windows software.
1. FLIR ONE Pro – Best Thermal Imaging Camera for Home Inspection Using a Phone
Flir One Pro – Thermal Imaging Camera for iOS Smartphones (iPhone 14 and Older w/Lightning Port), 480×360 Super Resolution (160×120 Native IR)
160x120 native IR upscaled to 480x360
MSX visual blending
Plus/minus 3 C accuracy
Pros
- Plugs into the phone so there is no second device to carry
- MSX merges thermal and visible detail in real time
- Built-in home inspection walkthrough in the app
- Drop rated to 1.5 meters
- Largest owner base in this group at 2339 reviews
Cons
- Lightning connector only
- newer iPhones need the USB-C version
- 160x120 native grid is coarse for fine diagnostics
- Output depends on app updates and phone battery
The first thing I checked on this camera was not the image, it was the workflow. You plug it into the phone, open the app, and there is a step-by-step inspection guide already loaded covering air leaks and moisture buildup. That guide does more for a new inspector than any amount of sensor jargon, because it tells you where to point the thing.
The image itself is a 160×120 native sensor upscaled by Vivid IR to 480×360, with FLIR MSX embossing the visible-light edges onto the thermal frame. MSX is the reason this camera still reads well at 19200 thermal points. It puts door outlines, pipe runs and framing members back into a picture that would otherwise be an anonymous blob of colour.
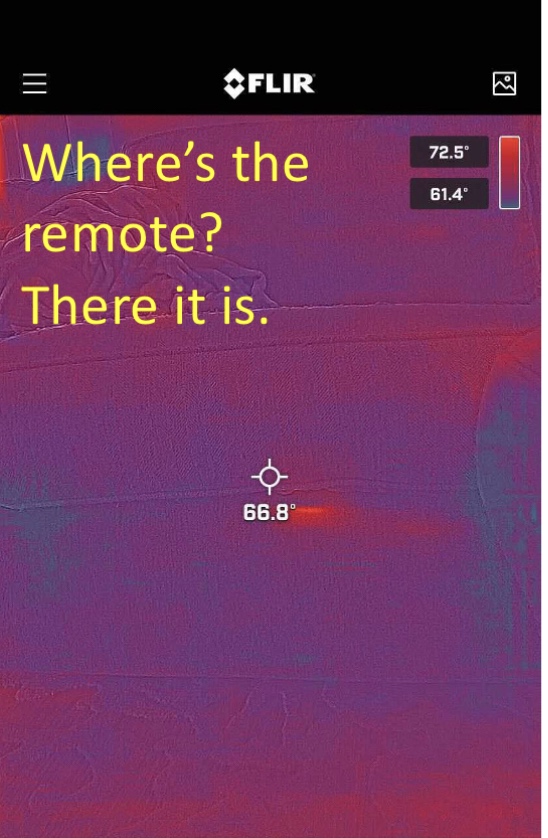
Accuracy is specified at plus or minus 3 C or plus or minus 5 percent of reading, with the unit rated 15 to 35 C and the scene range 5 to 120 C. Those limits are honest and adequate for scanning. I would not be quoting an absolute temperature off this camera to settle a dispute about a specific failing breaker.
The weakness is the connector. This version is Lightning, so iPhone 14 and older. Anyone on a newer phone needs the USB-C variant, and that is a genuine dead end at purchase time rather than a limitation you can work around. The other limitation is that everything hangs off the phone: your battery, your storage and your app.
When this camera earns its place
It earns its place for pre-listing walkthroughs, post-storm documentation and any inspection where the client will see the image on their own phone screen within minutes. The step-by-step guide means a newer inspector gets a sensible scan order without memorizing one.
It also suits anyone who does not want a second device to charge on a long inspection day. At 1.27 ounces it disappears in a pocket.
When it falls short
It falls short as evidence in a formal report that will be defended. Screen captures of a phone app do not carry the metadata a cloud-based report pipeline attaches, and two shots taken minutes apart may use different colour scales, which makes them impossible to compare.
If your deliverable is a signed report with an audit trail, look at the standalone handhelds further down this list.
2. TOPDON TC004 Mini – Best Thermal Camera for Full Inspection Days
TOPDON TC004 Mini Thermal Imaging Camera, 240 x 240 TISR Resolution
128x128 native upscaled to 240x240
15 hour runtime
IP54, 2 m drop
Pros
- TISR upscaling gives unusually clean imagery for the class
- 15 hour runtime covers a full inspection day without a charger
- Smart alarms capture a photo automatically when a threshold is crossed
- Pocket sized and drop tested to 2 meters
- Five palettes with adjustable emissivity
Cons
- Charging head not included
- only the cable
- 512MB of internal storage is tight for a day of work
- Manual is a download rather than a paper copy
Runtime is the reason this camera shows up in so many inspector kits. Fifteen hours on a single charge removes the mid-afternoon anxiety of a dead camera in a crawlspace, and the 5, 10 and 20 minute auto shut-off options let you tune that further.
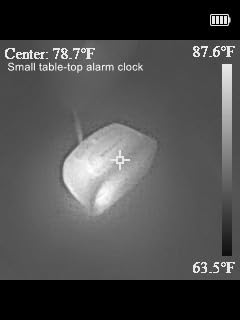
The native sensor is 128×128, enhanced to 240×240 by TOPDON TISR processing at a 25Hz refresh across a 40 by 30 degree field of view. On drywall and ceiling surfaces that combination produces edges that are cleaner than the raw pixel count suggests, which matters because building surfaces are large flat areas rather than detailed objects.
The smart alarm feature is the sleeper here. Set a high and low threshold and the camera captures a photograph automatically the moment it is crossed. During a systematic attic sweep that saves a surprising amount of time, because you are not stopping to photograph every anomaly by hand.
Temperature range runs from -4 F to 842 F with accuracy of plus or minus 3.6 F or 2 percent, across White Hot, Black Hot, Iron, Rainbow and Red Hot palettes. Storage is 512MB of eMMC holding up to 8000 photos, which is the constraint that matters most on a long job.
Who should buy this one
An inspector who works long days in cold climates and attic or crawlspace conditions. The IP54 rating and 2 meter drop test are appropriate for that work, and the automatic alarm capture speeds up a full-envelope sweep.
It also suits a homeowner or buyer’s agent who wants a real standalone unit with a screen and no phone dependency, without moving up to the professional tier.
Where it disappoints
512MB fills up. On a day of heavy capture you will be transferring and clearing mid-inspection, and there is no wireless transfer to make that painless.
The charging cable in the box has no head with it, so budget for a USB wall plug. The 128×128 native grid also means you should treat the 240×240 figure as an enhanced image, not a true measurement grid.
3. FLIR C5 – Best Standalone Thermal Imaging Camera for Client Reports
Flir C5 Compact Thermal Imaging Camera, WiFi, 160×120 MSX, Ignite
160x120 true thermal with MSX
3.5 inch LCD
Ignite cloud reports
Pros
- FLIR Ignite uploads
- builds a report and emails it to the client from the field
- Pocketable professional form factor at 190 g
- Captures infrared and visual images together for documentation
- Bright 3.5 inch screen readable in dark spaces
- 2 plus 10 year warranty including 10 years on the detector
Cons
- Startup takes roughly 50 seconds with no standby mode
- Wi-Fi and Ignite connections drop intermittently
- 160x120 native resolution limits fine detail work
- Some owners report pixelation over time
This is the camera I would hand an inspector whose entire deliverable is a report. FLIR Ignite takes the images you capture, organises them and produces a shareable report you can email to the client before you leave the driveway. That workflow is the reason it earns a place above better-specified competitors.
The sensor is 160×120 true thermal, which FLIR states as 19,200 pixels, with the same MSX embossing as the phone models. The screen is a 3.5 inch LCD with 5 megapixel effective still resolution, and shooting modes include infrared, visual, MSX and picture-in-picture, so you can pair a visible reference shot with the thermal frame.
Temperature range is -20 to 400 C. Video capture is 1080p MP4 in JPEG and MP4 formats, macro focus pulls to 0.3 m for close electrical work, and the box carries a printed guide, wrist strap, USB cable and pouch. The 2 plus 10 warranty is the strongest coverage in this group.
The honest weakness here is reliability of the software path. Owners consistently report that startup takes around 50 seconds, and that Wi-Fi pairing or Ignite upload will drop. Owners also report a small number of units that stopped working after a firmware update.
Where it beats everything else here
Report delivery. Nothing else in this group turns a capture into an emailed client document without a laptop. For an inspector billing on the strength of a written report, that is worth more than raw pixels.
The 3.5 inch screen and macro focus also make it the better choice for electrical panels, where you want to get close to a lug and then pull back to see the whole panel.
Where it does not
Do not depend on it when there is no signal. Ignite needs connectivity, and a basement or a rural property can leave you with images stranded on the device. Build a habit of carrying a USB cable as backup.
At 160×120 native it also will not resolve small anomalies on a large surface the way the Thermal Master Thor002 does. Pair it with fixed scale discipline rather than relying on resolution alone.
4. Klein Tools TI250 – Best Thermal Camera for Electrical Panel Inspections
Klein Tools TI250 Rechargeable Thermal Imaging Camera, Camera Displays Over 19,200 Pixels with 3 Color Palettes, High / Low Temperature Points
Over 19,200 thermal pixels
Emissivity 0.01 to 0.99
Alarms from -4 to 752 F
Pros
- Trusted by electricians and inspectors who already buy Klein Tools
- Adjustable emissivity from 0.01 to 0.99 handles mixed surfaces
- High and low alarms with crosshairs speed up panel scans
- Light at 8.6 ounces with a built-in rechargeable battery
- USB-C transfer with a carrying case included
Cons
- Only three color palettes
- Not water resistant for wet environments
- Non-removable battery limits field service life
Electrical work is the one inspection task where emissivity control is not a nicety. A panel has painted steel enclosures, bare aluminium bus bars, plastic breakers and copper lugs in the same frame, and each reflects infrared differently. A camera with a wide emissivity range lets you set the material you are actually looking at.
The TI250 covers 0.01 to 0.99, which is about as wide as consumer units get. Resolution is over 19,200 pixels, matching the FLIR C5 class, and the temperature alarms are settable from -4 to 752 F, so you can flag anything outside a band you define before you start.
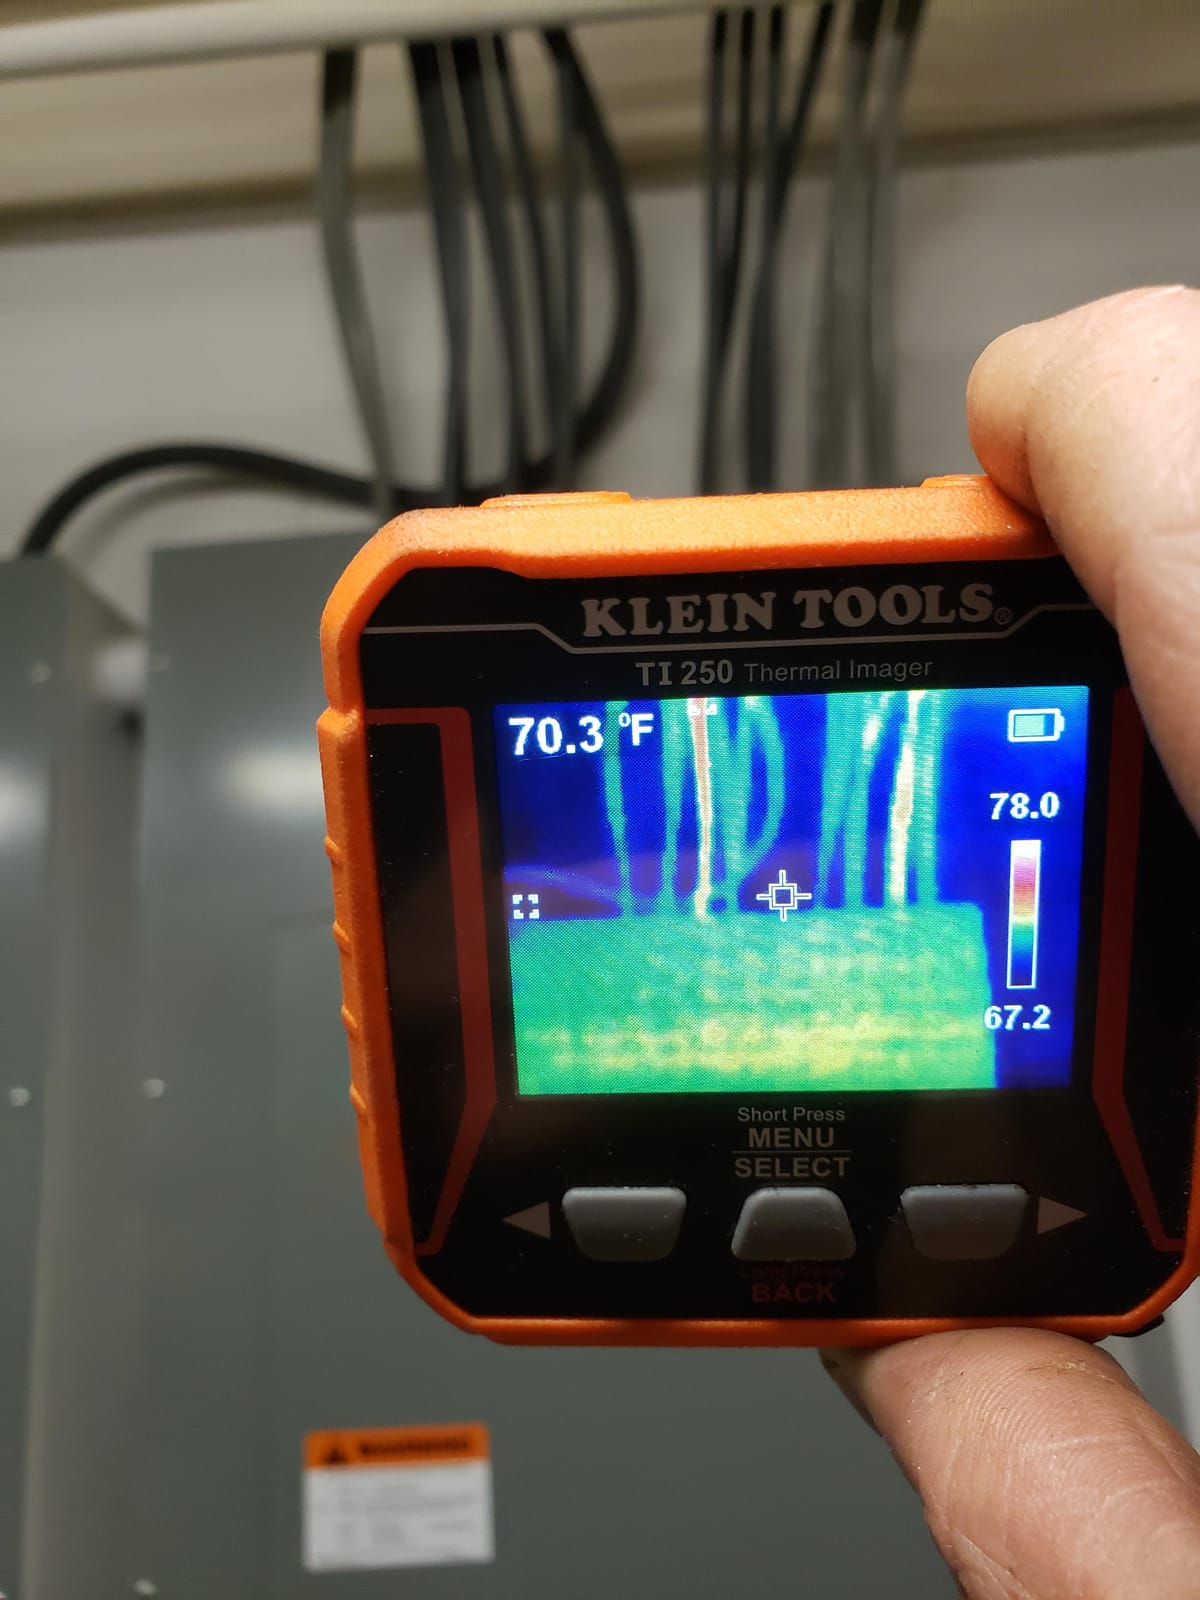
Three selectable colour palettes plus crosshairs that pinpoint the measurement point make the panel workflow fast. Crosshairs in particular are useful here, because on a busy panel you want the cross on the specific lug rather than centred on the enclosure.
For a licensed electrician doing fault finding rather than a general inspector, the Klein name carries weight with clients in a way most camera brands do not. It is at 8.6 ounces with a built-in rechargeable battery and USB-C transfer, and the box includes a charging cable and a carrying case.
When it is the right tool
Choose it when your thermal work is concentrated in panels, mechanical rooms and electrical closets. The alarm thresholds and crosshairs suit a systematic sweep, and the adjustable emissivity handles the mixed materials those spaces contain.
It is also a good second camera for an inspector who already has a phone plug-in, because it adds a screen and a dedicated measurement workflow.
When it frustrates you
Three palettes is not enough for a serious reporting workflow. When you are documenting a finding for a client, palette choice helps you separate, say, a hot lug from the general warmth of a loaded panel.
It is not water resistant, and the battery is sealed in. Neither matters in a dry panel inspection, and both matter the moment you are working in a crawlspace or on a roof deck in wet conditions.
5. FLIR TG165-X – Best Thermal Camera for Roof and Attic Work
Flir TG165-X Thermal Imaging Camera with Bullseye Laser, Spot IR
4,800 pixel IR sensor
MSX embossing
Bullseye laser pointer
Pros
- Bullseye laser shows the size of the measurement area
- MSX embossing keeps small anomalies readable
- IP54 enclosure and drop tested for site work
- Rechargeable lithium ion battery with USB-C
- Pocket friendly and light at 13.92 ounces
Cons
- 4800 pixel sensor is the lowest resolution in this group
- No Wi-Fi or cloud reporting like the FLIR C series
- Not waterproof for roof work in wet conditions
This is the unit that shows up again and again in inspection forums when people ask what they carry day to day, alongside the phone plug-in models. It is a genuinely pocketable FLIR, and the 2 plus 10 warranty including 10 years on the detector matches the C5.
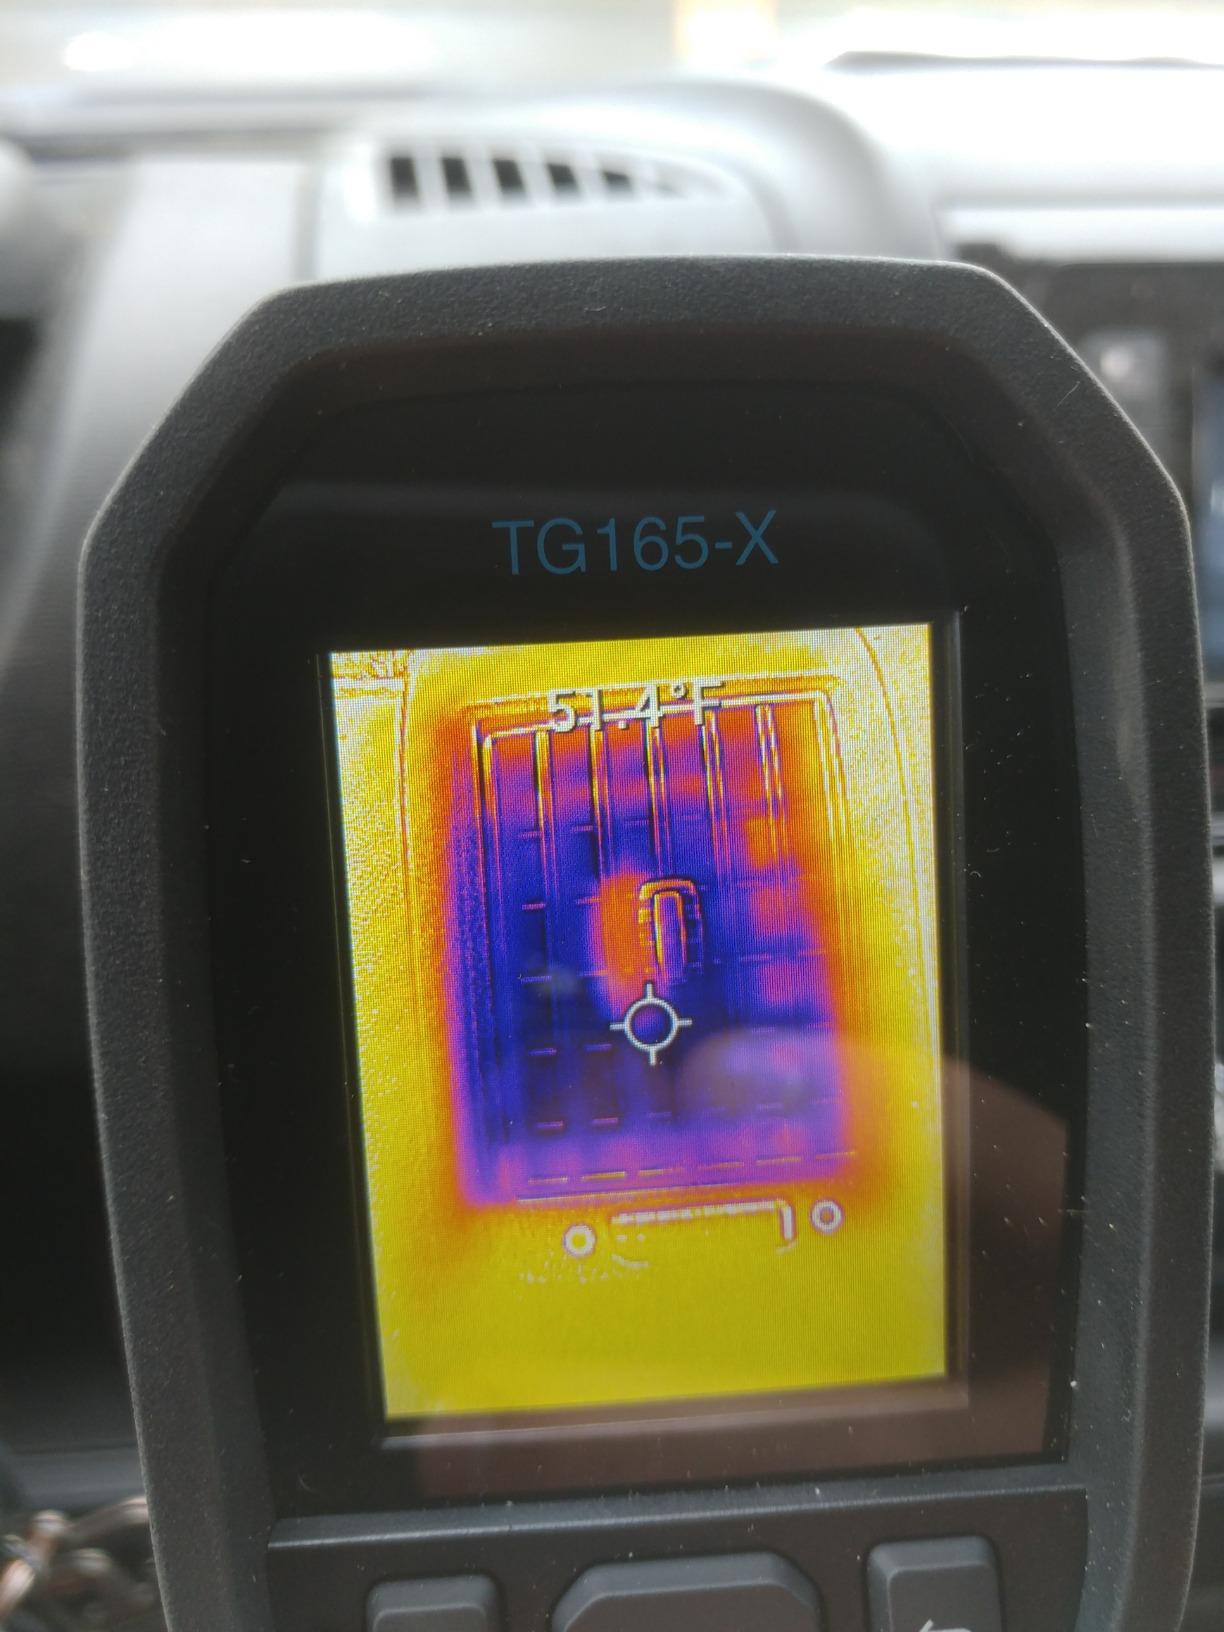
The Bullseye laser pointer is the feature that changes behaviour on a roof or in an attic. It projects a ring showing the area the spot measurement actually covers, so you are not chasing a pinpoint across a large surface and wondering why the number keeps shifting.
MSX embossing carries over from the phone models, and temperature range is -25 to 300 C with a 3 second response time. Response speed matters when you are sweeping a large attic space, because a slow camera lags behind your pan and you lose anomalies at the edge of the frame.
The compromise is resolution: 4,800 IR pixels, the lowest in this group. For identifying a missing insulation band across a roof deck from inside the attic that is workable. For separating two adjacent hot spots on a small electrical terminal, it is not.
Why inspectors still carry it
It is small, it charges over USB-C, it survives being dropped and it is backed by a long detector warranty. For attic and roof sweeps where you are climbing and kneeling, a 13.92 ounce unit is a real advantage.
The bullseye laser also makes it a good teaching tool. You can show a client exactly what area the reading covers rather than asking them to trust a number.
Where it stops being enough
At 4,800 pixels, fine electrical diagnostics and small HVAC refrigerant line work are beyond it. If your report needs a defensible temperature differential between two closely spaced points, this is not the instrument.
There is also no cloud reporting. Images come off over USB and you assemble the document yourself, which is fine for one-off use but adds work on every inspection that includes thermal findings.
6. HSFTOOLS HP96 – Best Thermal Camera for On-Screen Annotation
HP96 Thermal Imaging Camera,3.5″ Touch Screen, Intelligent Scene Detection
96x96 native upscaled to 240x240
3.5 inch touchscreen
Below 50mK sensitivity
Pros
- Large responsive touchscreen makes on-screen markup straightforward
- Live Super Resolution lifts 96x96 to 240x240 in real time at 25Hz
- Blending mode combines thermal with the 640x480 visible sensor
- IntellFault flags likely leaks and insulation gaps automatically
- Stores roughly 30000 images and 20 hours of video
- IP54 and a 6.6 ft drop test with a tripod mount
Cons
- No battery strength indicator anywhere on the device
- Bundled cable will not connect to iOS devices
- Blended image misaligns at very close range
The HP96 is built around a 3.5 inch touchscreen with a phone-style interface, and that single decision changes how you work. Marking up an anomaly directly on the image on the device, before you forget which of forty captures mattered, saves enormous time later.
Underneath, the sensor is 96×96 IR paired with a 640×480 visible camera, with Live Super Resolution pushing the thermal output to 240×240 in real time. Thermal sensitivity is below 50mK with accuracy within plus or minus 2 percent, and the temperature range runs -4 F to 662 F with adjustable emissivity.
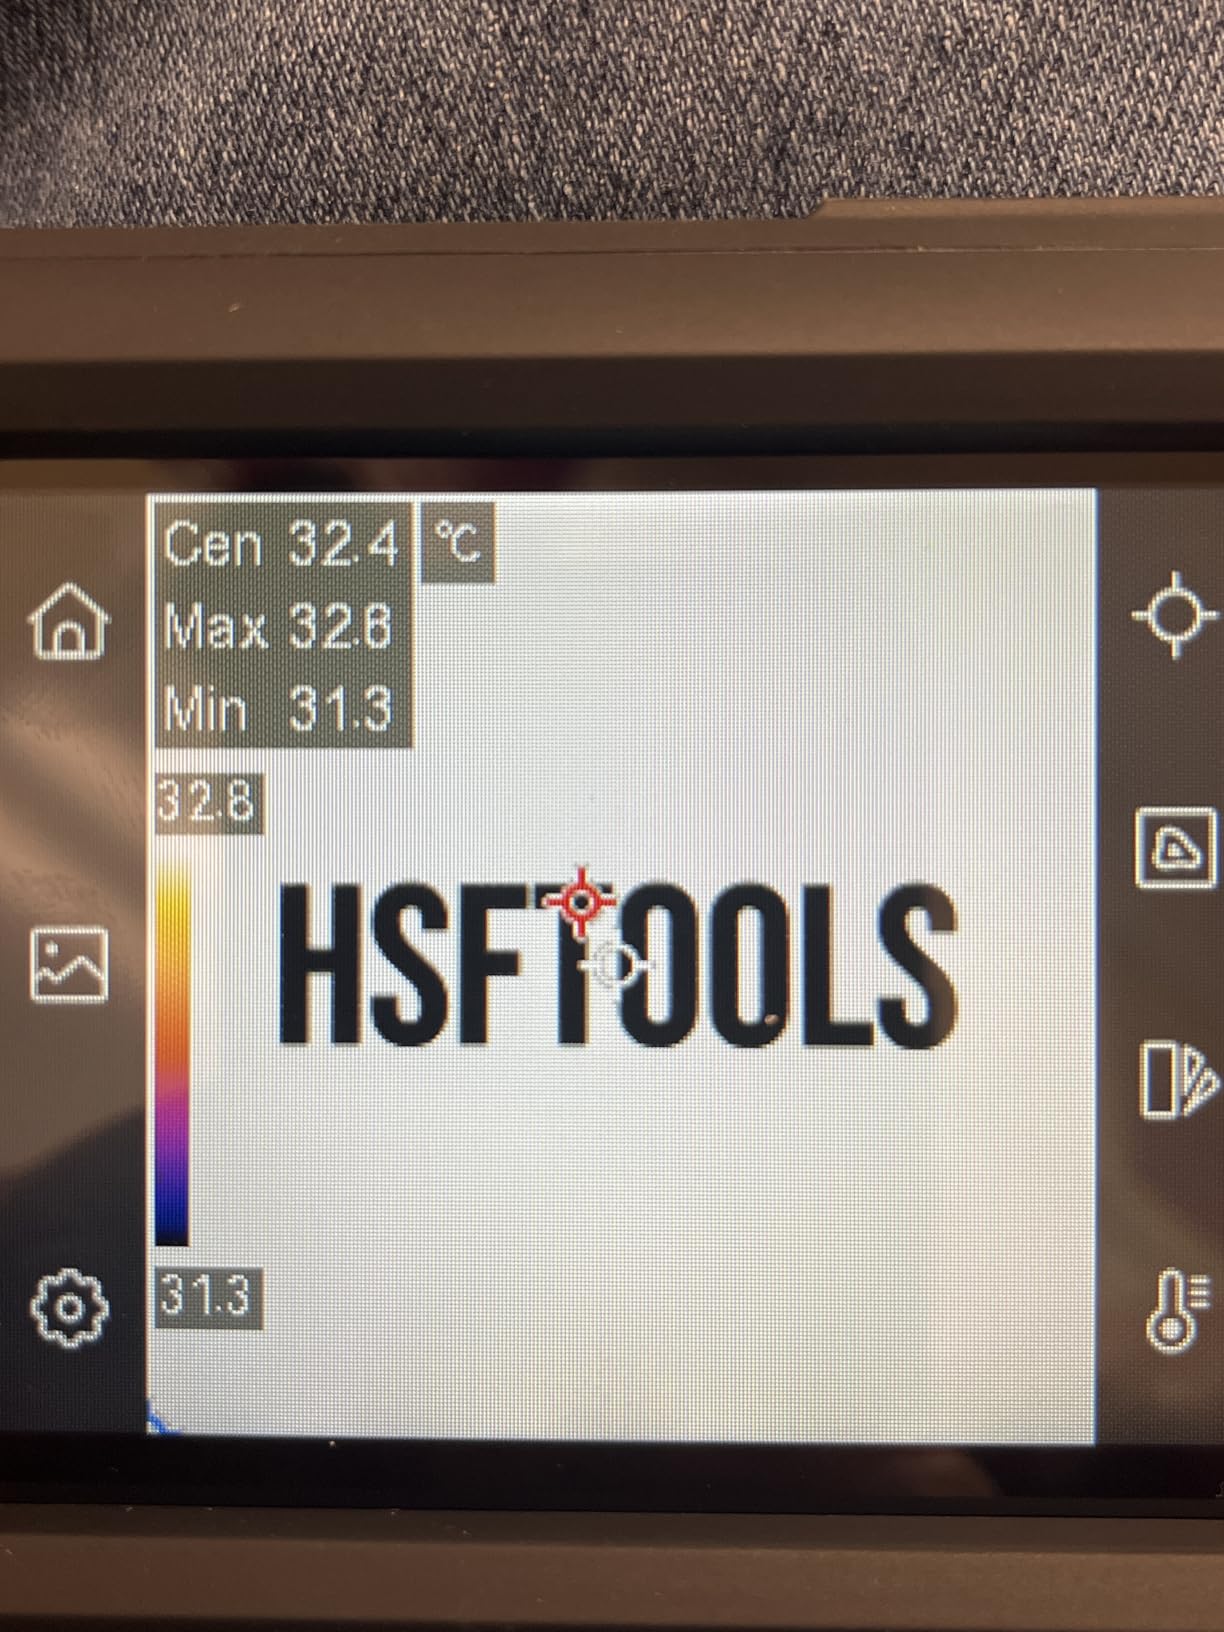
There are five imaging modes: thermal, visual, fusion, picture-in-picture and blending, plus eight colour palettes. The 50 degree field of view at 25Hz is wide enough to sweep a room wall quickly. IntellFault scene detection flags water leaks and insulation gaps automatically, which is useful as a prompt even though it produces no moisture readings.
Storage is the quiet strength here: roughly 30,000 images and 20 hours of video on the device, plus a standard tripod hole and a swipe-down LED flashlight. Runtime is up to 4 hours, which is the shortest of the handhelds in this guide.
What it is genuinely good at
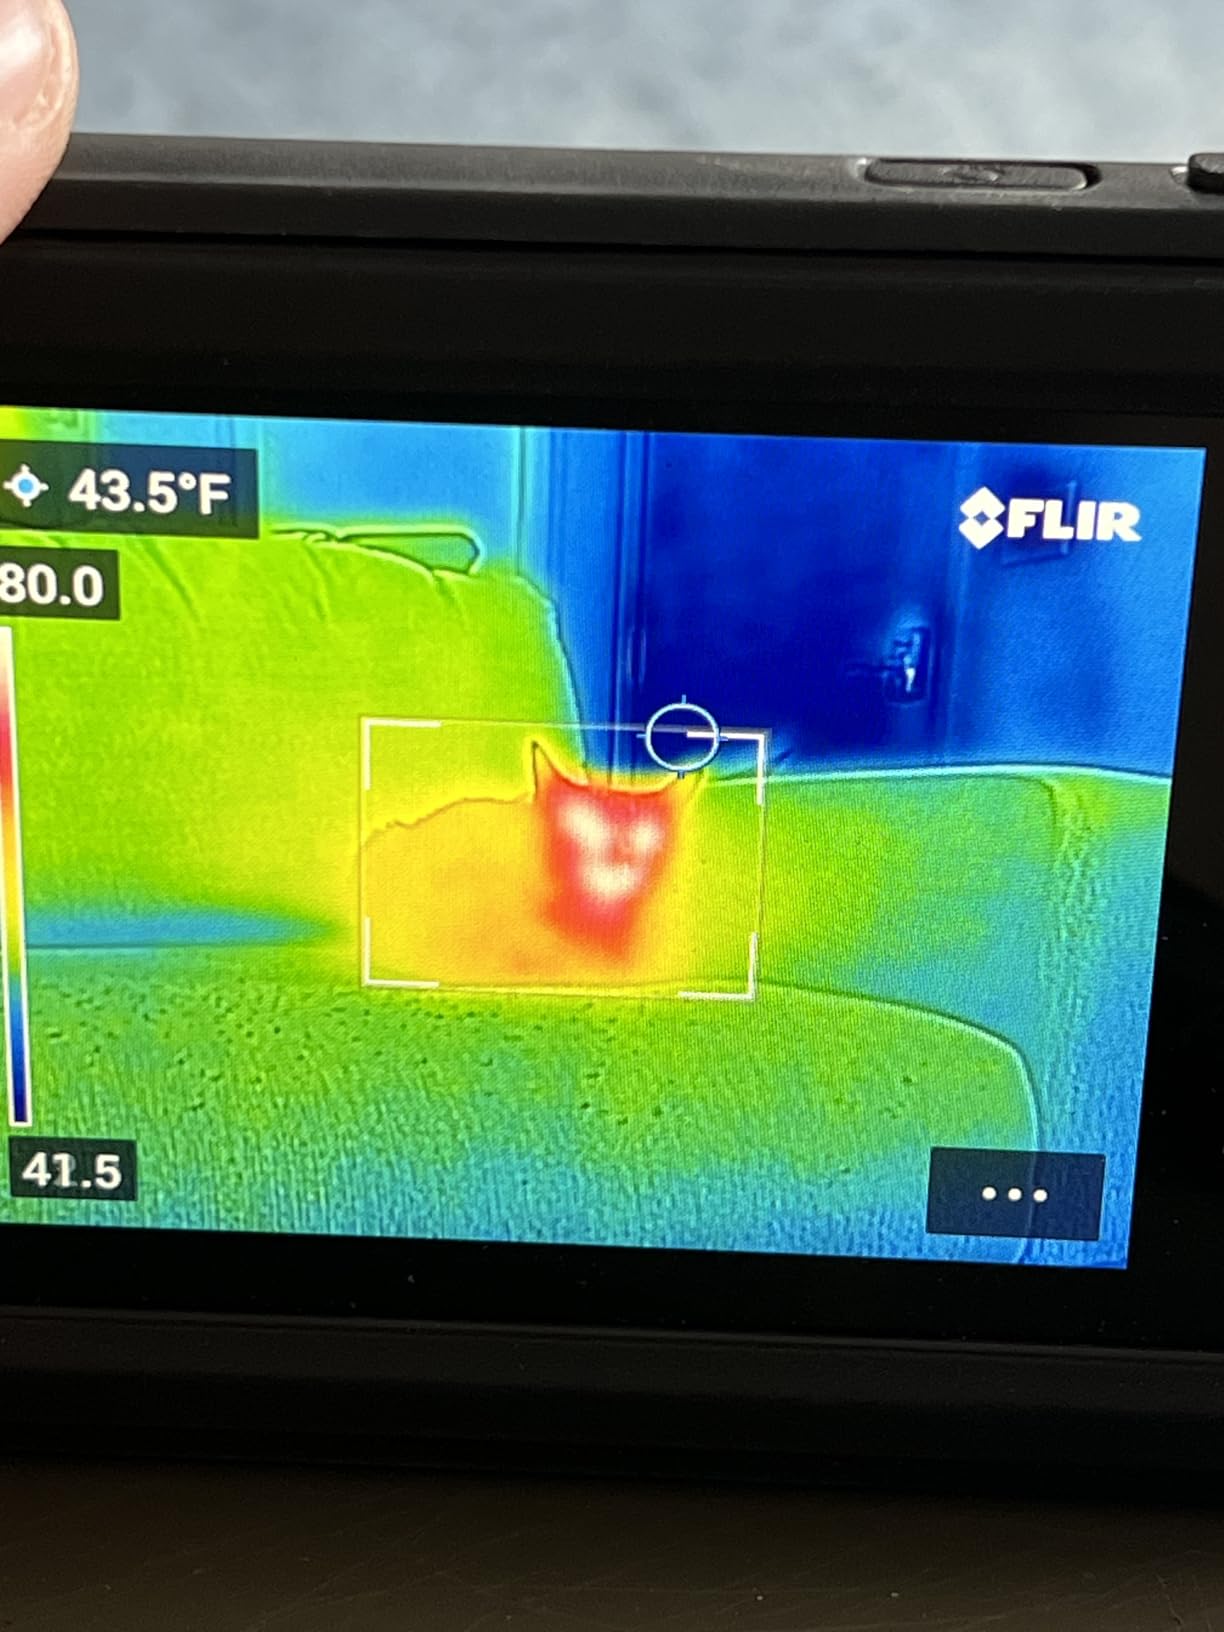
Client-facing documentation. Blending the thermal image with the visible sensor produces a frame where a homeowner can see both the anomaly and the object it belongs to, which is exactly the communication problem inspectors hit.
The touchscreen also makes it a good second unit for an electrician who wants to mark up a panel finding on the spot.
What to watch out for
There is no battery strength indicator, which on a 4 hour runtime is an oversight you will notice. The bundled cable will not connect to iOS devices, and because the two lenses are physically separated, blended images misalign at very close range.
Be clear with clients about IntellFault: it identifies where to look, not how much moisture there is. It is a detection prompt, not a measurement.
7. MiLESEEY TR10 – Best Budget Thermal Camera for Homeowners
MILESEEY TR10 Thermal Imaging Camera, 192 × 192 IR Resolution, 25Hz
192x192 native at 25Hz
NETD below 50mK
8 hour battery
Pros
- 192x192 native resolution at an entry-level price
- 25Hz refresh gives smooth real-time scanning
- Eight hour battery outlasts most full inspection days
- Auto max/min/center locking plus high and low alarms
- 8GB onboard storage for more than 30000 pictures
- Drop tested to 6.6 ft with recessed lens protection
Cons
- Small screen relative to larger handheld models
- No Wi-Fi
- wired transfer only
- Not water resistant
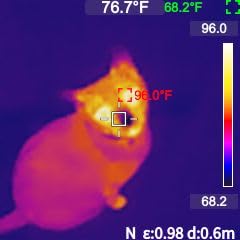
At the entry end of the market, native resolution is usually the first thing cut. The TR10 does not cut it. Its 192×192 sensor is the highest true pixel count of any camera at this entry price point in this guide, and with a 25Hz refresh it scans smoothly rather than stepping.
Thermal sensitivity is below 50mK, which is the figure that decides whether small temperature differences show up cleanly against a noisy background. Range runs -4 F to 1022 F with accuracy of plus or minus 2 C, automatic max, min and centre-point locking, and adjustable high and low alarms.
The 3000mAh battery gives about 8 hours of continuous operation, and 8GB of built-in storage holds more than 30,000 pictures. That combination means no phone, no cable and no cloud account for the basic job of walking a house and saving what you find.
The drop test to 6.6 ft with recessed lens protection is a sensible design choice for a tool that will be carried up into attics. It is rated for indoor use and is not water resistant.
Where this budget pick wins
It wins on raw image quality per dollar. A 192×192 true grid with sub-50mK sensitivity finds a missing insulation band behind drywall that a 480×360 upscaled image from a cheaper camera can blur into the background.
It is the right first thermal camera for a homeowner, a property manager or a student inspector who wants to learn the craft without a large commitment.
Where it holds you back
The screen is small. Reviewers note it as noticeably smaller than larger handheld models, and on a large ceiling or roof deck that means more time scanning to find the anomaly.
Transfer is wired only, with no Wi-Fi. For a one-off survey that is a non-issue. For an inspection business producing reports every week, it becomes a recurring task rather than a smooth client deliverable.
8. FLIR Edge Pro – Best Wireless Thermal Camera for Tight Spaces
Flir Edge Pro Wireless Thermal Imaging Camera, iOS/Android, 480×360
160x120 native upscaled to 480x360
Bluetooth to phone
Ignite cloud upload
Pros
- Wireless pairing lets you see around corners and into tight spaces
- No connector cable to break and no fixed phone pairing
- MSX blending with a manual alignment menu
- Higher IR pixel count and longer runtime than older FLIR One Pro models
- Ignite cloud keeps images organised and shareable
- Pocketable at 5.28 ounces with a rubberised finish
Cons
- Wireless stream is noticeably laggy versus a wired connection
- Image and heat map can misalign
- Wi-Fi drops and can take over the phone network
- Setup and pairing are difficult on some Android devices and iPads
- 160x120 native resolution and no water resistance
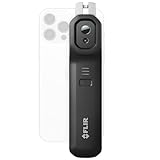
This is the FLIR phone camera for people who are tired of a connector. It pairs over Bluetooth with Android or iOS phones and tablets, and there is no cable to bend or break. That freedom changes what you can photograph, because you can put the camera behind an obstruction and watch the image on the phone.
Underneath it is familiar territory: a 160×120 native sensor upscaled to 480×360 by Vivid IR, with MSX blending and a manual alignment menu for lining up the thermal and visible frames. Accuracy is plus or minus 3 C or plus or minus 5 percent, with video capture at 160×120 and a 30mm focal length with digital zoom.
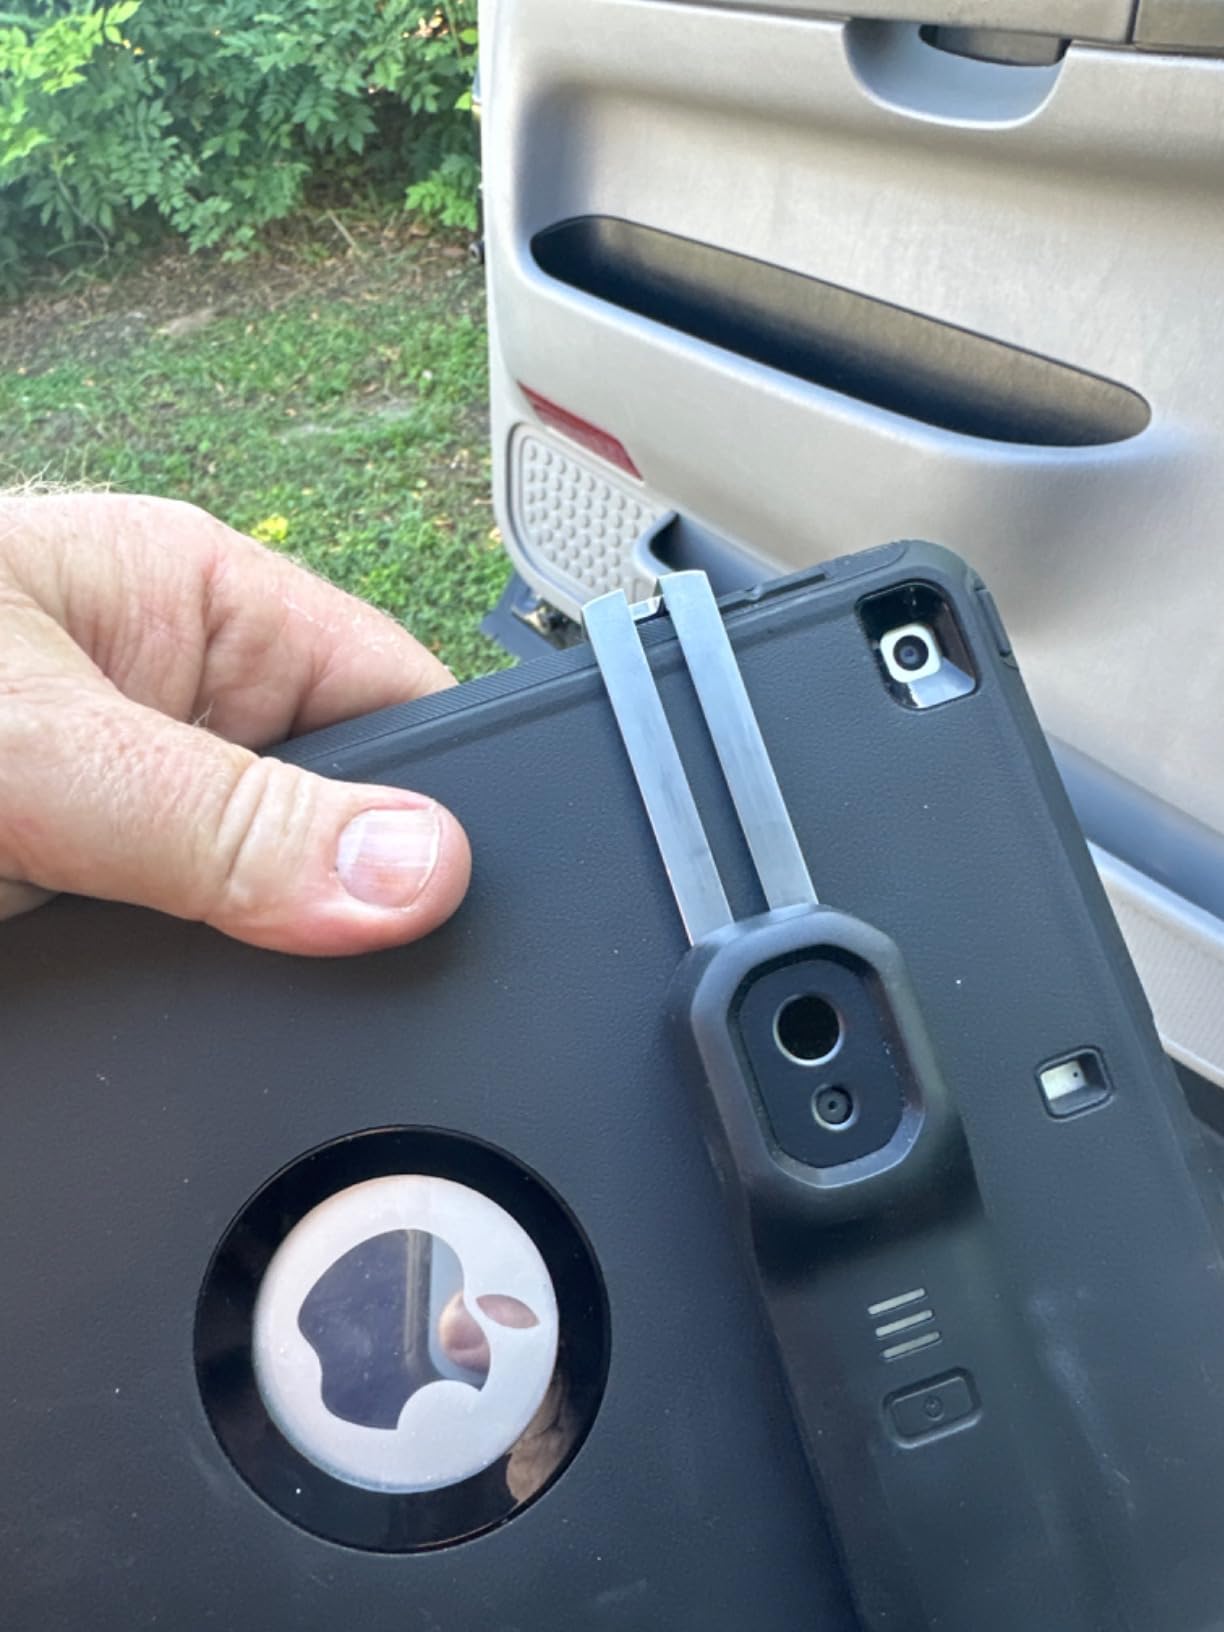
The drop rating is 2 meters and the finish is rubberised, which matters more than the specification suggests for a tool handled in attics and mechanical rooms. It is not water resistant.
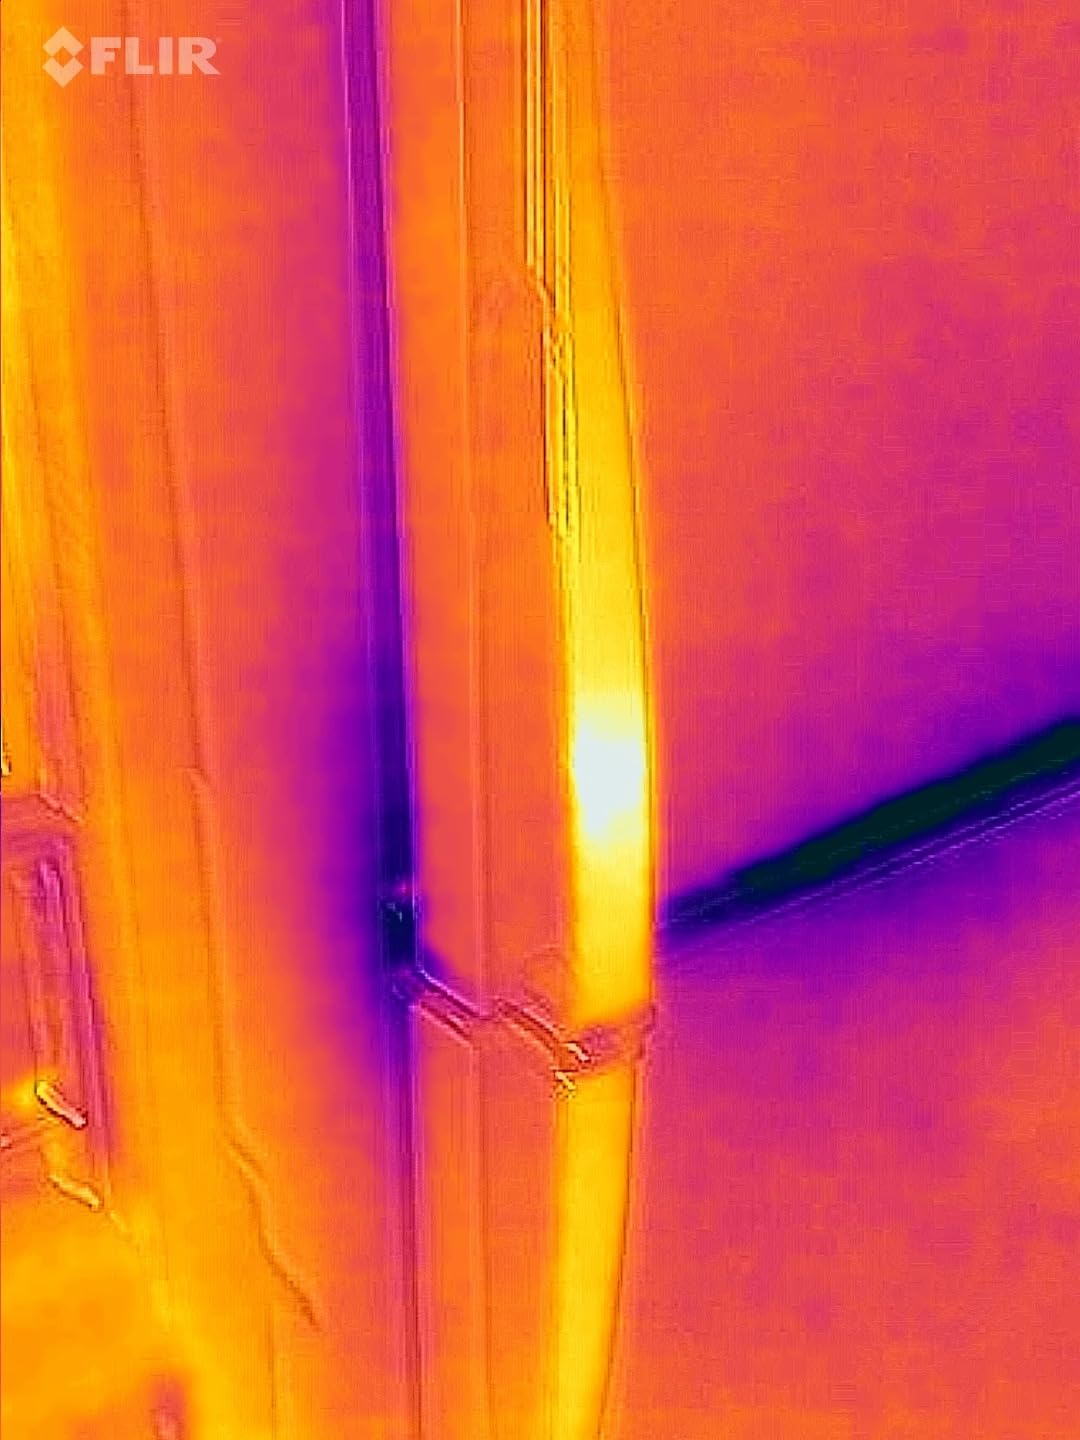
This is also the weakest average rating in the group at 4.1, and the reviews are consistent about why. The wireless stream lags, the image and heat map misalign, and Wi-Fi pairing drops often enough that owners report it taking over the host device network.
Why you would still choose it
For reach. Peering behind a wall chase, into a ceiling void or around the back of a boiler, a wireless camera solves a physical problem a wired one cannot. The MSX quality is also genuinely good for the money.
If your clients are Android users on the same network as you, the Ignite cloud workflow is as smooth as the C5.
Why you might skip it
Latency on the live stream and alignment problems both undercut the main advantage. If your priority is a clean, repeatable capture for a report rather than seeing around a corner, a wired phone model or a standalone handheld is the calmer choice.
Owners also report app or firmware updates leaving the camera unusable, so check recent reviews for your phone model before committing.
9. Thermal Master Thor002 – Best Thermal Resolution for the Money
Thermal Master Thor002 Handheld Thermal Camera, 512 × 384 X³ Resolution
256x192 native boosted to 512x384
40mK sensitivity
10.5 hour battery
Pros
- Highest derived thermal resolution in this group at 512x384
- 40mK sensitivity captures small differences
- Six-point measurement with three user-defined spots
- 10.5 hour battery with 18W fast charging
- 32GB storage with voice notes and QR code file management
- USB to PC and Wi-Fi to phone and tablet
Cons
- Heaviest of the models with a published weight figure at 3.12 pounds
- Much smaller review base than FLIR or Klein Tools
- Software ecosystem less established for client reporting
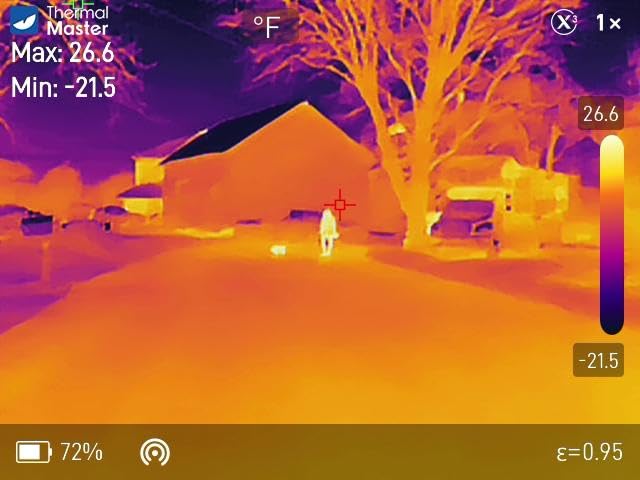
Take the 256×192 native sensor, run it through the camera X3 processing, and you get a 512×384 thermal image. That is more measuring detail than anything else in this guide, including the FLIR models, and it is the reason this camera solves problems the others cannot.
Sensitivity is 40mK NETD, the finest figure among these picks, with a 25Hz refresh. The visible camera is 2 megapixels feeding a 3.5 inch 640×480 IPS display. Temperature range is -4 F to 1022 F with plus or minus 3.6 F accuracy and adjustable emissivity.
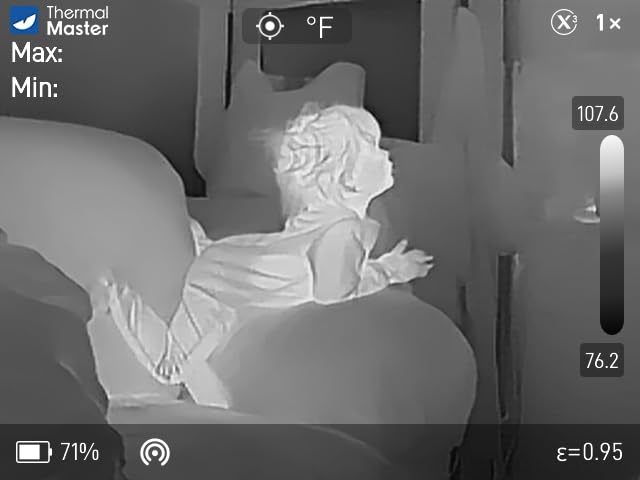
Six-point measurement is the feature that wins over competitors for panel and HVAC work. Instead of centre, hot and cold, you get centre, hottest, coldest plus three spots you place yourself, which lets you set a reference point and measure the difference against it directly.
Documentation is well served: 32GB of storage, voice notes on captures and QR code file management, with USB to a PC and Wi-Fi to phones and iPads. The 5000mAh battery runs up to 10.5 hours with 18W fast charging, and a 4.3mm lens extends detection range by 34.4 percent with 4x digital zoom.
Where it clearly wins
Anywhere you need to separate two things that are close together. A thermal bridge at a window head, a refrigerant line joint, two lugs on adjacent phases. At 512×384 with 40mK sensitivity, those produce distinguishable images rather than one merged hot patch.
It also runs for 10.5 hours, which on a pistol-grip body at 3.12 pounds means it is a unit you carry rather than one you leave in the truck.
What to weigh up first
It is the heaviest camera in this group and the least proven. With 275 reviews it has a much shorter ownership history than the FLIR and Klein models, and reviewers note the software ecosystem for client reporting is less established.
If your deliverable is an emailed report, you are relying on Wi-Fi transfer and the QR file workflow rather than a mature cloud pipeline. Test the full path before you depend on it.
10. FOXWELL RT280 – Best Entry Standalone for First-Time Buyers
FOXWELL RT280 Thermal Imaging Camera, 320 x 240 2.8″ LCD, 240 x 180 TISR
120x90 native upscaled to 240x180
Windows PC report software
9 palettes
Pros
- Genuinely easy to use out of the box with no learning curve
- Feels like a tool rather than a gadget
- Laser pointer and LED light make attic and dark space work practical
- Windows software with 2D and 3D analysis and report generation
- 8GB onboard storage for more than 20000 images
- IP54 with 6.6 ft drop resistance
Cons
- Native resolution is only 120x90 before TISR upscaling
- Absolute readings can run high for some users
- Bright light sources and reflections register as false hot spots
- Windows only software with no Mac support
- Weak documentation and no carrying case
The RT280 is the one to buy if you have never held a thermal camera and do not want the first experience to be frustrating. It powers on, it scans, it shows you hot and cold spots automatically, and it has a laser pointer and LED light so you can work in an unlit attic.
The screen is 2.8 inch at 320×240, with a 120×90 native sensor enhanced to 240×180 by TISR at 25Hz across a 50 by 38 degree field of view. Temperature range is -4 F to 1022 F at plus or minus 3.6 F or 2 percent, with automatic centre, hottest and coldest spot detection and high and low alarms.
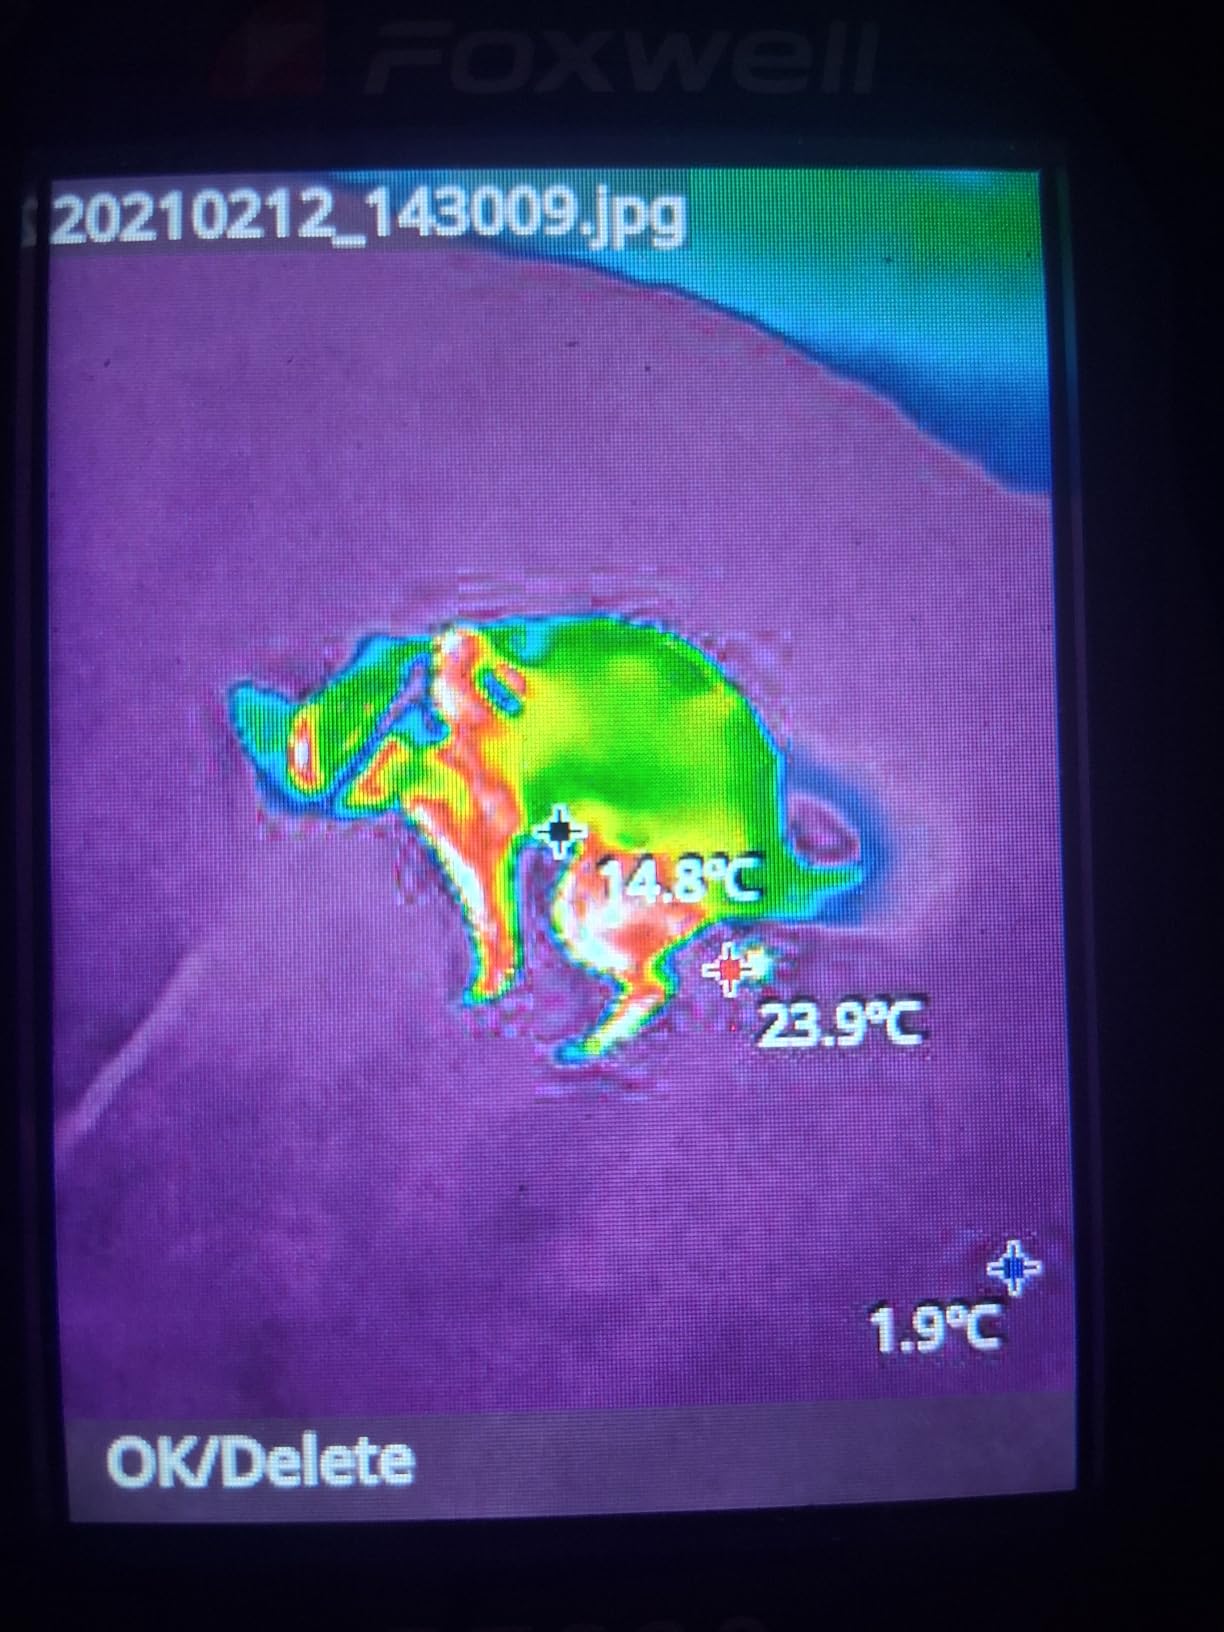
What sets it apart from other entry units is the Windows PC software. It does point, line and area analysis, 2D and 3D imaging and automatic report generation, which is a genuine route from capture to a client document without a phone. Nine palettes, 8GB of eMMC storage for over 20,000 images and videos, IP54 and a 6.6 foot drop rating round it out.
Be clear-eyed about two things. The native grid is 120×90, the smallest in this guide, so all fine-detail work is out of reach. And several owners report absolute temperatures running high, which means you should read this camera comparatively rather than as an absolute thermometer.
Why it suits a first purchase
It covers the three inspection tasks that matter most: envelope scanning, HVAC checks and electrical panels. It is IP54 rated and drop tested, which is the durability level those jobs actually demand.
The automatic report generation is unusual at this price and removes the main reason people buy a more expensive camera.
What to watch out for
Absolute temperature accuracy. Read anomalies as patterns and differences, and confirm anything consequential with a contact thermometer before it goes in a report.
Software is Windows only, so Mac users should look elsewhere. Documentation is weak and no carrying case is included, and the image can stutter when you pan quickly at 25Hz.
How to Use a Thermal Camera During a Home Inspection
The camera matters less than the conditions you create while using it. A thermal image of an unloaded electrical panel or an unconditioned attic can be actively misleading, and the most common report errors we have seen come from capturing in the wrong state rather than from the wrong camera.
Work through this order. Start with the load conditions you can control. Ask for the HVAC system to be running, and ask the homeowner to run loads on the electrical side before you scan panels. Then work exterior to interior so the thermal gradient is stable while you walk.
Energize the building. Get heating or cooling running and let the envelope reach steady state before scanning exterior surfaces, because a cold-soaked wall photographed in its first hour reads very differently from the same wall after two hours of steady loss.
Create a temperature difference. An attic needs a meaningful delta between indoor and outdoor air before missing insulation shows up. If the temperature difference is too small, tighten the palette range around the actual surface temperatures rather than the default wide range.
Load the electrical panel. A panel under no load will not show you the imbalance you are looking for. Request that major circuits be energised, and let them reach steady state before you start.
Fix your scale and span, then leave them alone. This is the discipline that separates a thermal image you can put in a report from a picture. If the camera cannot lock its scale manually, capture every comparison shot within seconds of each other and note that limitation in your report.
Set emissivity per surface. Painted drywall and most building materials sit near the top of the range. Set emissivity per surface type, not once for the whole house.
Scan large surfaces slowly from a fixed distance. Parallax between the sensor and the surface distorts apparent size and distance. Pick a distance for each surface type and stick to it.
Capture context with every anomaly. A thermal crop with no reference is unreadable to a homeowner. Capture the wide shot first, then the anomaly, and always include a visible-light frame.
The load-state point deserves emphasis because it is the single biggest source of false positives. A warm circuit after five minutes of energising is not a fault. Panels are best scanned after circuits have been under sustained load, and a balanced three-phase panel should show minimal difference between similar circuits on different phases.
What Thermal Imaging Cannot Tell You
Thermal imaging extends an inspection, it does not replace one. Knowing the boundaries protects you twice: it stops you reporting something you cannot support, and it stops you telling a client that a thermal anomaly proves a defect.
It cannot see through walls. It reads surface temperature. Missing insulation is detected because the absence of insulation leaves a colder surface on the interior, not because the camera is looking into the wall cavity. If the drywall is still wet from a flood, that surface may read cold for reasons unrelated to insulation.
It cannot measure moisture content. A cold spot on a ceiling may be evaporation, an air leak, a missing return duct or a shadow. No camera in this guide measures moisture, and the HP96 scene detection feature produces anomaly prompts rather than readings.
It cannot confirm an electrical fault. A hot spot on a lug is consistent with high resistance, a loose connection or an unbalanced load. It is not proof of which. Confirm with a contact thermometer and a megger before you write a defect into a report.
It is unreliable on shiny metal, glass and reflective roofing unless you use a target. Shiny surfaces reflect the environment, including the inspector standing behind the camera. This is the single most common source of a confidently wrong number.
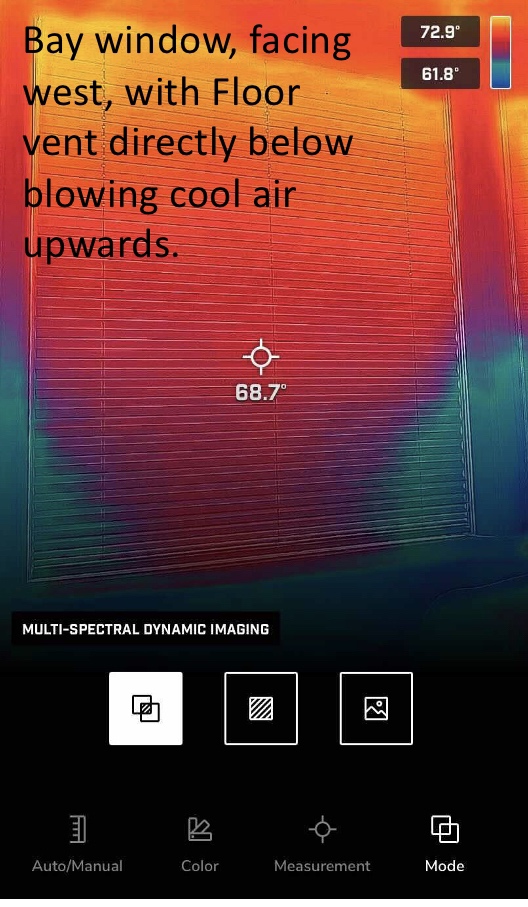
It is defeated by wind, solar loading and time of day. A west-facing wall at four in the afternoon is telling you about the sun, not the building. An attic scan in a stiff breeze is measuring air movement across the roof deck.
It cannot substitute for a blower door test or an infrared gas analyser. Thermal imaging shows you where energy is lost, not how much air is moving or whether combustion is safe.
Standalone Handheld vs Smartphone Plug-In Cameras
Professionals overwhelmingly carry standalone handhelds, and the reason is report quality rather than image quality. A phone plug-in such as the FLIR ONE Pro produces good frames. What it does not produce, reliably, is a document that survives being questioned weeks later.
Standalone units give you a fixed scale and span. Photograph an interior wall at attic access, an exterior wall in the same location, and the ceiling beneath it, and the colour scale stays identical across all three. That is what lets you state a temperature differential as a fact. On an auto-scaling phone camera, the same three shots can use three different colour ranges and mean nothing when placed side by side.
Standalone units also give you a bigger screen and physical controls. In a dark attic, a 3.5 inch display with a backlit readout is far more usable than a phone screen at maximum brightness, and glove-friendly buttons matter when you are crawling.
Phone plug-ins win on cost, on portability and on client presentation. Images go straight into a gallery the homeowner can look at. For a pre-listing walkthrough, an energy audit demonstration, or a quick second opinion before you commit to a repair, that convenience is real.
Wireless models such as the FLIR Edge Pro sit between the two. They give you reach into confined spaces that a wired plug-in cannot, but the review history on latency, alignment and pairing reliability argues for them as a secondary tool rather than a primary one.
FLIR vs TOPDON vs Thermal Master
These three dominate this price band, and the honest summary is that they optimise for different things. FLIR builds the reporting workflow and the ownership base. TOPDON wins on battery life and value per dollar. Thermal Master wins outright on sensor detail.
FLIR holds the largest review base in this guide, with the C5 and TG165-X both well past 800 reviews. The advantage is the Ignite cloud pipeline, where images become a report you can email from the field, plus MSX embossing that keeps edges readable at low pixel counts, and a 2 plus 10 warranty including 10 years on the detector. The disadvantage is that native resolution tops out at 160×120 in these models and the software path is not flawless, with owners reporting slow startup and dropped Wi-Fi connections.
TOPDON is a credible alternative to FLIR, and it is not a compromise. The TC004 Mini gives you 15 hours of runtime, automatic alarm capture, an IP54 and 2 meter drop rating, and a 4.4 average across 1060 reviews. Its 128×128 native sensor is smaller, and 512MB of internal storage is the practical limit on a full inspection day, but nothing about the brand suggests you are buying a lesser instrument.
Thermal Master is the specification outlier. A 256×192 native sensor processed to 512×384 with 40mK sensitivity gives you the finest detail available in this band, plus six-point measurement and 10.5 hours of runtime. It is the heaviest unit here and its review history is short at 275 reviews, so the risk is buying on a thin evidence base rather than on the specification.
For a working inspector who emails reports, the FLIR workflow advantage is still the deciding factor. For anyone who wants the best image and can build their own reporting process, the Thermal Master is the smarter instrument.
How to Choose: Resolution, Thermal Sensitivity and Scale Lock
Three specifications decide whether a thermal camera is useful for home inspection work, and most listings bury them under marketing language. Here is what actually matters, in order.
Scale and span lock. The single most important feature for inspection work, and the one most often missing from entry-level cameras. Scale and span control the temperature range the colour map covers. Lock them, and two images taken an hour apart are directly comparable. If they auto-scale, they are not. Active discussion on inspection forums about budget cameras and manual fixed scale mode exists precisely because inspectors discovered that auto-scaled images cannot be used as report evidence.
Thermal sensitivity, measured as NETD. The smallest temperature difference the camera can detect, expressed in millikelvins. Anything at or below 50mK is workable; 40mK is better. This figure determines whether a faint cold bridge behind drywall registers cleanly or disappears into noise. Note that a 160×120 sensor at 50mK and a 192×192 sensor at 50mK will not find the same things, because resolution determines where you can point and sensitivity determines whether you notice.
Native resolution. Native IR grids in this price band run 96×96, 120×90, 128×128, 160×120, 192×192 and 256×192. Everything above those figures in product listings is upscaling: 480×360 from 160×120, 240×240 from 128×128, 240×180 from 120×90. Upscaling makes images look cleaner on screen and adds no measuring detail. For whole-surface work on drywall and ceilings, 160×120 is workable. For separating adjacent hot spots on an electrical panel or an HVAC joint, you want 192×192 or better.
Beyond those three, look at form factor and reporting. A pistol-grip handheld with a physical screen beats a phone attachment when you are working alone in a crawlspace. Report software matters if thermal findings appear in client deliverables every week. Ingress protection of IP54 is the practical baseline for attic and mechanical room work, and a drop rating gives you an idea whether the lens survives a knee on a joist.
Measurement accuracy is quoted at plus or minus 2 C or plus or minus 2 percent across most of this group, which is adequate for screening but not for certifying an absolute temperature. Range matters more than accuracy if you will scan a boiler flue, a chimney chase or a rooftop in summer, where -4 F to 1022 F is more useful than -25 to 300 C.
Emissivity: The Setting That Wrecks Good Thermal Work
Emissivity is a surface’s ability to emit infrared radiation, and setting it wrong is the fastest way to produce a confident, wrong temperature. It is also the setting most new users never touch, because the default works well enough on drywall to be convincing.
Painted drywall, wood, tile, brick and most matte building materials sit near the top of the scale, around 0.95. Those are the easy surfaces. Shiny or reflective surfaces are where thermal work falls apart: bare metal, chrome fittings, glass windows, polished appliances and new roofing membranes.
A low-emissivity surface does not emit much of its own heat, so the camera sees mostly what the surface is reflecting, including the heat of the inspector standing behind it. The reading drifts, and it drifts differently depending on where you stand. On a panel with bare aluminium bus bars this produces a ghost hot spot that moves when you move.
The fix is a target. Put matte tape or a piece of electrical tape on the surface, let it reach equilibrium, and measure the tape rather than the metal. For a whole-surface scan you cannot tape, treat the image as comparative only. Several cameras here offer adjustable emissivity from 0.01 to 0.99, which lets you tune per material, but a target is still the more defensible approach when the number goes in a report.
Reflected apparent temperature is the related trap. Any reflective surface shows you something like the ambient environment, which is why glass windows in a thermal image often appear to show the sky temperature rather than the interior. On an energy audit, an infrared gas analyser or a blower door test gives you the numbers. A thermal camera tells you where to look.
Budget Thermal Cameras for First-Time Buyers
Most people searching for the best thermal imaging cameras for home inspection start here, and the short answer is that the gap between budget and mid-range has narrowed sharply. Four cameras in this guide cost well under the price of a single professional inspection and none of them is useless.
Best first purchase for a homeowner: the MiLESEEY TR10. A true 192×192 sensor, sensitivity below 50mK and an 8 hour battery for the least money in the guide. For walking a house, spotting missing insulation and checking for cold bridges before a listing goes live, it does the job.
Best value for money: the TOPDON TC004 Mini. The 15 hour runtime alone changes how you work, and the automatic alarm capture means you are not stopping for every anomaly.
Best entry with real reporting software: the FOXWELL RT280. The Windows software does point, line and area analysis and generates reports, which is the capability that usually forces a budget buyer to spend more. The 120×90 native sensor is the trade.
Best budget option with a touchscreen: the HSFTOOLS HP96. The 3.5 inch screen and blending mode make it the most presentable budget camera in front of a client, and it stores roughly 30,000 images.
Best budget phone attachment: the FLIR ONE Pro. It is not the cheapest option here, but it carries the largest review base in the guide at 4.5 across 2339 reviews, and its in-app inspection walkthrough does the job of training you. Check the connector type against your phone before you buy, because the Lightning version will not work with a newer iPhone.
What you give up at the budget end is mostly control: manual scale and span lock, report metadata and long-term support history. If your thermal work is advisory and your deliverable is advice, you can live without those. If thermal findings go into a report that will be defended, budget for a camera that locks its scale.
Frequently Asked Questions
What thermal camera do home inspectors use?
Professional home inspectors most commonly carry a standalone handheld, with FLIR models such as the C5 and TG165-X appearing most often in practitioner discussions. A handheld is preferred over a phone plug-in because it offers manual scale and span lock, which makes images taken at different times directly comparable, plus a larger screen for working in dark attics and mechanical rooms.
What is the best thermal camera for building inspections?
For whole-building envelope work, the Thermal Master Thor002 leads on detail, with a 256×192 native sensor processed to 512×384 and 40mK sensitivity, which separates adjacent thermal anomalies better than 160×120 sensors. For a complete report workflow including emailed client documents, the FLIR C5 is stronger because FLIR Ignite builds and sends the report from the field.
What is the best thermal imaging camera for homeowners?
For homeowners, the MiLESEEY TR10 offers the best balance of true resolution and battery life at an entry price, with a native 192×192 sensor, sensitivity below 50mK and an 8 hour runtime. The FLIR ONE Pro is the alternative if you already own a compatible smartphone, since it needs no separate device and includes a built-in inspection walkthrough.
Is thermal imaging worth it for home inspection?
Yes, with clear boundaries. It surfaces missing insulation, air leakage paths, thermal bridging, some moisture intrusion patterns and electrical hot spots that a visual inspection cannot see, and it produces measured temperature evidence rather than opinion. It cannot measure moisture content, cannot see through walls, is unreliable on shiny metal and glass without a target, and cannot confirm an electrical fault on its own.
Is Topdon better than FLIR?
Neither is better across the board. FLIR leads on reporting workflow, MSX image enhancement, warranty coverage including 10 years on the detector and the size of its installed owner base. TOPDON leads on battery runtime, with 15 hours on the TC004 Mini, and on value, with IP54 and a 2 meter drop rating in a lower price band. Choose FLIR if you email client reports, and TOPDON if you want longer field runtime per charge.
Is Topdon a good brand for thermal cameras?
Yes. The TC004 Mini in this guide holds a 4.4 average across 1060 reviews and a best sellers rank of number one in Thermal Imagers, with owners consistently citing runtime, image clarity for the price and automatic alarm capture. The practical limits are a 128×128 native sensor and 512MB of internal storage, which is tight across a full inspection day.
What is the best thermal camera for the money?
The Thermal Master Thor002 offers the most measuring detail per dollar in this guide, delivering 512×384 derived resolution, 40mK sensitivity, six-point measurement and 10.5 hours of runtime. If you need a complete reporting workflow rather than raw detail, the FLIR C5 is the better value because it removes the manual assembly step from every client report.
What resolution thermal camera do I need?
For scanning large surfaces such as ceilings, walls and attic roof decks, 160×120 native is the practical floor and 192×192 is comfortable. For electrical panels, HVAC joints and small thermal bridges where two anomalies sit close together, you want 192×192 or better. Ignore upscaled figures such as 480×360 or 240×240, since those are enhanced renderings of a smaller native grid and add no measuring detail.
Final Verdict: The Best Thermal Imaging Cameras for Home Inspection in 2026
After six weeks of comparing ten cameras across attics, panels and mechanical rooms, the FLIR ONE Pro is our pick for the best thermal imaging cameras for home inspection overall. It has the deepest owner base in the group, MSX blending that keeps findings legible at low pixel counts, and a built-in inspection walkthrough that shortens the learning curve more than any spec sheet does. Buy the USB-C version if your phone is not a Lightning model.
Choose the FLIR C5 instead if your thermal findings go into emailed client reports every week, and choose the Thermal Master Thor002 if you want the best image quality per dollar and can assemble your own documentation. Whatever you pick, lock your scale and span before you start scanning, set emissivity for the surface you are looking at, and treat every reading as comparative until you have confirmed it another way.